TSFFS Documentation
TSFFS is a snapshotting, coverage-guided fuzzer built on the SIMICS full system simulator. TSFFS makes it easy to fuzz and triage crashes on traditionally challenging targets including UEFI applications, bootloaders, BIOS, kernel modules, and device firmware. TSSFS can even fuzz user-space applications on Linux and Windows.
Capabilities
This fuzzer is built using LibAFL and SIMICS and takes advantage of several of the state of the art capabilities of both.
- Edge coverage guided
- Snapshotting (fully deterministic)
- Parallel fuzzing (across cores, machines soon)
- Easy to add to existing SIMICS projects
- Triage mode to reproduce and debug crashes
- Modern fuzzing methodologies:
- Redqueen/I2S taint-based mutation
- MOpt & Auto-token mutations
- More coming soon!
Use Cases
TSFFS is focused on several primary use cases:
- UEFI and BIOS code, particulary based on EDKII
- Pre- and early-silicon firmware and device drivers
- Hardware-dependent kernel and firmware code
- Fuzzing for complex error conditions
However, TSFFS is also capable of fuzzing:
- Kernel & kernel drivers
- User-space applications
- Network applications
Why TSFFS
There are several tools capable of fuzzing firmware and UEFI code. Notably, the HBFA project and the kAFL project enable system software fuzzing with various tradeoffs.
HBFA is very fast, and enables fuzzing with sanitizers in Linux userspace. However, it requires stubs for any hardware interactions as well as the ability to compile code with instrumentation. For teams with resources to create a working HBFA configuration, it should be used alongside TSFFS to enable additional error condition detection.
kAFL is also extremely fast, and is hypervisor based which allows deterministic snapshotting of systems under test. This also makes it ideal for very complex systems and system-of-systems fuzzing, where interactions between components or the use of real hardware is necessary. kAFL suffers from a similar limitation as HBFA in that it requires working device stubs or simulation to be implemented in QEMU, and additionally requires a patched kernel to run the required KVM modifications.
Both of these tools should be used where possible to take advantage of their unique capabilities, but TSFFS aims to reduce the barrier to fuzzing low-level systems software. It is slower (though not unacceptably so) than HBFA or kAFL, and is not (yet) capable of leveraging sanitizers. In exchange, using it is as simple as adding a few lines of code to a SIMICS script and ten or less lines of code to your firmware source code. In addition, because it is based on SIMICS, the tool of choice of firmware developers, the models and configurations for the code under test can be used as they are, and developers can continue to use familiar tools to reduce the lift of enabling fuzzing.
Terminology
Some terminology in this document might be unfamiliar, or used in an unfamiliar way.
- Solution: Any condition that is a goal of a fuzzing campaign. Most fuzzing campaigns look for crashes or hangs in the target software, both of which are types of solutions. However, at the firmware level, other conditions may also be considered exceptional, and are considered solutions as well. For example, some firmware is only permitted to write to specific memory regions, and a write outside of them is problematic but will not cause a crash in the traditional sense.
- Target Software: Because TSFFS is capable of fuzzing the full stack of software from initial firmware through user-space applications, any software under test by the fuzzer is referred to as target software.
Setup
Setup instructions are provided for all major platforms TSFFS supports (all platforms supported by SIMICS).
Setup (Docker)
Setting up TSFFS using Docker is the recommended way to use TSFFS externally to Intel, and is the best way for all new users of TSFFS to get familiar with the build process, tools and configurations available.
For In-Docker Use
If you intend to use TSFFS inside a container, use the Dockerfile in the repository.
Setting up and using tsffs using the provided Dockerfile is only a few simple steps:
- Install Docker following the directions for your OS from docker.com.
- Clone this repository:
git clone https://github.com/intel/tsffs/ && cd tsffs - Build the container (this will take some time):
docker build -t tsffs . - Run the container:
docker run -it tsffs
The provided base container will prompt you to run the included sample. Feel free to customize the provided script and target – any non-platform-specific UEFI application can be fuzzed with this container!
For Out-Of-Docker Use
Install ISPM
First, you’ll need to install ISPM. External users can install it from the public release:
curl --noproxy '*.intel.com' -L -o $HOME/Downloads/ispm.tar.gz \
    "https://registrationcenter-download.intel.com/akdlm/IRC_NAS/ead79ef5-28b5-48c7-8d1f-3cde7760798f/intel-simics-package-manager-1.8.3-linux64.tar.gz"
mkdir -p $HOME/simics/ispm/
tar -C $HOME/simics/ispm --strip-components=1 -xf $HOME/Downloads/ispm.tar.gz
Next, we add $HOME/simics/ispm to our PATH by adding a line to our .bashrc or
.zshrc. You need not configure both shells, only configure the shell you plan to use
ispm in.
bash:
echo 'PATH="${PATH}:${HOME}/simics/ispm/"' >> $HOME/.bashrc
source $HOME/.bashrc
zsh:
echo 'PATH="${PATH}:${HOME}/simics/ispm/"' >> $HOME/.zshrc
source $HOME/.zshrc
ISPM is installed. You can check that it is installed and working with:
ispm --version
Build and Install TSFFS
If you want to use a container to build TSFFS, but you want to run it on your own machine, you can run the build script to build TSFFS in a container, then install it with ISPM.
./scripts/build.sh
This script will produce a directory packages with an ISPM file
simics-pkg-31337*.ispm. You can install this package with:
ispm packages -i packages/*.ispm --trust-insecure-packages
Setup (Linux)
The easiest way to get started with TSFFS is with our docker setup.
This guide will walk you through local build and installation of the fuzzer instead. This is recommended for both internal users and external users who want to move beyond the initial examples.
Install Local Dependencies
The TSFFS fuzzer module, its example cases, and the SIMICS installation process require several local system dependencies.
For Fedora Linux:
sudo dnf -y update
sudo dnf -y install clang clang-libs cmake curl dosfstools g++ gcc git glibc-devel \
    glibc-devel.i686 glibc-static glibc-static.i686 gtk3 lld llvm make mtools \
    ninja-build openssl openssl-devel openssl-libs
Install Rust
Rust’s official installation instructions can be found at rustup.rs. To install Rust with the recommended settings for this project (including the nightly toolchain), run:
curl https://sh.rustup.rs -sSf | bash -s -- -y --default-toolchain nightly
The installer may prompt you to add source $HOME/.cargo/env to your shell init file.
You should accept this option if prompted, or otherwise add cargo to your path.
Verify that cargo is installed in your path with:
cargo +nightly --version
Install SIMICS
For users of the public distribution of SIMICS, visit the SIMICS download page, accept the EULA, and download the following files. Users of internal or commercial private Wind River or Intel SIMICS should follow internal documentation available here.
intel-simics-package-manager-[VERSION].tar.gzsimics-6-packages-[VERSION].ispm
You can also download via the direct links as shown below. You can download these files
anywhere, we suggest your Downloads directory. In subsequent commands, if you downloaded
directly from the download page, replace ispm.tar.gz with the full name of the ispm
tarball you downloaded, and likewise with simics-6-packages.
curl --noproxy '*.intel.com' -L -o $HOME/Downloads/ispm.tar.gz \
    "https://registrationcenter-download.intel.com/akdlm/IRC_NAS/ead79ef5-28b5-48c7-8d1f-3cde7760798f/intel-simics-package-manager-1.8.3-linux64.tar.gz"
curl --noproxy '*.intel.com' -L -o $HOME/Downloads/simics-6-packages.ispm \
    "https://registrationcenter-download.intel.com/akdlm/IRC_NAS/ead79ef5-28b5-48c7-8d1f-3cde7760798f/simics-6-packages-2024-05-linux64.ispm"
Next, we will install SIMICS. Here, we install to $HOME/simics/ . We will extract
ispm into our install directory. ispm is a static electron executable.
mkdir -p $HOME/simics/ispm/
tar -C $HOME/simics/ispm --strip-components=1 -xf $HOME/Downloads/ispm.tar.gz
Next, we add $HOME/simics/ispm to our PATH by adding a line to our .bashrc or
.zshrc. You need not configure both shells, only configure the shell you plan to use
ispm in.
bash:
echo 'PATH="${PATH}:${HOME}/simics/ispm/"' >> $HOME/.bashrc
source $HOME/.bashrc
zsh:
echo 'PATH="${PATH}:${HOME}/simics/ispm/"' >> $HOME/.zshrc
source $HOME/.zshrc
ISPM is installed. You can check that it is installed and working with:
ispm --version
If ISPM prints its version number, it is installed successfully. With ISPM installed, we
will configure an install-dir. This is the directory all downloaded SIMICS packages
will be installed into. Custom-built SIMICS packages, including the TSFFS package, will
be installed here as well.
ispm settings install-dir $HOME/simics/
Now that we have configured our install-dir, we will install the ISPM bundle we
downloaded.
ispm packages --install-bundle $HOME/Downloads/simics-6-packages.ispm --non-interactive
ISPM will report any errors it encounters. SIMICS is now installed.
Build TSFFS
With all dependencies installed, it is time to clone (if you have not already) and build
TSFFS. You can clone tsffs anywhere you like, we use the SIMICS directory we already
created. If you already cloned tsffs, you can skip this step, just cd to the cloned
repository directory.
git clone https://github.com/intel/tsffs $HOME/simics/tsffs/
cd $HOME/simics/tsffs/
With the repository cloned, you can install and run the build utility:
cargo install cargo-simics-build
cargo simics-build -r
This will produce a file target/release/simics-pkg-31337-VERSION-linux64.ispm. We can
then install this package into our local SIMICS installation. This in turn allows us to
add the TSFFS package to our SIMICS projects for use. Note the
--trust-insecure-packages flag is required because this package is not built and
signed by the SIMICS team, but by ourselves.
ispm packages -i target/release/*-linux64.ispm \
    --non-interactive --trust-insecure-packages
You are now ready to use TSFFS! Continue on to learn how to add TSFFS to your SIMICS projects, configure TSFFS, and run fuzzing campaigns.
Set Up For Local Development
End users can skip this step, it is only necessary if you will be developing the fuzzer.
If you want to develop TSFFS locally, it is helpful to be able to run normal cargo
commands to build, run clippy and rust analyzer, and so forth.
To set up your environment for local development, note the installed SIMICS base version
you would like to target. For example, SIMICS 6.0.169. For local development, it is
generally best to pick the most recent installed version. You can print the latest
version you have installed by running (jq can be installed with your package manager):
ispm packages --list-installed --json | jq -r '[ .installedPackages[] | select(.pkgNumber == 1000) ] | ([ .[].version ] | max_by(split(".") | map(tonumber))) as $m | first(first(.[]|select(.version == $m)).paths[0])'
On the author’s system, for example, this prints:
/home/YOUR_USERNAME/simics/simics-6.0.185
Add this path in the [env] section of .cargo/config.toml as the variable
SIMICS_BASE in your local TSFFS repository. Using this path, .cargo/config.toml
would look like:
[env]
SIMICS_BASE = "/home/YOUR_USERNAME/simics/simics-6.0.185"
This lets cargo find your SIMICS installation, and it uses several fallback methods to
find the SIMICS libraries to link with.
Finally, check that your configuration is correct by running:
cargo clippy
The process should complete without error.
Setup (Windows)
This guide will walk you through installing build dependencies, building, and installing TSFFS into your SIMICS installation on Windows. All console commands in this document should be run in PowerShell (the default shell on recent Windows versions).
Install System Dependencies
Update WinGet
winget source update
If you see the following output (with the Cancelled message):
winget source update
Updating all sources...
Updating source: msstore...
Done
Updating source: winget...
                                  0%
Cancelled
Then run the following to manually update the winget source:
Invoke-WebRequest -Uri https://cdn.winget.microsoft.com/cache/source.msix -OutFile ~/Downloads/source.msix
Add-AppxPackage ~/Downloads/source/msix
winget source update winget
You should now see the correct output:
Updating source: winget...
Done
Git
Install Git with WinGet and add it to your PATH:
winget install --id Git.Git -e --source winget
$env:Path += ";C:\Program Files\Git\bin"
[Environment]::SetEnvironmentVariable("Path", $env:Path + ";C:\Program Files\Git\bin", "Machine")
Alternatively, you can add Git to the PATH using the GUI.
- Open the
Edit the System Environment Variablescontrol panel option - Select
Environment Variables - Highlight
PathunderUser variables for YOUR_USERNAME - Select
Edit.... A new window will open. - Select
New - Type
C:\Users\Program Files\Git\bin. - Select
OK. The window will close. - Select
OKon the previous window. - Close your terminal and open a new one. Run
git -hand ensure no error occurs.
Alternatively you can also download and install Git for Windows from the git
website. The default options are acceptable. In a new
powershell terminal, the command git -h should complete with no error.
7-Zip
Install 7-zip and add it to your PATH:
winget install --id 7zip.7zip -e --source winget
$env:Path += ";C:\Program Files\7-Zip"
[Environment]::SetEnvironmentVariable("Path", $env:Path + "C:\Program Files\7-Zip", "Machine")
Alternatively, you can add 7-Zip to the PATH using the GUI.
- Open the
Edit the System Environment Variablescontrol panel option - Select
Environment Variables - Highlight
PathunderUser variables for YOUR_USERNAME - Select
Edit.... A new window will open. - Select
New - Type
C:\Users\Program Files\7-Zip. - Select
OK. The window will close. - Select
OKon the previous window. - Close your terminal and open a new one. Run
7z -hand ensure no error occurs.
Alternatively you can also download and install 7-Zip from the
website. In a new powershell terminal, the command 7z -h
should complete with no error.
Install MinGW-w64
If you already have a MinGW-w64 installation, you can skip this step and see the section on using an existing installation.
Download the MinGW archive from winlibs.com. Select the 7-Zip archive for Win64 with UCRT runtime and POSIX threads and LLVM/Clang/LLD/LLDB:
$ProgressPreference = 'SilentlyContinue'
Invoke-WebRequest -Uri "https://github.com/brechtsanders/winlibs_mingw/releases/download/13.2.0-16.0.6-11.0.0-ucrt-r1/winlibs-x86_64-posix-seh-gcc-13.2.0-llvm-16.0.6-mingw-w64ucrt-11.0.0-r1.7z" -OutFile ~/Downloads/winlibs-x86_64-posix-seh-gcc-13.2.0-llvm-16.0.6-mingw-w64ucrt-11.0.0-r1.7z
Alternatively you can also use the direct link to download and install the tested MinGW version (LLVM/Clang/LLD/LLDB+UCRT+POSIX, GCC 13.2.0).
Once downloaded, run the following commands (assuming the file is downloaded to
~/Downloads, substitute the correct path if not) to extract the file to the MinGW
directory. You may prefer to right-click the 7z file, choose 7-Zip: Extract Files,
and type C:\MinGW\ as the destination instead of running these commands.
7z x -omingw-w64/ $HOME/Downloads/winlibs-x86_64-posix-seh-gcc-13.2.0-llvm-16.0.6-mingw-w64ucrt-11.0.0-r1.7z
mv mingw-w64/mingw64/ C:/MinGW/
Next, add MinGW to the Path in your environment variables:
$env:Path += ";C:\MinGW\bin"
[Environment]::SetEnvironmentVariable("Path", $env:Path + "C:\MinGW\bin", "Machine")
Alternatively, you can use the GUI:
- Open the
Edit the System Environment Variablescontrol panel option - Select
Environment Variables - Highlight
PathunderUser variables for YOUR_USERNAME - Select
Edit.... A new window will open. - Select
New - Type
C:\MinGW\bin - Select
OK. The window will close. - Select
OKon the previous window. - Close your terminal and open a new terminal. Run
gcc --versionand ensure no error occurs.
Install Rust
Download rustup-init.exe:
$ProgressPreference = 'SilentlyContinue'
Invoke-WebRequest -Uri "https://win.rustup.rs/x86_64" -OutFile $HOME/Downloads/rustup-init.exe
You can also go to rustup.rs and download rustup-init.exe. Run
rustup-init.exe with the following arguments:
~\Downloads\rustup-init.exe --default-toolchain nightly --default-host x86_64-pc-windows-gnu -y
After installation, close your terminal and open a new terminal as prompted. Run cargo --verison. Ensure the version ends with -nightly (this is required to run the build
script).
Install SIMICS
Download SIMICS:
$ProgressPreference = 'SilentlyContinue'
Invoke-WebRequest -Uri "https://registrationcenter-download.intel.com/akdlm/IRC_NAS/881ee76a-c24d-41c0-af13-5d89b2a857ff/simics-6-packages-2023-31-win64.ispm" -OutFile $HOME/Downloads/simics-6-packages.ispm
Invoke-WebRequest -Uri "https://registrationcenter-download.intel.com/akdlm/IRC_NAS/881ee76a-c24d-41c0-af13-5d89b2a857ff/intel-simics-package-manager-1.7.5-win64.exe" -OutFile $HOME/Downloads/intel-simics-package-manager-win64.exe
Alternatively, you can also go to the SIMICS download page and download:
simics-6-packages-VERSION-win64.ispmintel-simics-package-manager-VERSION-win64.exe
Run the downloaded .exe file with the command below in an elevated PowerShell prompt
to install ispm using the default settings (for your user only, note that if you
downloaded manually, you should type the name of the file you downloaded).
~/Downloads/intel-simics-package-manager-win64.exe /S | Out-Null
Next, add ISPM to the Path in your environment variables:
$env:Path += ";$HOME\AppData\Local\Programs\Intel Simics Package Manager"
[Environment]::SetEnvironmentVariable("Path", $env:Path + "$HOME\AppData\Local\Programs\Intel Simics Package manager", "User")
Alternatively, you can add ISPM to the PATH using the GUI:
- Open the
Edit the System Environment Variablescontrol panel option - Select
Environment Variables - Highlight
PathunderUser variables for YOUR_USERNAME - Select
Edit.... A new window will open. - Select
New - Type
C:\Users\YOUR_USERNAME\AppData\Local\Programs\Intel Simics Package Manager, replacingYOUR_USERNAMEwith your Windows user account name. - Select
OK. The window will close. - Select
OKon the previous window. - Close your terminal and open a new one. Run
ispm.exe --versionand ensure no error occurs.
Next, install the downloaded SIMICS packages. Run the following, replacing VERSION with the version in your downloaded filename:
mkdir ~/simics
ispm.exe settings install-dir ~/simics
ispm.exe packages --install-bundle ~/Downloads/simics-6-VERSION-win64.ispm `
    --non-interactive --trust-insecure-packages
You may be prompted to accept certificates, choose Y.
Build TSFFS
Clone TSFFS to your system (anywhere you like) and build with:
git clone https://github.com/intel/tsffs
cd tsffs
cargo install cargo-simics-build
cargo simics-build -r
Once built, install TSFFS to your SIMICS installation with:
ispm.exe packages -i target/release/*-win64.ispm --non-interactive --trust-insecure-packages
Test TSFFS
We can test TSFFS by creating a new project with our minimal test case, a UEFI boot disk, and the same fuzz script used in the Linux docker example in the README. Run the following from the root of this repository:
mkdir $env:TEMP\TSFFS-Windows
ispm.exe projects $env:TEMP\TSFFS-Windows\ --create
cp examples\docker-example\fuzz.simics $env:TEMP\TSFFS-Windows\
cp tests\rsrc\x86_64-uefi\* $env:TEMP\TSFFS-Windows\
cp tests\rsrc\minimal_boot_disk.craff $env:TEMP\TSFFS-Windows\
cp harness\tsffs.h $env:TEMP\TSFFS-Windows\
cd $env:TEMP\TSFFS-Windows
./simics --no-win ./fuzz.simics
Set Up For Local Development
End users can skip this step, it is only necessary if you will be developing the fuzzer.
If you want to develop TSFFS locally, it is helpful to be able to run normal cargo
commands to build, run clippy and rust analyzer, and so forth.
To set up your environment for local development, note the installed SIMICS base version
you would like to target. For example, SIMICS 6.0.169. For local development, it is
generally best to pick the most recent installed version. You can print the latest
version you have installed by running (jq can be installed with winget install stedolan.jq):
ispm packages --list-installed --json | jq -r '[ .installedPackages[] | select(.pkgNumber == 1000) ] | ([ .[].version ] | max_by(split(".") | map(tonumber))) as $m | first(first(.[]|select(.version == $m)).paths[0])'
On the author’s system, for example, this prints:
C:\Users\YOUR_USERNAME\simics\simics-6.0.185
Add this path in the [env] section of .cargo/config.toml as the variable
SIMICS_BASE in your local TSFFS repository. Using this path, .cargo/config.toml
would look like:
[env]
SIMICS_BASE = "C:\Users\YOUR_USERNAME\simics\simics-6.0.185"
This lets cargo find your SIMICS installation, and it uses several fallback methods to
find the SIMICS libraries to link with.
Finally, check that your configuration is correct by running:
cargo clippy
The process should complete without error.
Troubleshooting
I Already Have A MinGW Installation
If you already have a MinGW-w64 installation elsewhere, and you do not want to reinstall
it to C:\MinGW, edit compiler.mk and point CC= and CXX= at your MinGW gcc.exe
and g++.exe binaries, respectively, or change the location passed with the
--mingw-dir option in the build step.
Command is Unrecognized
If PowerShell complains that any command above is not recognized, take the following steps:
- Run
echo $env:PATHand ensure the directory containing the command you are trying to run is present, add it to yourPathenvironment variable if it is absent. - Close your terminal and open a new one. The
Pathvariable is only reloaded on new terminal sessions
Configuration
Before TSFFS can fuzz target software, it must be configured. The configuration API is kept as simple as possible, with sane defaults. TSFFS exposes all of its configuration options as Simics attributes which means that you can list its configuration options by running the following in a Simics CLI prompt in a project with TSFFS installed (see Installing in Projects).
load-module tsffs
list-attributes tsffs
You’ll see a list of attributes, each of which has help documentation available through the Simics CLI like:
help tsffs.exceptions
To read about all of the TSFFS options in detail, including methods for setup, installation, and configuration:
Installing In Projects
After building and installing TSFFS into the local SIMICS installation (the last step in the Linux and Windows documents), TSFFS will be available to add when creating projects.
In New Projects Using ISPM
Projects are created using ispm (Intel Simics Package Manager). The command below
would create a project with packages numbered 1000 (SIMICS Base), 2096 (Quick Start
Platform, or QSP, x86), 8112 (QSP CPU), and 31337 (TSFFS), each with the latest version
except SIMICS base, which here is specified as 6.0.169. All that is required to create
a new project with the TSFFS package included is to add it after the --create flag
to ispm. Using the -latest version is recommended for simplicity, but if you are a
TSFFS developer and need to test specific versions the version of any package may be
specified in the same way as the SIMICS base package here.
ispm projects /path/to/new-project --create 1000-6.0.169 2096-latest 8112-latest 31337-latest
In Existing Projects
All SIMICS projects have a file .package-list, which contains a list of absolute or
relative (from the project’s SIMICS base package root) paths to packages that should
be included in the project.
If all SIMICS packages are installed into an install-dir together, the TSFFS package
can be added by adding a line like (if your installed package version is 6.0.1):
../simics-tsffs-6.0.1/
to your .package-list file, then running bin/project-setup.
If your SIMICS packages are not all installed together, the path can be absolute, like:
/absolute/path/to/installed/simics-tsffs-6.0.1/
You can obtain your latest installed version with:
ispm packages --list-installed --json | jq -r '[ .installedPackages[] | select(.pkgNumber == 31337) ] | ([ .[].version ] | max_by(split(".") | map(tonumber))) as $m | first(first(.[]|select(.version == $m)).paths[0])'
In Projects Which Do Not Use ISPM
Some projects, including those which use custom builds of Simics, do not use the ispm
package manager. In these scenarios, the TSFFS package can be installed in a project by
extracting the package manually:
tar -xf simics-pkg-31337-7.0.0-linux64.ispm
tar -xf package.tar.gz
This will extract to a directory simics-tsffs-7.0.0. In your existing Simics project,
you can run:
./bin/addon-manager -s /path/to/simics-tsffs-7.0.0/
You should see a prompt like:
Simics 6 Add-on Package Manager
===============================

This script will configure this Simics installation to use optional
Simics add-on packages.

Default alternatives are enclosed in square brackets ([ ]).

=== Using the package list in project (/home/rhart/hub/tsffs/target/tmp/test_riscv_64_kernel_from_userspace_magic/project) ===

Configured add-on packages:
   RISC-V-CPU     7.2.0  ../simics-risc-v-cpu-7.2.0
   RISC-V-Simple  7.1.0  ../simics-risc-v-simple-7.1.0
   tsffs          7.0.0  ../simics-tsffs-7.0.0

The following operations will be performed:
   -> Upgrade  tsffs  7.0.0  ../simics-tsffs-7.0.0
           to         7.0.0  ../../../../../packages/simics-tsffs-7.0.0

New package list:
   RISC-V-CPU     7.2.0  ../simics-risc-v-cpu-7.2.0
   RISC-V-Simple  7.1.0  ../simics-risc-v-simple-7.1.0
   tsffs          7.0.0  ../../../../../packages/simics-tsffs-7.0.0

Do you want to update the package list? (y/n) [y]
Type y to accept each prompt.
Loading & Initializing TSFFS
Before TSFFS can be used, the module must be loaded, an instance of the fuzzer must be created and instantiated, and the fuzzer must be configured for your target.
Loading the Module
The TSFFS module can be loaded by running (in a SIMICS script):
load-module tsffs
Or, in a Python script:
SIM_load_module("tsffs")
Initializing the Fuzzer
“The Fuzzer” is an instance of the tsffs class, declared in the tsffs module. The
tsffs class can only be instantiated once in a given simulation.
This can be done by running (in a SIMICS script):
init-tsffs
Alternatively, in a Python script, you can write:
tsffs_cls = SIM_get_class("tsffs")
And in the Python script, once we have the tsffs_cls an instance can be created with:
tsffs = SIM_create_object(tsffs_cls, "tsffs", [])
The fuzzer instance is now created and ready to configure and use.
Configuring the Fuzzer
The fuzzer is configured via various attributes, many of which have default values. You can view the list of configuration settings at runtime by running:
@print(*tsffs.attributes, sep="\n")
Most settings can be set from Python scripting, for example the timeout can be set to 3 seconds with:
@tsffs.timeout = 3.0
Common Options
TSFFS provides a set of common options that are usable no matter what type of harnessing is desired.
- Common Options
- Solution Configuration
- Fuzzer Settings
- Using CMPLog
- Set Corpus and Solutions Directory
- Enable and Set the Checkpoint Path
- Enable Random Corpus Generation
- Set an Iteration Limit
- Set Snapshot Restore Interval
- Adding Tokens From Target Software
- Setting an Architecture Hint
- Adding a Trace Processor
- Disabling Coverage Reporting
- Enable Logging and Set Log path
- Keep All Corpus Entries
- Use Initial Buffer Contents As Corpus
- Disable Auto-Continue in Repro Mode
Solution Configuration
TSFFS can be configured to treat various events as solutions.
Setting the Timeout
To set the number of seconds in virtual time until an iteration is considered timed out, use the following (for example, to set the timeout to 3 seconds):
@tsffs.timeout = 3.0
Note that this timeout is in virtual time, not real time. This means that whether the simulation runs faster or slower than real time, the timeout will be accurate to the target software’s execution speed.
Setting Exception Solutions
The primary way TSFFS detects bugs is via CPU exceptions that are raised, but should not be. For example, when fuzzing a user-space application on x86 a General Protection Fault (GPF) (#13) tells the fuzzer that a crash has occurred, or when fuzzing a UEFI application a Page Fault (#14) tells the fuzzer that a crash has occurred.
Each CPU model has different exceptions (e.g. RISC has different codes than x86), but SIMICS represents all exceptions as an integer. An exception number can be added as a tracked condition that will cause the fuzzer to consider an exception (in this example, GPF #13) as a solution with:
@tsffs.exceptions = [13]
An already-added exception can be removed from the tracked set that are considered solutions with:
@tsffs.exceptions.remove(13)
In addition, if all exceptions should be considered as solutions, use:
@tsffs.all_exceptions_are_solutions = True
Note that this is typically not useful in practice. With all exceptions set as solutions, all exceptions including innocuous exceptions like timer interrupts will cause solutions. It is mainly useful for embedded models running short code paths like when fuzzing interrupt handlers themselves, where any exception occurring is truly an error.
Setting Breakpoint Solutions
SIMICS provides several ways of setting breakpoints, for example below shows setting a breakpoint when a CPU writes to a specific range of memory:
local $ctx = (new-context)
local $BREAK_BUFFER_ADDRESS = 0x400000
local $BREAK_BUFFER_SIZE = 0x100
qsp.mb.cpu0.core[0][0].set-context $ctx
local $bp_number = ($ctx.break -w $BREAK_BUFFER_ADDRESS $BREAK_BUFFER_SIZE)
Breakpoints have numbers, which you can add and remove from the set of breakpoints the fuzzer treats as solutions with:
@tsffs.breakpoints = [2]
@tsffs.breakpoints.remove()
Note that when setting a breakpoint via a Simics command, like:
local $bp_number = ($ctx.break -w $BREAK_BUFFER_ADDRESS $BREAK_BUFFER_SIZE)
The variable bp_number can be added to the set of solution breakpoints by accessing
the simenv variable, like:
@tsffs.breakpoints += [simenv.bp_number]
If not specifying a breakpoint number, breakpoints can be set as solutions with:
@tsffs.all_breakpoints_are_solutions = True
This is useful when testing code that is not allowed to write, read, or execute specific code. For example, userspace code should typically not execute code from its stack or heap.
Fuzzer Settings
Using CMPLog
Comparison logging greatly improves the efficiency of the fuzzer by making each iteration more likely to progress through sometimes difficult-to-solve checks. It logs values that are compared against during execution and uses them to mutate the input.
Comparison logging is enabled by default. It can be disabled with:
@tsffs.cmplog = False
Set Corpus and Solutions Directory
By default, the corpus will be taken from (and written to) the directory “%simics%/corpus”.
Initial test cases should be placed in this directory.
The directory test cases are taken from and written to can be changed with:
@tsffs.corpus_directory = SIM_lookup_file("%simics%/other_corpus_directory")
Note the directory must exist. Likewise, the directory solutions are saved to can be changed with:
@tsffs.solutions_directory = SIM_lookup_file("%simics%/other_solutions_directory")
Enable and Set the Checkpoint Path
The fuzzer captures an on-disk checkpoint before starting fuzzing by default. On Simics 7 and higher, this increases the snapshot restore speed very significantly, so it should only be disabled if required.
To disable this behavior, you can set:
@tsffs.pre_snapshot_checkpoint = False
To set the path for the checkpoint, you can set:
@tsffs.checkpoint_path = SIM_lookup_file("%simics%") + "/checkpoint.ckpt"
Enable Random Corpus Generation
For testing, the fuzzer can generate an initial random corpus for you. This option should not be used for real fuzzing campaigns, but can be useful for testing.
In real campaigns, a representative corpus of the input triggering both the error and
non-error paths of the software under test should be placed in the %simics%/corpus
directory (or the directory specified with the
API).
This can be enabled with:
@tsffs.generate_random_corpus = True
The size of the initial random corpus can be set via (note, larger random corpuses are generally not useful and a real corpus matching the expected data format should be used instead!):
@tsffs.initial_random_corpus_size = 64
Set an Iteration Limit
The fuzzer can be set to execute only a specific number of iterations before exiting. This is useful for CI fuzzing or for testing. The limit can be set with:
@tsffs.iteration_limit = 1000
Set Snapshot Restore Interval
By default, TSFFS restores the initial snapshot at every normal iteration boundary. This can be changed to support semi-persistent or fully persistent execution:
# Default behavior: restore every iteration
@tsffs.snapshot_restore_interval = 1

# Semi-persistent: restore every 100 iterations
@tsffs.snapshot_restore_interval = 100

# Fully persistent: never restore after startup
@tsffs.snapshot_restore_interval = 0
Values greater than 1 restore every N iterations, where N is the configured
value. This cadence is based on the global iteration count.
This option only accepts integer values (0, 1, or N > 1).
Discovered solutions, including timeouts, exceptions, and
breakpoint-triggered solutions, always restore the initial snapshot before
the next iteration resumes if one exists. snapshot_restore_interval
controls only the restore behavior for normal iteration boundaries.
When using values other than 1, the harness must use a loop so that execution
reaches the next HARNESS_STOP without relying on a snapshot restore. See
Semi-Persistent and Fully Persistent Execution.
Adding Tokens From Target Software
The fuzzer has a mutator which will insert, remove, and mutate tokens in testcases. This allows the fuzzer to much more easily pass checks against strings and other short sequences. In many cases, especially for text based protocols, this is an extremely large improvement to fuzzer performance, and it should always be used where possible.
The fuzzer provides methods for adding tokens from executable files, source files, and dictionary files. Executable files can be PE/COFF (i.e. UEFI applications or Windows applications) or ELF (i.e. unpacked kernel images or Linux applications).
To add tokens from an executable file:
@tsffs.token_executables += [SIM_lookup_file("%simics%/test.efi")]
Tokens from source files are extracted in a best-effort language-independent way. Multiple source files can be added.
@tsffs.token_src_files += [
  "/home/user/source/test.c",
  "/home/user/source/test_lib.c",
  "/home/user/source/test.h"
]
Dictionary files are given in the same format as AFL and LibFuzzer:
token_x = "hello"
token_y = "foo\x41bar"
Token dictionaries can be created manually, or tokens can be extracted from source files more accurately than the built-in executable tokenizer using some existing tools:
Once created, the tokens from these dictionaries can be added to the fuzzer with:
@tsffs.token_files += [SIM_lookup_file("%simics%/token-file.txt")]
Setting an Architecture Hint
Some SIMICS models may not report the correct architecture for their CPU cores. When not
correct, setting an architecture hint can be useful to override the detected
architecture for the core. this is mostly useful for architectures that report x86-64
but are actually i386, and for architectures that are actually x86-64 but are
running i386 code in backward-compatibility mode.
An architecture hint can be set with:
@tsffs.iface.config.add_architecture_hint(qsp.mb.cpu0.core[0][0], "i386")
Adding a Trace Processor
By default, only the processor core that either executes the start harness or is passed to the manual start API is traced during execution. When fuzzing code running on multiple cores, the additional cores can be added with:
@tsffs.iface.config.add_trace_processor(qsp.mb.cpu0.core[0][1])
Disabling Coverage Reporting
By default, the fuzzer will report new interesting control flow edges. This is normally useful to check the fuzzer’s progress and ensure it is finding new paths. However in some cases, output may not be needed, so coverage reporting can be disabled with:
@tsffs.coverage_reporting = False
Enable Logging and Set Log path
By default, the fuzzer will log useful informational messages in JSON format to
a log in the project directory (log.json).
The path for this log can be set by setting:
@tsffs.log_path = SIM_lookup_file("%simics%) + "/log.json"
You can also disable the logging completely with:
@tsffs.log_to_file = False
Keep All Corpus Entries
For debugging purposes, TSFFS can be set to keep all corpus entries, not just corpus entries which cause interesting results. This generates a large number of corpus files.
@tsffs.keep_all_corpus = True
Use Initial Buffer Contents As Corpus
When using compiled-in or manual harnessing, the initial contents of the testcase buffer can be used as a seed corpus entry. This can be enabled with:
@tsffs.use_initial_as_corpus = True
Disable Auto-Continue in Repro Mode
By default, when running in repro mode, TSFFS automatically resumes simulation after preparing the testcase. To instead pause and let an external debugger (for example a GDB stub) control resume, set:
@tsffs.repro_auto_continue = False
See Debugging Live with a GDB Stub for a full walkthrough.
Harnessing
Harnessing target software to effectively use TSFFS to fuzz it is a target-dependent subject, so examples of each supported harnessing method are provided here. The order of each approach here is roughly equivalent to the preferred order harnessing should be tried. If possible, the target software should be harnessed at the source-code level. If not, try injecting testcases into its memory directly, and if this is still not possible or not appropriate for your use case, the fully-manual approach can be used.
Compiled-In Harnessing
Using Provided Headers
The TSFFS project provides harnessing headers for each supported combination of
architecture and build toolchain. These headers can be found in the harness directory
in the repository. There is also a monolithic header tsffs.h which conditionally
compiles to whichever architecture is in use and can be used on any supported
architecture and platform.
Each header provides the macros HARNESS_START and HARNESS_STOP.
HARNESS_START(testcase_ptr, size_ptr) takes two arguments, a buffer for the fuzzer to
write testcases into each fuzzing iteration and a pointer to a pointer-sized variable,
which the fuzzer will write the size of each testcase to each fuzzing iteration. The
variable pointed to by size_pointer should be initially equal to the maximum size of a
testcase, typically the size of the buffer passed as the first argument.
HARNESS_STOP takes no arguments.
For example, the following code will invoke the start and stop harnesses correctly:
#include "tsffs.h"

int main() {
    char buffer[20];
    size_t size = sizeof(buffer);

    // Each fuzzer iteration, execution will start from here, with a different buffer content
    // and size=len(buffer).
    HARNESS_START(buffer, &size);

    // Check if we got enough data from the fuzzer -- this is not always necessary
    if (size < 3) {
        // Stop early if we didn't get enough bytes from the fuzzer
        HARNESS_STOP();
    }

    // Do something with buffer and size
    int retval = function_under_test(buffer, size);

    if (retval == SOMETHING_IMPOSSIBLE_HAPPENED) {
        /// Some exceptional condition occurred -- note, don't use this for normal "bad" return
        /// values, use it for instances where something that you are fuzzing for happened.
        HARNESS_ASSERT();
    }

    // Stop normally
    HARNESS_STOP();
    return 0;
}
By default, TSFFS is enabled to use these harnesses, so no explicit configuration is necessary. However, the defaults are equivalent to the configuration:
@tsffs.start_on_harness = True
@tsffs.stop_on_harness = True
@tsffs.magic_start_index = 0
@tsffs.magic_stop_indices = [0]
@tsffs.magic_assert_indices = [0]
This sets TSFFS to start the fuzzing loop on a magic
harness with magic number 1 (used by HARNESS_START)
and index 0 (the default) and stop execution and
restore to the initial snapshot on magic harnesses
with magic number 2 (used by HARNESS_STOP) and
index 0 (the default).
Multiple Harnesses in One Binary
If multiple fuzzing campaigns will be run on the same target software, it is sometimes advantageous to compile multiple harnesses into the same target software ahead of time, and choose which to enable at runtime.Each provided header also provides two lower-level macros for this purpose.
HARNESS_START_INDEX(index, testcase_ptr, size_ptr)HARNESS_STOP(index)
These macros are used in the same way as HARNESS_START and HARNESS_STOP,
with the additional first argument. The default value of index is 0, but
TSFFS can be configured to treat a different index as the trigger to start or
stop the fuzzing loop.
#include "tsffs.h"

int main() {
    char buf[20];
    size_t size = sizeof(buf);

    HARNESS_START(buf, &size);

    if (size < 3) {
        // Stop early if there is not enough data
        HARNESS_STOP();
    }

    char * result = function_under_test(buf);

    // Stop normally on success
    HARNESS_STOP();

    HARNESS_START_INDEX(1, result, &size);

    second_function_under_test(result);

    HARNESS_STOP();

    return 0;
}
And configuration settings like:
@tsffs.start_on_harness = True
@tsffs.stop_on_harness = True
@tsffs.magic_start_index = 1
With this runtime configuration, the first harness will be ignored, and only the second set of harness calls will be used.
Alternative Start Harnesses
Several additional variants of the start harness are provided to allow different target software to be used with as little modification as possible.
HARNESS_START_WITH_MAXIMUM_SIZE(void *buffer, size_t max_size)takes a pointer to a buffer likeHARNESS_STARTbut takes a size instead of a pointer to a size as the second argument. Use this harness when the target software does not need to read the actual buffer size.HARNESS_START_WITH_MAXIMUM_SIZE_AND_PTR(void *buffer, void *size_ptr, size_t max_size)takes a pointer to both a buffer and size likeHARNESS_START, and takes a size as the third argument. Use this harness when the target software does not initially have*size_ptrset to the maximum size, but still needs to read the actual buffer size.
Semi-Persistent and Fully Persistent Execution
When snapshot_restore_interval is set to a value other than 1, the snapshot is not
restored at every iteration boundary. Execution continues normally after HARNESS_STOP,
so the harness must use a loop so that control flow reaches the next HARNESS_STOP
without relying on a snapshot restore. HARNESS_START only needs to be called once
(the snapshot is taken on the first call); it does not need to be repeated each
iteration:
#include "tsffs.h"

int main() {
    char buffer[20];
    size_t size = sizeof(buffer);

    // Snapshot is taken here (once). TSFFS writes the first testcase into buffer
    // and size.
    HARNESS_START(buffer, &size);

    while (1) {
        // TSFFS injects new testcase data into buffer before each iteration.
        function_under_test(buffer, size);

        HARNESS_STOP();
    }
}
For snapshot_restore_interval = N (semi-persistent), the snapshot is restored every N
iterations. For snapshot_restore_interval = 0 (fully persistent), the snapshot is
never restored; any per-iteration state (allocated memory, open handles, etc.) must be
cleaned up manually inside the loop.
Troubleshooting
Compile Errors About Temporaries
Some toolchains or compiler versions may reject the use of an & reference in the
HARNESS_START macro (like HARNESS_START(buffer, &size)). In this case, create a
temporary to hold the address and pass it instead, like:
char buffer[100];
size_t size = sizeof(buffer);
size_t size_ptr = &size;
HARNESS_START(buffer, size_ptr);
Closed Box Harnessing
Disabling Compiled-in/Magic Harnesses
Magic start and stop behavior can be disabled, which allows harnessing target software without compiled-in harness code. However, implementation becomes highly target-specific and the magic harness approach is highly preferred.
The same code as before, with no harness:
#include "tsffs.h"

int main() {
    char buf[20];
    size_t size = sizeof(buf);

    function_under_test(buf);

    return 0;
}
Can be harnessed in a closed-box fashion by creating a script-branch to wait until the simulation reaches a specified address, timeout, HAP, or any other condition. First, we can disable magic harnesses (this is not strictly necessary unless any magic harnesses actually exist in the target software, but it is good practice).
@tsffs.start_on_harness = False
@tsffs.stop_on_harness = False
Once compiled-in harnesses are disabled, the fuzzing loop can be started manually. There
are two APIs available. Both receive a cpu object as their first argument, which
should be a processor instance, for example on the QSP platform
qsp.mb.cpu0.core[0][0]. This is the processor whose associated memory will be written
with new testcases, and whose address space will be used for virtual address
translation.
Both testcases also take a virt: bool as their final argument, to specify whether the
addresses passed are virtual addresses or physical addresses. If False, the addresses
will not be translated, which can allow circumventing issues where the address is
accessible, but the page table does not contain an identity mapping for it. A physical
address that is identity mapped may be passed with either a True or False value of
virt.
The first API takes two memory addresses, and is equivalent to the compiled in
HARNESS_START macro. When called, the fuzzer
will save the passed-in addresses (which may be virtual or physical), read the
pointer-sized integer at *size_address as the maximum size of testcases. take a
snapshot, and begin the fuzzing loop. Each iteration, a testcase will be written to the
testcase pointer, and the size of the testcase will be written to the provided size
pointer. This API is called like:
@tsffs.iface.fuzz.start(cpu, testcase_address, size_address, True)
The second API takes one memory address and a maximum size. Testcases will be written to the provided testcase address, and will be truncated to the provided maximum size. This API is called like:
@tsffs.iface.fuzz.start_with_maximum_size(cpu, testcase_address, maximum_size, True)
Triggering Manual Stops/Solutions
During manual or harnessed fuzzer execution, a normal stop or solution can be specified at any time using the API. This allows arbitrary conditions for stopping execution of a test case, or treating an execution as a solution, by programming via the SIMICS script or SIMICS Python script.
During execution, the fuzzer can be signaled to stop the current testcase execution with a normal exit (i.e. not a solution), and reset to the initial snapshot with a new testcase with:
@tsffs.iface.fuzz.stop()
Likewise, the fuzzer can be signaled to stop the current testcase execution with a
solution. The fuzzer will save the input for this execution to the solutions directory
(see that section).
The solution method takes an ID and message that will be saved along with this
solution for later use. Any id and message can be provided, it is entirely up to the
user:
@tsffs.iface.fuzz.solution(1, "A descriptive message about why this is a solution condition")
Manual Harnessing
If the target software does not provide opportunity for injecting testcases into memory, for example when testing an application which takes input via a network or other hardware interface, manual harnessing can be used. This interface simply provides a way for users to obtain the fuzzing test case directly from the fuzzer and use it in any way that is appropriate.
Harnessing in this way can be done using the api. Note that the API method still takes a CPU object. When called, the initial snapshot is still captured in the same way as with other closed-box harnessing methods.
@testcase = tsffs.iface.fuzz.start_without_buffer(cpu)
Fuzzing
Compatibility
There are a small number of requirements for the target software for this fuzzer to support it as a fuzz target. If your project meets the requirements here, it is likely it can use this fuzzer for fuzz testing!
Requirements Overview
TSFFS has two requirements to run:
- Your target software must be running on a CPU model with a supported architecture
- Your target CPU model must support either micro-checkpoints or snapshots
Architecture
Supported Architectures:
- x86_64
- x86
- RISC-V (32 and 64-bit)
If your model’s target architecture is one of these, it is supported by TSFFS. If not, file an issue or pull request. Adding new architectures is easy, and can be a good first contribution to the fuzzer. See the generic and specific architecture information here.
Micro Checkpoints
Micro checkpoints are only supported prior to Simics 7.0.0. If you are using a newer version of Simics, snapshots first.
SIMICS has a feature called micro checkpoints that allows in-memory snapshots of the target software state, as well as reasonably fast restoration of these snapshots to enable fuzzing.
There are different levels of micro checkpoint support – this fuzzer requires only that initialization and code actively under test with the fuzz harness for your project works correctly with micro checkpoints. You can test that micro checkpoints work for your model with a simple test.
Testing Micro Checkpoints
As an example, let’s consider the x86 QSP platform model that ships with SIMICS and the
Hello World EFI resource
example which you can
build by running ./build.sh in the resource directory. The process for fuzzing this
target software follows the basic flow:
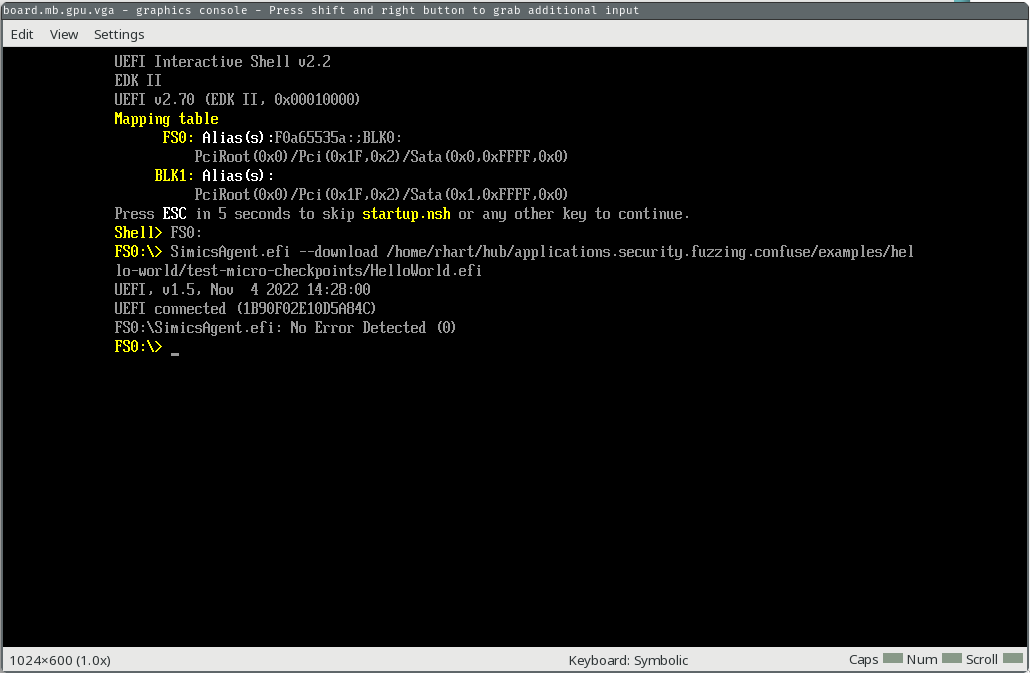
- Boot the x86 QSP BIOS with the QSP x86 hdd boot script, with a minimal boot disk
- Upload the test.efi EFI app using the SIMICS agent (for most real targets, we would just boot an image that has our target software EFI app already included).
- Run the test.efi EFI app we uploaded
- While running, the test.efi target software code reaches our start harness, which triggers the beginning of the fuzzing loop by taking a micro checkpoint. The fuzzer continues execution of the target software.
- While running, either a fault is encountered or the software reaches the stop harness. In either case, the fuzzer restores the original micro checkpoint with a new fuzz input, runs the software, and replays this step infinitely.
Set Up The Project
In this case, to test micro checkpoints manually from the SIMICS command line, we can
create a new project (replace 6.0.169 with your installed SIMICS base version):
$ "${SIMICS_HOME}/simics-6.0.169/bin/project-setup" ./test-micro-checkpoints
Project created successfully
$ cd test-micro-checkpoints
This Hello World example project needs the 2096 package, which is for the SIMICS QSP
platform model. Add the package to the project by running (replace 6.0.70 with your
installed SIMICS QSP package version):
$ echo "${SIMICS_HOME}/simics-qsp-x86-6.0.70/" >> ".package-list"
$ ./bin/project-setup
Project updated successfully
We will also add a simics script. Add the contents below as test.simics in the project
root.
$disk0_image = (lookup-file "%simics%/minimal_boot_disk.craff")
run-command-file "%simics%/targets/qsp-x86/qsp-hdd-boot.simics"

script-branch "UEFI Shell Enter Branch" {
    local $kbd = $system.mb.sb.kbd
    local $con = $system.console.con
    local $sercon = $system.serconsole.con

    bp.time.wait-for seconds = 10

    $kbd.key-press ESC
    bp.time.wait-for seconds = 3
    foreach $i in (range 2) {
        $kbd.key-press KP_DOWN
        bp.time.wait-for seconds = .5
    }
    $kbd.key-press ENTER
    bp.time.wait-for seconds = .5
    $kbd.key-press KP_UP
    bp.time.wait-for seconds = .5
    $kbd.key-press ENTER
    bp.time.wait-for seconds = .5
    $kbd.key-press ENTER
    bp.time.wait-for seconds = .5
    $con.input "FS0:\n"
    bp.time.wait-for seconds = 10

    # We are now in the UEFI shell, we'll download our EFI app
    local $manager = (start-agent-manager)
    $con.input ("SimicsAgent.efi --download " + (lookup-file "%simics%/test.efi") + "\n")
    bp.time.wait-for seconds = .5
}
Finally, build and copy the test.efi module and the minimal_boot_disk.craff image
into the project root:
pushd /path/to/this/repo/examples/tests/x86_64-uefi/
ninja
popd
cp /path/to/this/repo/examples/tests/x86_64-uefi/test.efi ./
cp /path/to/this/repo/examples/rsrc/minimal_boot_disk.craff ./
Test Micro Checkpoints
To test micro checkpoints, run SIMICS in the project with the script you just created:
$ ./simics test.simics
Intel Simics 6 (build 6218 linux64) © 2024 Intel Corporation

Use of this software is subject to appropriate license.
Type 'copyright' for details on copyright and 'help' for on-line documentation.

[board.mb.cpu0.core[0][0] info] VMP disabled. Failed to open device.

WARNING: Simics failed to enable VMP. Enabling VMP substantially improves
         simulation performance. The problem is most likely caused by the
         vmxmon kernel module not being properly installed or updated.
         See the "Simics User's Guide", the "Performance" section,
         for instructions how to setup VMP.

NAPT enabled with gateway 10.10.0.1/24 on link ethernet_switch0.link.
NAPT enabled with gateway fe80::2220:20ff:fe20:2000/64 on link ethernet_switch0.link.
simics>
SIMICS is now running, and we can continue through the boot process all the way into
the EFI shell on filesystem FS0 by running run:
simics> run
[board.mb.sb.lpc.bank.cs_conf unimpl] Write to unimplemented field cs_conf.oic.aen (0x31ff) (value written = 0x01, contents = 0x00), will not warn again.
[board.mb.cpu0.core[0][0] unimpl] Writing to unimplemented MSR 0x1f2 (ia32_smrr_physbase), value = 0xdf800006
[board.mb.cpu0.core[0][0] unimpl] Writing to unimplemented MSR 0x1f3 (ia32_smrr_physmask), value = 0xff800000
[board.mb.sb.lpc.bank.acpi_io_regs unimpl] Write to unimplemented field acpi_io_regs.smi_en.EOS (0x30) (value written = 0x00000001, contents = 0x00000000), will not warn again.
[board.mb.cpu0.core[0][0] unimpl] Reading from unimplemented MSR 0x1f3 (ia32_smrr_physmask), value = 0xff800000
[board.mb.cpu0.core[0][0] unimpl] Writing to unimplemented MSR 0x1f3 (ia32_smrr_physmask), value = 0xff800800
[board.mb.sb.spi.bank.spi_regs spec-viol] Write to read-only field spi_regs.hsfsts.fdv (value written = 0x0000, contents = 0x0001).
[board.mb.sb.thermal.bank.pci_config spec-viol] Enabling bus master, but this device doesn't support it
[board.mb.sb.lan.bank.csr unimpl] Read from unimplemented register csr.extcnf_ctrl (0x00000f00) (contents = 0x00000000).
[board.mb.sb.lan.bank.csr unimpl] Write to unimplemented register csr.extcnf_ctrl (0xf00) (value written = 0x00000020).
[board.mb.sb.lan.bank.csr unimpl] Write to unimplemented field csr.tctl.rrthresh (0x400) (value written = 0x00000000, contents = 0x00000001), will not warn again.
[board.mb.sb.lan.bank.csr unimpl] Read from unimplemented register csr.fwsm_s (0x00005b54) (contents = 0x00000000).
[board.mb.sb.lan.bank.csr unimpl] Write to unimplemented register csr.strap (0xc) (value written = 0x00008086).
[board.mb.sb.lan.bank.csr spec-viol] Read from poorly or non-documented register csr.dummy_3004 (contents = 0).
[board.mb.sb.lan.bank.csr spec-viol] Write to poorly or non-documented register csr.dummy_3004 (value written = 0x50000, contents = 0).
[board.mb.sb.phy.bank.mii_regs unimpl] Write to unimplemented register mii_regs.vendor_specific[15] (0x3e) (value written = 0x6094).
[board.mb.sb.phy.bank.mii_regs unimpl] Read from unimplemented register mii_regs.vendor_specific[4] (0x0028) (contents = 0x0000).
[board.mb.sb.phy.bank.mii_regs unimpl] Write to unimplemented register mii_regs.vendor_specific[4] (0x28) (value written = 0x0000).
[board.mb.sb.lan.bank.csr spec-viol] writing 0 to count is not allowed
[board.mb.sb.lan.bank.csr spec-viol] writing 0 to count is not allowed
[board.mb.sb.lan.bank.csr unimpl] Read from unimplemented register csr.eec (0x00000010) (contents = 0x00000000).
[board.mb.sb.lan.bank.csr unimpl] Read from unimplemented register csr.ledctl (0x00000e00) (contents = 0x00000000).
[board.mb.sb.lan.bank.csr unimpl] Write to unimplemented field csr.tx_queue[0].txdctl.pthresh (0x3828) (value written = 0x0000001f, contents = 0x00000000), will not warn again.
[board.mb.sb.lan.bank.csr unimpl] Write to unimplemented field csr.tx_queue[0].txdctl.wthresh (0x3828) (value written = 0x00000001, contents = 0x00000000), will not warn again.
[board.mb.sb.lan.bank.csr unimpl] Write to unimplemented field csr.tx_queue[0].txdctl.gran (0x3828) (value written = 0x00000001, contents = 0x00000000), will not warn again.
[board.mb.sb.lan.bank.csr unimpl] Write to unimplemented field csr.tx_queue[1].txdctl.pthresh (0x3928) (value written = 0x0000001f, contents = 0x00000000), will not warn again.
[board.mb.sb.lan.bank.csr unimpl] Write to unimplemented field csr.tx_queue[1].txdctl.wthresh (0x3928) (value written = 0x00000001, contents = 0x00000000), will not warn again.
[board.mb.sb.lan.bank.csr unimpl] Write to unimplemented field csr.tx_queue[1].txdctl.gran (0x3928) (value written = 0x00000001, contents = 0x00000000), will not warn again.
[board.mb.sb.lan.bank.csr spec-viol] Read from poorly or non-documented register csr.dummy_5b00 (contents = 0).
[board.mb.sb.lan.bank.csr spec-viol] Write to poorly or non-documented register csr.dummy_5b00 (value written = 0xffffffc0, contents = 0).
[board.mb.sb.lan.bank.csr spec-viol] Read from poorly or non-documented register csr.sec (contents = 0).
[board.mb.sb.lan.bank.csr spec-viol] writing 0 to count is not allowed
[board.mb.sb.lan.bank.csr spec-viol] writing 0 to count is not allowed
[board.mb.sb.lan spec-viol] access to reserved register at offset 0x280c in CSR bank
[board.mb.sb.lan.bank.csr unimpl] Write to unimplemented register csr.h2me (0x5b50) (value written = 0x00000000).
[board.mb.sb.phy.bank.mii_regs unimpl] Read from unimplemented register mii_regs.vendor_specific[3] (0x0026) (contents = 0x0000).
[board.mb.sb.lan.bank.csr unimpl] Write to unimplemented field csr.ctrl.rfce (0) (value written = 0x00000001, contents = 0x00000000), will not warn again.
[board.mb.sb.lan.bank.csr unimpl] Write to unimplemented field csr.ctrl.tfce (0) (value written = 0x00000001, contents = 0x00000000), will not warn again.
[matic0 info] The Simics agent has terminated.
[matic0 info] disconnected from UEFI0 (0x1b90f02e10d5a84c)
running>
You’ll see several automatic actions on the SIMICS GUI, and you will end up with the console screen below.
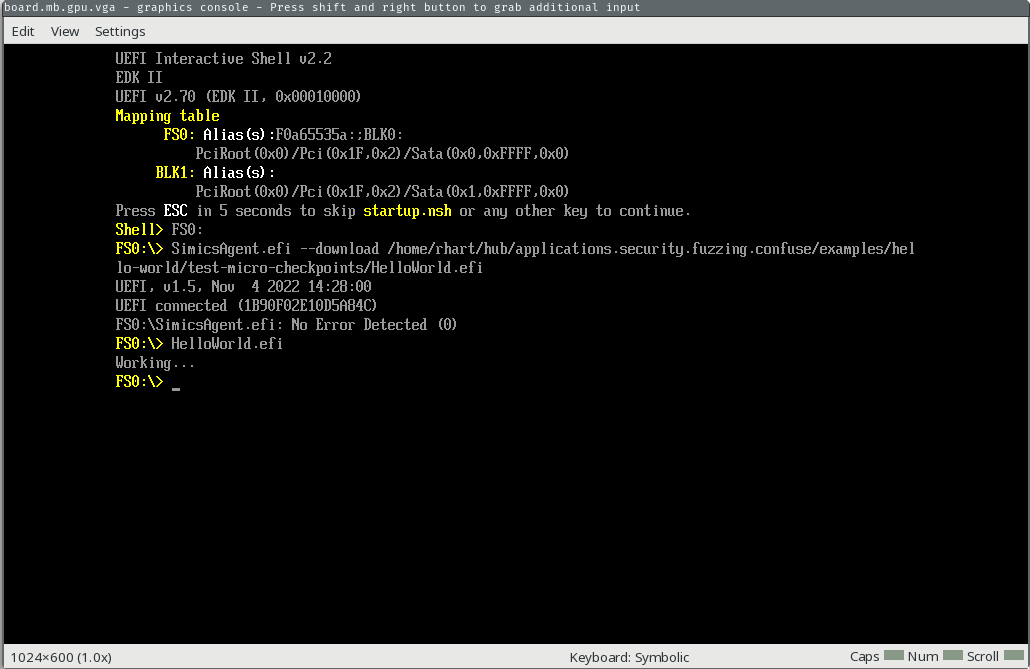
First, we’ll run our EFI app to make sure all is well.
running> $system.console.con.input "test.efi\n"
You should see “Working…” print out on the console.
Now, we’ll go ahead stop the simulation and take our micro checkpoint.
running> stop
simics> @VT_save_micro_checkpoint("origin", 0)
None
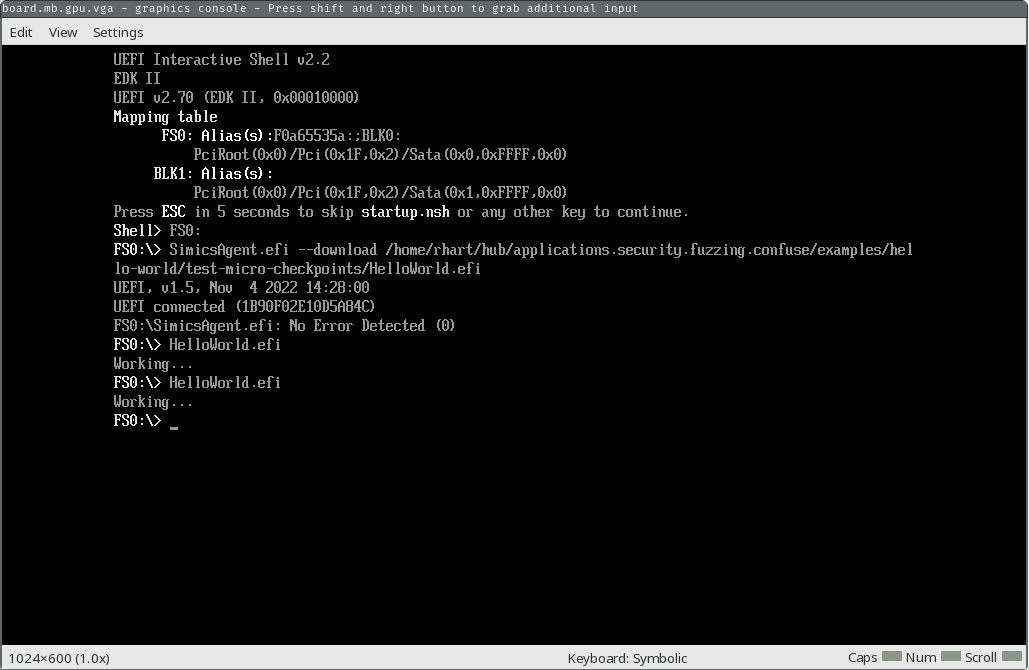
Our simulation is now stopped, with a checkpoint just taken. We’ll run the EFI app again and continue, then stop the simulation after the app finishes running.
simics> $system.console.con.input "test.efi\n"
simics> continue
running> stop
We stopped our execution after the app executed, so you should see the output from the second time we ran it (“Working…”) printed on the GUI console.
Now, we will restore our micro checkpoint and clear the recorder. The second step is important, because if we did not clear the recorder we would replay the execution of the app.
simics> @VT_restore_micro_checkpoint(0)
None
simics> @CORE_discard_future()
None
simics> continue
The console should be back to the state it was before you ran the second app execution, and will look like this:
Testing for Your App
What you want to fuzz will depend on your project, so this procedure will change somewhat depending on your project. In general, try to follow this flow:
- Save a micro checkpoint
- Run whatever software you want to fuzz in a normal configuration, for example via a test case you already have
- Restore the micro checkpoint
- Make sure everything is reset as you expect it to be, for example if your software relies on register values or filesystem objects, make sure they are reset.
- If you are able, do this several times. Some issues can occur on many executions that are not apparent after just one, for example if your model has a memory leak. You can script this step if you’d like.
Snapshots
Newer versions of SIMICS (>= 7.0.0) support a new feature called snapshots, which are similar to micro checkpoints but do not rely on underlying rev-exec support. If your model supports a new version of SIMICS, follow the same instructions as for micro checkpoints, but replace:
VT_save_micro_checkpoint("origin", 0)withVT_save_snapshot("origin")VT_restore_micro_checkpoint(0)withVT_restore_snapshot("origin")
And do not call CORE_discard_future.
Choosing a Harnessing Method
As covered in the harnessing section, there are three options for harnessing a given target software:
- Open-box, or compiled-in harnesses using provided macros
- Closed-box harnessing that injects testcases into some target software memory
- Fully manual harnessing that returns the testcase to the harnessing script
The method that should be used depends on your target software and, more importantly, your build system.
Compiled-In/Open-Box Harnessing
If you control the build system and are able to modify the code, you should almost always prefer the compiled-in harnesses. When you control the compilation, some examples of when compiled-in harnesses should be used are:
- Your UEFI application has a function (or code flow) that takes external input
- Uses files from the filesystem, SRAM, or other persistent storage
- Takes input from the operating system
- Your Kernel module takes external input
- Receives input from user-space via IOCTL or system call
- Uses DMA or MMIO to take input from an external source
- Your user space application takes user input
- From command line
- From a file
Closed-Box Harnessing
The closed-box harnessing methods covered in the closed-box section work in the same way as the open-box harnessing approach. They should be used when the software takes input in the same way as software that would be harnessed using the open-box approach, but whose code or build system cannot be changed to add compiled-in harnessing.
Fully Manual Harnessing
Fully manual harnessing should be used in cases where neither other approach is possible or in extremely complex cases. For example, when significant code is required to preprocess and send an input via an external interface, for harnessing code such as a UEFI update mechanism. This approach (when used correctly) can save time that would have been spent writing a harness in the target software, but you should take care that in-target harnessing is not the best option.
Running the Fuzzer
Once a fuzzing campaign is set up, you can generally run the fuzzer like:
./simics --no-win --batch-mode fuzz.simics
At a log level of 2 or greater (i.e. set tsffs.log-level 2 in your script) , you’ll
see statistics of the current progress during execution.
Optimizing for Fuzzing
There are a few techniques that can be used to optimize the fuzzer for performance while fuzzing.
Reduce Output
The most effective (and, helpfully, often the easiest) way to improve performance of the
fuzzer is to eliminate as much output as possible from the target software. You can use
the preprocessor definition FUZZING_BUILD_MODE_UNSAFE_FOR_PRODUCTION to do this:
Before:
log_info("Some info about what's happening");
log_debug("Some even more info about what's happening, the value is %d", some_value);
After:
#ifndef FUZZING_BUILD_MODE_UNSAFE_FOR_PRODUCTION
    log_info("Some info about what's happening");
    log_debug("Some even more info about what's happening, the value is %d", some_value);
#endif
This will reduce the logging output, which is important in SIMICS as it reduces the running of the console output model, which is much slower than the CPU model.
Run as little as possible
In general, the harnesses for fuzzing should be placed as close around the code you
actually wish to fuzz as possible. For example, if you only want to fuzz a specific function,
like YourSpecialDecoder, place your harnesses immediately around the function call you
want to fuzz:
HARNESS_START(buf, buf_size_ptr);
int retval = YourSpecialDecoder(certbuf, certbuf_size_ptr);

if (!retval) {
    /// An error occurred
    HARNESS_ASSERT();
} else {
    HARNESS_STOP();
}
Analyzing Results
Once a solution is found, the fuzzer can be run in repro mode which will:
- Mark a restore point at the moment the testcase is written (a bookmark on SIMICS 6, the initial snapshot on SIMICS 7)
- Write only one testcase, the bytes from the specified file
- Stop without resetting to the initial snapshot
Repro mode can be run after stopping execution, or before executing the fuzzing loop.
@tsffs.iface.fuzz.repro("%simics%/solutions/TESTCASE")
By default, repro mode automatically resumes simulation after preparing the testcase. If you need to attach an external debugger (for example a GDB stub) before execution begins, you can disable auto-continue so that when the harness is triggered, TSFFS prepares the testcase but waits for you to resume manually:
@tsffs.repro_auto_continue = False
See Disable Auto-Continue in Repro Mode for more details.
Tutorials
We have several tutorials for harnessing and fuzzing various target software.
- Fuzzing an EDK2 UEFI Application
- Fuzzing a Kernel Module
- Fuzzing a Custom BIOS
- Fuzzing a Windows Kernel Mode Driver
Fuzzing an EDK2 UEFI Application
This tutorial will walk you through the entire process of creating, building, and fuzzing a UEFI application built with EDK2 on the x86-64 platform. The completed example code and fuzzing script can be found in the edk2-uefi tutorial directory.
- Writing the Application
- Building the Application
- Testing the Application
- Configuring the Fuzzer
- Running the Fuzzer
- Reproducing Runs
- Optimizing For Speed
Writing the Application
Learning to write EDK2 applications in general is well outside the scope of this tutorial, but we will cover the general workflow.
First, we will create a src directory with the following files:
PlatformBuild.py- the stuart build description file for our target software. You can read more about the pytool extensions here.Tutorial.dsc- The EDK2 description file for building our target softwareTutorial.inf- The EDK2 info file for building our target softwareTutorial.c- Our C source filetsffs.h- The header file from theharnessdirectory in the repository for our target architecture
We’ll cover the auxiliary and build files first, then we’ll cover the source code.
PlatformBuild.py
As mentioned above, this file is used by the EDK2 PyTools (also known as Stuart) to configure tools for building our target software. You can read about stuart and the PyTool Extensions .
We specify our workspace, scopes, packages, and so forth:
from os.path import abspath, dirname, join
from typing import Iterable, List
from edk2toolext.environment.uefi_build import UefiBuilder
from edk2toolext.invocables.edk2_platform_build import BuildSettingsManager
from edk2toolext.invocables.edk2_setup import RequiredSubmodule, SetupSettingsManager
from edk2toolext.invocables.edk2_update import UpdateSettingsManager


class TutorialSettingsManager(
    UpdateSettingsManager, SetupSettingsManager, BuildSettingsManager
):
    def __init__(self) -> None:
        script_path = dirname(abspath(__file__))
        self.ws = script_path

    def GetWorkspaceRoot(self) -> str:
        return self.ws

    def GetActiveScopes(self) -> List[str]:
        return ["Tutorial"]

    def GetPackagesSupported(self) -> Iterable[str]:
        return ("Tutorial",)

    def GetRequiredSubmodules(self) -> Iterable[RequiredSubmodule]:
        return []

    def GetArchitecturesSupported(self) -> Iterable[str]:
        return ("X64",)

    def GetTargetsSupported(self) -> Iterable[str]:
        return ("DEBUG",)

    def GetPackagesPath(self) -> Iterable[str]:
        return [abspath(join(self.GetWorkspaceRoot(), ".."))]

class PlatformBuilder(UefiBuilder):
    def SetPlatformEnv(self) -> int:
        self.env.SetValue(
            "ACTIVE_PLATFORM", "Tutorial/Tutorial.dsc", "Platform hardcoded"
        )
        self.env.SetValue("PRODUCT_NAME", "Tutorial", "Platform hardcoded")
        self.env.SetValue("TARGET_ARCH", "X64", "Platform hardcoded")
        self.env.SetValue("TOOL_CHAIN_TAG", "GCC", "Platform Hardcoded", True)
        return 0
Tutorial.inf
The exact meaning of all the entries in the Tutorial.inf file is out of scope of this
tutorial, but in general this file declares the packages and libraries our application
needs.
[Defines]
  INF_VERSION                    = 0x00010005
  BASE_NAME                      = Tutorial
  FILE_GUID                      = 6987936E-ED34-44db-AE97-1FA5E4ED2116
  MODULE_TYPE                    = UEFI_APPLICATION
  VERSION_STRING                 = 1.0
  ENTRY_POINT                    = UefiMain
  UEFI_HII_RESOURCE_SECTION      = TRUE

[Sources]
  Tutorial.c

[Packages]
  CryptoPkg/CryptoPkg.dec
  MdeModulePkg/MdeModulePkg.dec
  MdePkg/MdePkg.dec

[LibraryClasses]
  BaseCryptLib
  SynchronizationLib
  UefiApplicationEntryPoint
  UefiLib
Tutorial.dsc
The descriptor file also declares classes and libraries that are needed to build the whole platform including our application and requisite additional libraries.
[Defines]
  PLATFORM_NAME                  = Tutorial
  PLATFORM_GUID                  = 0458dade-8b6e-4e45-b773-1b27cbda3e06
  PLATFORM_VERSION               = 0.01
  DSC_SPECIFICATION              = 0x00010006
  OUTPUT_DIRECTORY               = Build/Tutorial
  SUPPORTED_ARCHITECTURES        = X64
  BUILD_TARGETS                  = DEBUG|RELEASE|NOOPT
  SKUID_IDENTIFIER               = DEFAULT

!include MdePkg/MdeLibs.dsc.inc
!include CryptoPkg/CryptoPkg.dsc

[LibraryClasses]
  BaseCryptLib|CryptoPkg/Library/BaseCryptLib/BaseCryptLib.inf
  BaseLib|MdePkg/Library/BaseLib/BaseLib.inf
  BaseMemoryLib|MdePkg/Library/BaseMemoryLib/BaseMemoryLib.inf
  DevicePathLib|MdePkg/Library/UefiDevicePathLib/UefiDevicePathLib.inf
  HobLib|MdePkg/Library/DxeHobLib/DxeHobLib.inf
  IntrinsicLib|CryptoPkg/Library/IntrinsicLib/IntrinsicLib.inf
  IoLib|MdePkg/Library/BaseIoLibIntrinsic/BaseIoLibIntrinsic.inf
  MemoryAllocationLib|MdePkg/Library/UefiMemoryAllocationLib/UefiMemoryAllocationLib.inf
  OpensslLib|CryptoPkg/Library/OpensslLib/OpensslLib.inf
  PcdLib|MdePkg/Library/BasePcdLibNull/BasePcdLibNull.inf
  PrintLib|MdePkg/Library/BasePrintLib/BasePrintLib.inf
  SynchronizationLib|MdePkg/Library/BaseSynchronizationLib/BaseSynchronizationLib.inf
  UefiApplicationEntryPoint|MdePkg/Library/UefiApplicationEntryPoint/UefiApplicationEntryPoint.inf
  UefiBootServicesTableLib|MdePkg/Library/UefiBootServicesTableLib/UefiBootServicesTableLib.inf
  UefiLib|MdePkg/Library/UefiLib/UefiLib.inf
  UefiRuntimeServicesTableLib|MdePkg/Library/UefiRuntimeServicesTableLib/UefiRuntimeServicesTableLib.inf
  TimerLib|UefiCpuPkg/Library/CpuTimerLib/BaseCpuTimerLib.inf

[Components]
  Tutorial/Tutorial.inf
tsffs.h
Copy this file from the TSFFS repository’s harness directory. It provides macros for
compiling in the harness so the target software can communicate with and receive
test cases from the fuzzer.
Tutorial.c
This is our actual source file. We’ll be fuzzing a real EDK2 API: X509VerifyCert,
which tries to verify a certificate was issued by a given certificate authority.
#include <Library/BaseCryptLib.h>
#include <Library/MemoryAllocationLib.h>
#include <Library/UefiApplicationEntryPoint.h>
#include <Library/UefiBootServicesTableLib.h>
#include <Library/UefiLib.h>
#include <Uefi.h>

#include "tsffs.h"

void hexdump(UINT8 *buf, UINTN size) {
  for (UINTN i = 0; i < size; i++) {
    if (i != 0 && i % 26 == 0) {
      Print(L"\n");
    } else if (i != 0 && i % 2 == 0) {
      Print(L" ");
    }
    Print(L"%02x", buf[i]);
  }
  Print(L"\n");
}

EFI_STATUS
EFIAPI
UefiMain(IN EFI_HANDLE ImageHandle, IN EFI_SYSTEM_TABLE *SystemTable) {
  UINTN MaxInputSize = 0x1000;
  UINTN InputSize = MaxInputSize;
  UINT8 *Input = (UINT8 *)AllocatePages(EFI_SIZE_TO_PAGES(MaxInputSize));

  if (!Input) {
    return EFI_OUT_OF_RESOURCES;
  }

  Print(L"Input: %p Size: %d\n", Input, InputSize);
  UINT8 *Cert = Input;
  UINTN CertSize = InputSize / 2;
  UINT8 *CACert = (Input + CertSize);
  UINTN CACertSize = CertSize;

  Print(L"Certificate:\n");
  hexdump(Cert, CertSize);
  Print(L"CA Certificate:\n");
  hexdump(CACert, CACertSize);

  X509VerifyCert(Cert, CertSize, CACert, CACertSize);

  if (Input) {
    FreePages(Input, EFI_SIZE_TO_PAGES(MaxInputSize));
  }

  return EFI_SUCCESS;
}
Now that we have some code, we’ll move on to building.
Building the Application
To build the application, we’ll use the EDK2 docker containers provided by tianocore. In
the directory that contains your src directory, create a Dockerfile:
FROM ghcr.io/tianocore/containers/ubuntu-22-build:a0dd931
ENV DEBIAN_FRONTEND=noninteractive

SHELL ["/bin/bash", "-o", "pipefail", "-c"]

ENV EDK2_REPO_URL "https://github.com/tianocore/edk2.git"
ENV EDK2_REPO_HASH "d189de3b0a2f44f4c9b87ed120be16569ea19b51"
ENV EDK2_PATH "/edk2"

RUN git clone "${EDK2_REPO_URL}" "${EDK2_PATH}" && \
    git -C "${EDK2_PATH}" checkout "${EDK2_REPO_HASH}" && \
    python3 -m pip install --no-cache-dir -r "${EDK2_PATH}/pip-requirements.txt" && \
    stuart_setup -c "${EDK2_PATH}/.pytool/CISettings.py" TOOL_CHAIN_TAG=GCC&& \
    stuart_update -c "${EDK2_PATH}/.pytool/CISettings.py" TOOL_CHAIN_TAG=GCC

COPY src "${EDK2_PATH}/Tutorial/"

RUN stuart_setup -c "${EDK2_PATH}/Tutorial/PlatformBuild.py" TOOL_CHAIN_TAG=GCC && \
    stuart_update -c "${EDK2_PATH}/Tutorial/PlatformBuild.py" TOOL_CHAIN_TAG=GCC && \
    python3 "${EDK2_PATH}/BaseTools/Edk2ToolsBuild.py" -t GCC

WORKDIR "${EDK2_PATH}"

RUN source ${EDK2_PATH}/edksetup.sh && \
    ( stuart_build -c ${EDK2_PATH}/Tutorial/PlatformBuild.py TOOL_CHAIN_TAG=GCC \
    EDK_TOOLS_PATH=${EDK2_PATH}/BaseTools/ \
    || ( cat ${EDK2_PATH}/Tutorial/Build/BUILDLOG.txt && exit 1 ) )
This Dockerfile will obtain the EDK2 source and compile the BaseTools, then copy our
src directory into the EDK2 repository as a new package and build the package.
We will want to get our built UEFI application from the container, which we can
do using the docker cp command. There are a few files we want to copy, so we’ll
use this script build.sh to automate the process.
It will also copy the tsffs.h header into the harness sources, copy the minimal boot disk
and create a initial fuzzing corpus to prepare the project.
#!/bin/bash

SCRIPT_DIR=$(cd -- "$(dirname -- "${BASH_SOURCE[0]}")" &>/dev/null && pwd)
IMAGE_NAME="tsffs-tutorial-edk2-uefi"
CONTAINER_UID=$(echo "${RANDOM}" | sha256sum | head -c 8)
CONTAINER_NAME="${IMAGE_NAME}-tmp-${CONTAINER_UID}"

mkdir -p "${SCRIPT_DIR}/project/"
# copy minimal boot disk
cp "${SCRIPT_DIR}/../../rsrc/minimal_boot_disk.craff" "${SCRIPT_DIR}/project/"

# copy tsffs.h header into src
cp "${SCRIPT_DIR}/../../../harness/tsffs.h" "${SCRIPT_DIR}/src/"
docker build -t "${IMAGE_NAME}" -f "Dockerfile" "${SCRIPT_DIR}"
docker create --name "${CONTAINER_NAME}" "${IMAGE_NAME}"

for file_ext in efi map debug; do
    docker cp \
        "${CONTAINER_NAME}:/edk2/Tutorial/Build/CryptoPkg/All/DEBUG_GCC/X64/Tutorial/Tutorial/DEBUG/Tutorial.efi" \
        "${SCRIPT_DIR}/project/Tutorial.${file_ext}"
done

docker rm -f "${CONTAINER_NAME}"

# ensure corpus
if [ ! -d "${SCRIPT_DIR}/corpus" ]; then
    mkdir "${SCRIPT_DIR}/corpus"
    curl -L -o "${SCRIPT_DIR}/corpus/0" https://github.com/dvyukov/go-fuzz-corpus/raw/master/x509/certificate/corpus/0
    curl -L -o "${SCRIPT_DIR}/corpus/1" https://github.com/dvyukov/go-fuzz-corpus/raw/master/x509/certificate/corpus/1
    curl -L -o "${SCRIPT_DIR}/corpus/2" https://github.com/dvyukov/go-fuzz-corpus/raw/master/x509/certificate/corpus/2
    curl -L -o "${SCRIPT_DIR}/corpus/3" https://github.com/dvyukov/go-fuzz-corpus/raw/master/x509/certificate/corpus/3
fi
The script will build the image, create a container using it, copy the relevant files
to our host machine (in a project directory), then delete the container.
Let’s go ahead and run it:
./build.sh
Testing the Application
Before we harness the application for fuzzing, we should test it to make sure it runs.
Before this step, you’ll need to have the TSFFS SIMICS package installed in your system
by following the setup steps or by installing a prebuilt ispm
package. You’ll also need the SIMICS base package (1000), the QSP-x86 package (2096),
and the QSP-CPU (8112) package. All three are available in the public simics release.
You can check that you have the package installed by running:
ispm packages --list-installed
You should see (at least, but likely more packages):
Installed Base Packages
 Package Number  Name         Version  Installed Paths
 1000            Simics-Base  6.0.185  /home/rhart/simics/simics-6.0.185

Installed Addon Packages
 Package Number  Name             Version    Installed Paths
 2096            QSP-x86          6.0.73     /home/rhart/simics/simics-qsp-x86-6.0.73
 8112            QSP-CPU          6.0.21     /home/rhart/simics/simics-qsp-cpu-6.0.21
 31337           TSFFS            6.1.6      /home/rhart/simics/simics-tsffs-6.1.6
in the list!
Create a Project
The build script for our application created a project directory for us if it did not
exist, so we’ll instantiate that directory as our project with ispm:
ispm projects project --create 1000-6.0.185 2096-6.0.73 8112-6.0.21 31337-latest \
  --ignore-existing-files
cd project
Minimal Boot Disk
The TSFFS repository provides a boot disk called minimal_boot_disk.craff which
provides a filesystem and the Simics Agent to allow us to easily download our UEFI
application to the filesystem so we can run it.
Note: this boot disk has already been copied by build.sh into the project directory
in the previous step.
Create a Script
Our initial script will load (but not use yet) the TSFFS module, then configure and
start our simple x86-64 platform and run our UEFI application. In the project
directory, create run.simics:
# Load the TSFFS module (to make sure we can load it)
load-module tsffs

# Load the UEFI shell target with out boot disk
# also provide a fake value for lan_bios, which has no default
load-target "qsp-x86/uefi-shell" namespace = qsp machine:hardware:storage:disk0:image = "minimal_boot_disk.craff" machine:hardware:firmware:lan_bios = "minimal_boot_disk.craff" machine:software:firmware:lan_bios = "minimal_boot_disk.craff"

script-branch {
    # Wait for boot
    bp.time.wait-for seconds = 15
    qsp.serconsole.con.input "\n"
    bp.time.wait-for seconds = .5
    # Change to the FS0: filesystem (which is our mounted minimal_boot_disk.craff)
    qsp.serconsole.con.input "FS0:\n"
    bp.time.wait-for seconds = .5
    # Start the UEFI agent manager (the host side connection from the SIMICS agent)
    local $manager = (start-agent-manager)
    # Run the SIMICS agent to download our Tutorial.efi application into the simulated
    # filesystem
    qsp.serconsole.con.input ("SimicsAgent.efi --download " + (lookup-file "%simics%/Tutorial.efi") + "\n")
    bp.time.wait-for seconds = .5
    # Run our Tutorial.efi application
    qsp.serconsole.con.input "Tutorial.efi\n"
}

script-branch {
  # Wait until the application is done running, then quit
  bp.time.wait-for seconds = 30
  quit 0
}

# Start!
run
Run the Test Script
Run the script:
./simics --no-win --batch-mode run.simics
The machine will boot, the UEFI application will run and dump out the contents of the
certificates, then the simulation will exit (this is because we passed --batch-mode).
Now that everything works, we’re ready to move on to harnessing!
Harnessing the Application
Note that as written, our application will be running the certificate verification
with uninitialized allocated memory. We want to run it instead using our fuzzer input,
so we need to add harnessing. We’ve already #include-ed our harness header file and
loaded the TSFFS module in our simulation, so we’re halfway there.
Adding Harness Code
In our Tutorial.c file, we’ll add a few lines of code so that our main function looks
like this (the rest of the code can stay the same):
EFI_STATUS
EFIAPI
UefiMain(IN EFI_HANDLE ImageHandle, IN EFI_SYSTEM_TABLE *SystemTable) {
  UINTN MaxInputSize = 0x1000;
  UINTN InputSize = MaxInputSize;
  UINT8 *Input = (UINT8 *)AllocatePages(EFI_SIZE_TO_PAGES(MaxInputSize));

  if (!Input) {
    return EFI_OUT_OF_RESOURCES;
  }

  HARNESS_START(Input, &InputSize);

  Print(L"Input: %p Size: %d\n", Input, InputSize);
  UINT8 *Cert = Input;
  UINTN CertSize = InputSize / 2;
  UINT8 *CACert = (Input + CertSize);
  UINTN CACertSize = CertSize;

  Print(L"Certificate:\n");
  hexdump(Cert, CertSize);
  Print(L"CA Certificate:\n");
  hexdump(CACert, CACertSize);

  BOOLEAN Status = X509VerifyCert(Cert, CertSize, CACert, CACertSize);

  if (Status) {
    HARNESS_ASSERT();
  } else {
    HARNESS_STOP();
  }

  if (Input) {
    FreePages(Input, EFI_SIZE_TO_PAGES(MaxInputSize));
  }

  return EFI_SUCCESS;
}
First, we invoke HARNESS_START with two arguments:
- The pointer to our buffer – this is where the fuzzer will write each testcase
- The pointer to our maximum input size (aka, the size of the buffer). The fuzzer records the initial value and will truncate testcases to it so it does not cause buffer overflows, and will write the actual size of the input here each iteration so we know how much data the fuzzer has given us.
Then, we let the function we are testing run normally. If a CPU exception happens, the fuzzer will pick it up and treat the input as a “solution” that triggers a configured exceptional condition.
Finally, we check the status of certificate verification. If validation was successful,
we HARNESS_ASSERT because we really do not expect this to happen, and we want to
know if it does happen. This type of assertion can be used for any condition that you
want to fuzz for in your code. If the status is a certificate verification failure, we
HARNESS_STOP, which just tells the fuzzer we completed our test under normal
conditions and we should run again.
Re-compile the application by running the build script.
Obtain a Corpus
The fuzzer will take input from the corpus directory located under edk2-uefi:
@tsffs.corpus_directory = SIM_lookup_file("%simics%/../corpus")
In build.sh we have already created that directory and added some sample
certificate files in DER format as our input corpus.
Configuring the Fuzzer
Even though we loaded the fuzzer module, it didn’t run previously because we did not
instantiate and configure it. Let’s do that now. At the top of your run.simics
script, we’ll add each of the following lines.
First, we need to create an actual tsffs object to instantiate the fuzzer.
load-module tsffs # You should already have this
init-tsffs
Next, we’ll set the log level to maximum for demonstration purposes:
tsffs.log-level 4
Then, we’ll set the fuzzer to start and stop on the magic harnesses we just compiled into our UEFI application. This is the default, so these calls can be skipped in real usage unless you want to change the defaults, they are just provided here for completeness.
@tsffs.start_on_harness = True
@tsffs.stop_on_harness = True
We’ll set up our “solutions” which are all the exceptional conditions that we want to fuzz for. In our case, these are timeouts (we’ll set the timeout to 3 seconds) to detect hangs, and CPU exceptions. we’ll enable exceptions 13 for general protection fault and 14 for page faults to detect out of bounds reads and writes.
@tsffs.timeout = 3.0
@tsffs.exceptions = [13, 14]
By default, TSFFS expects the corpus and solutions directories to be located within
the Simics project directory.
However, Since our fuzzer is configured to read its corpus from the ../corpus
directory (relative to the project directory), we must explicitly specify the
correct path using the following configuration:
# project/../corpus
@tsffs.corpus_directory = SIM_lookup_file("%simics%/../corpus")
# set solutions directory (default location, explicitly defined for clarity)
@tsffs.solutions_directory = SIM_lookup_file("%simics%/solutions")
We’ll also delete the following code from the run.simics script:
script-branch {
  bp.time.wait-for seconds = 30
  quit 0
}
Since we’ll be fuzzing, we don’t want to exit!
Running the Fuzzer
Now that we have configured the fuzzer and harnessed our target application, it’s time to run again:
./simics --no-win run.simics
Press Ctrl+C at any time to stop the fuzzing process and return to the SIMICS CLI.
From there you can run continue to continue the fuzzing process.
Reproducing Runs
It is unlikely you’ll find any bugs with this harness (if you do, report them to edk2!), but we can still test the “repro” functionality which allows you to replay an execution of a testcase from an input file.
Listing and Examining Testcases
After pressing Ctrl+C during execution, list the corpus files (tip: ! in front of a
line in the SIMICS console lets you run shell commands):
simics> !ls corpus
0
1
2
3
4385dc33f608888d
5b7dc5642294ccb9
You will probably have several files. Let’s examine testcase 4385dc33f608888d:
simics> !hexdump -C corpus/4385dc33f608888d | head -n 2
00000000  30 82 04 e8 30 82 04 53  a0 03 02 01 02 02 1d 58  |0...0..S.......X|
00000010  74 4e e3 aa f9 7e e8 ff  2f 67 53 31 6e 62 3d 1e  |tN...~../gS1nb=.|
We can tell the fuzzer that we want to run with this specific input by using:
simics> @tsffs.iface.fuzz.repro("%simics%/corpus/4385dc33f608888d")
Note: You can change the testcase you are examining by choosing a different one with
tsffs.iface.fuzz.repro, but you cannot resume fuzzing after entering repro mode due to inconsistencies with the simulated system clock.
Inspecting State with SIMICS Reverse Debugging
By default, the simulation runs the testcase through to completion and preserves the state at the point the harness was triggered. How you replay it depends on which SIMICS version you are running:
-
On SIMICS 6, TSFFS uses reverse-execution bookmarks. Restore the start state with:
simics> reverse-to start -
On SIMICS 7, the
set-bookmark/reverse-tocommands have been removed. TSFFS uses a snapshot namedtsffs-origin-snapshotinstead. Restore it with:simics> restore-snapshot tsffs-origin-snapshot
TSFFS prints the exact command to use in the Stopped for repro. log line, so you can
just copy it from there.
From here, you can examine memory and registers (with x), single step execution (si)
and more! Check out the SIMICS documentation and explore all the deep debugging
capabilities that SIMICS offers. When you’re done exploring, run c to continue.
Debugging Live with a GDB Stub
Reverse debugging is great for inspecting state after a testcase has run. If you instead want to step through execution as it happens (setting breakpoints, watching registers change, using a familiar GDB workflow), you can attach a GDB stub before the testcase executes.
Step 1: Enable repro mode without auto continue.
Add the following to your SIMICS script:
@tsffs.iface.fuzz.repro("%simics%/corpus/4385dc33f608888d")
@tsffs.repro_auto_continue = False
With this set, when the harness start (HARNESS_START) is hit, TSFFS will write the
testcase into the target’s buffer and pause the simulation there, waiting for you to
resume manually.
  if (!Input) {
    return EFI_OUT_OF_RESOURCES;
  }

  HARNESS_START(Input, &InputSize);  // <-- Simulation is paused here

  Print(L"Input: %p Size: %d\n", Input, InputSize);
Step 2: Start the GDB stub.
SIMICS exposes a GDB remote stub via the new-gdb-remote command. Start it by
appending it to your invocation on the command line so it runs after your script
finishes loading:
./simics run.simics -e new-gdb-remote
Or add it at the end of your script directly, after the run line:
new-gdb-remote
SIMICS output (Simics 7; Simics 6 shows reverse-to start instead):
[tsffs info] Stopped for repro. Restore origin state with 'restore-snapshot tsffs-origin-snapshot'
No CPU is specified; using current processor.
[gdb0 info] Attached to CPU: qsp.mb.cpu0.core[0][0]
Warning: This can expose the target system on the host local network.
[gdb0 info] Awaiting GDB connections on port 9123.
[gdb0 info] Connect from GDB using: "target remote localhost:9123"
Step 3: Connect from your GDB client.
From a separate terminal, connect to the stub. You now have full GDB control over the simulated target. Set breakpoints, step through instructions, inspect memory and registers. The simulation will only advance when you tell it to.
(gdb) target remote :9123
Remote debugging using :9123
warning: No executable has been specified and target does not support
determining executable automatically.  Try using the "file" command.
0x00000000dd5b7c8c in ?? ()
(gdb) bt
#0  0x00000000dd5b7c8c in ?? ()
#1  0x0000000000000000 in ?? ()
(gdb) x/10i $rip
=> 0xdd5b7c8c:  cpuid
   0xdd5b7c8e:  incq   -0x128(%rbp)
   0xdd5b7c95:  jne    0xdd5b7743
   0xdd5b7c9b:  lea    0x2a6a4(%rip),%rcx        # 0xdd5e2346
   0xdd5b7ca2:  call   0xdd5b5af9
   0xdd5b7ca7:  mov    0x4f6a2(%rip),%rax        # 0xdd607350
   0xdd5b7cae:  mov    $0x1,%edx
   0xdd5b7cb3:  mov    -0x118(%rbp),%rcx
   0xdd5b7cba:  call   *0x30(%rax)
   0xdd5b7cbd:  test   %rax,%rax
(gdb)
Source-Level Debugging
Once connected with a GDB stub, you can go further and load debug symbols so GDB shows C source lines, function names, and local variables instead of raw addresses. This requires two additional pieces of setup: OS awareness in the SIMICS script, and loading the symbols at the correct address in GDB.
Step 1: Add OS awareness to the script.
Add the following block to your run.simics right after the load-target line:
new-os-awareness name = qsp.software
qsp.software.insert-tracker tracker = uefi_fw_tracker_comp
qsp.software.tracker.detect-parameters -load
qsp.software.enable-tracker
This instructs SIMICS to track which EFI modules are loaded and at what addresses.
Step 2: Find the load address of Tutorial.efi.
After the simulation has started and the target has booted, run in the SIMICS console:
simics> qsp.software.tracker.list-modules max = 100
Look for Tutorial.efi in the output:
│ 85│Tutorial.efi │ 0xdd548000│ 0xc3b80│
The Loaded Address column gives the base address of the module (0xdd548000 in this
example).
Step 3: Find the .text section RVA.
On your host, inspect the debug file produced by the build:
$ objdump -h project/Tutorial.debug
project/Tutorial.debug:     file format elf64-x86-64

Sections:
Idx Name          Size      VMA               LMA               File off  Algn
  0 .text         0009a9d4  0000000000000240  0000000000000240  00000100  2**6
  1 .data         ...
The VMA of the .text section is 0x240. Since EFI binaries are position-independent,
this equals the RVA to add to the load address.
Step 4: Load symbols in GDB.
In your GDB session, load the debug file using the load address from step 2 and the
.text VMA from step 3:
(gdb) add-symbol-file project/Tutorial.debug 0xdd548000+0x240
GDB will now resolve addresses to source lines and function names. You can set breakpoints by function or file location, step through C source, and inspect named variables.
Step 5: Map source paths.
The debug symbols reference the paths as they existed inside the Docker build container
(rooted at /edk2). The build script can copy those sources to your host under
edk2-uefi/edk2/ when run with COPY_SOURCES=1:
COPY_SOURCES=1 ./build.sh
Then tell GDB how to map the container paths to your local copy:
(gdb) set substitute-path /edk2 /absolute/path/to/examples/tutorials/edk2-uefi/edk2
GDB will now find source files automatically when stepping through code.
(gdb) bt
#0  0x00000000dd5b89c6 in UefiMain (SystemTable=<optimized out>, ImageHandle=<optimized out>) at /edk2/Tutorial/Tutorial.c:58
#1  ProcessModuleEntryPointList (SystemTable=<optimized out>, ImageHandle=<optimized out>) at /edk2/Tutorial/Build/CryptoPkg/All/DEBUG_GCC/X64/Tutorial/Tutorial/DEBUG/AutoGen.c:319
#2  _ModuleEntryPoint (ImageHandle=<optimized out>, SystemTable=<optimized out>) at /edk2/MdePkg/Library/UefiApplicationEntryPoint/ApplicationEntryPoint.c:58
#3  0x00000000df32e14c in ?? ()
#4  0x00000001df322a88 in ?? ()
#5  0x00000000df322a98 in ?? ()
#6  0x00000000df322a20 in ?? ()
#7  0x0000000000000000 in ?? ()
(gdb) list .
53    BOOLEAN Status = X509VerifyCert(Cert, CertSize, CACert, CACertSize);
54
55    if (Status) {
56      HARNESS_ASSERT();
57    } else {
58      HARNESS_STOP();
59    }
60
61    if (Input) {
62      FreePages(Input, EFI_SIZE_TO_PAGES(MaxInputSize));
(gdb)
Optimizing
There is a lot of room to optimize this test scenario. You’ll notice that with full
logging on (and full hexdumping of input on), each run takes over a second for around
0.3 executions per second. While this is much better than nothing, his is quite poor
performance for effective fuzzing.
Remove Target Software Output
First, we’ll #ifdef out our print statements in our target software:
EFI_STATUS
EFIAPI
UefiMain(IN EFI_HANDLE ImageHandle, IN EFI_SYSTEM_TABLE *SystemTable) {
  UINTN MaxInputSize = 0x1000;
  UINTN InputSize = MaxInputSize;
  UINT8 *Input = (UINT8 *)AllocatePages(EFI_SIZE_TO_PAGES(MaxInputSize));

  if (!Input) {
    return EFI_OUT_OF_RESOURCES;
  }

  HARNESS_START(Input, &InputSize);

#ifndef FUZZING_BUILD_MODE_UNSAFE_FOR_PRODUCTION
  Print(L"Input: %p Size: %d\n", Input, InputSize);
#endif
  UINT8 *Cert = Input;
  UINTN CertSize = InputSize / 2;
  UINT8 *CACert = (Input + CertSize);
  UINTN CACertSize = CertSize;

#ifndef FUZZING_BUILD_MODE_UNSAFE_FOR_PRODUCTION
  Print(L"Certificate:\n");
  hexdump(Cert, CertSize);
  Print(L"CA Certificate:\n");
  hexdump(CACert, CACertSize);
#endif

  BOOLEAN Status = X509VerifyCert(Cert, CertSize, CACert, CACertSize);

  if (Status) {
    HARNESS_ASSERT();
  } else {
    HARNESS_STOP();
  }

  if (Input) {
    FreePages(Input, EFI_SIZE_TO_PAGES(MaxInputSize));
  }

  return EFI_SUCCESS;
}
[tsffs info] Stopped after 1107 iterations in 11.048448 seconds (100.19507 exec/s).
We are now running at 100+ iterations per second! This is a massive increase. Let’s take it a little further.
Turn Down Logging
TSFFS logs a large amount of redundant information at high log levels (primarily for debugging purposes). You can reduce the amount of information printed by setting:
tsffs.log-level 2
Where 0 is the lowest (error) and 4 is the highest (trace) logging level. Errors are
always displayed. This can typically buy a few exec/s. Note that fuzzer status messages
are printed at a logging level of info (2), so you likely want to at least set the
log level to 2.
This can buy us a few executions per second:
[tsffs info] [Testcase #0] run time: 0h-0m-42s, clients: 1, corpus: 21, objectives: 0, executions: 4792, exec/sec: 112.5
Shorten The Testcase
In our case, we are calling one function, sandwiched between HARNESS_START and
HARNESS_STOP. There is almost nothing we can do to shorten the runtime of each
individual run here, but this is a good technique to keep in mind for your future
fuzzing efforts.
Run More Instances
TSFFS includes stages for flushing the queue and synchronizing the queue from a shared corpus directory. This means you can run as many instances of TSFFS as you’d like in parallel, and they will periodically pick up new corpus entries from each other. Execution speed scales approximately linearly across cores.
We’ll launch 8 instances, all in batch mode, using tmux:
#!/bin/bash

SESSION_NAME="my-tsffs-campaign"

# Create a new tmux session or attach to an existing one
tmux new-session -d -s "$SESSION_NAME"

# Loop to create 8 windows and run the command in each window
for i in {1..8}; do
    # Create a new window
    tmux new-window -t "$SESSION_NAME:$i" -n "${SESSION_NAME}-window-$i"

    # Run the command in the new window
    tmux send-keys -t "$SESSION_NAME:$i" "./simics -no-gui --no-win --batch-mode run.simics" C-m
done

# Attach to the tmux session
tmux attach-session -t "$SESSION_NAME"
You can select each window with (for example to select window 3 Ctrl+b 3), and you can
detach and leave the campaign running in the background with Ctrl+b d. After detaching
you can reattach using the last command in the script tmux attach-session -t my-tsffs-campaign. Running 8 instances of the fuzzer means approximately 8 times the
exec/s of a single instance, however each instance operates independently, so bug
finding does not scale in a correspondingly linear fashion. Regardless, the common
wisdom of more iterations being better holds.
Fuzzing a Kernel Module
This tutorial will walk you through the entire process of creating, building, and fuzzing a Linux Kernel module running on the simulated RISC-V platform. The complete example code and scripts can be found in the kernel-module tutorial directory.
- Target Software Outline
- Target Software Boilerplate
- Kernel Module Code
- Kernel Module Harnessing
- Updating the Build Configuration
- Running the Fuzzer
Target Software Outline
We are targeting RISC-V, so we will be using buildroot for our toolchain and Linux build. We need to build the following:
fw_jump.elf,Image, androotfs.ext2, our firmware jump binary, linux kernel image, and root filesystem, respectively. These three files are expected by the public RISC-V platform model for SIMICS to boot Linux. Other approaches can be used but will require significantly more customization.tutorial-mod.koour tutorial kernel module. We’ll create a kernel module which provides a virtual device which can be controlled via IOCTL.tutorial-mod-drivera user-space application which will trigger the funcionality we want to fuzz in our kernel module. We’ll discuss how to harness both by compiling the harness code into the kernel module and by compiling the harness code into the user-space driver application.
We’ll use the br2-external mechanism to keep our kernel module package separate from the buildroot tree.
Target Software Boilerplate
Creating the external Buildroot tree requires several small files to be in just the right places.
Dockerfile
The first thing we need to do is create a Dockerfile. We’ll add more lines to this
dockerfile as we create the sources.
FROM ubuntu:22.04 AS buildroot

SHELL ["/bin/bash", "-o", "pipefail", "-c"]

ENV DEBIAN_FRONTEND=noninteractive

RUN apt-get -y update && \
    apt-get -y install \
        bash bc build-essential cpio file git gcc g++ rsync unzip wget && \
    git clone \
        https://github.com/buildroot/buildroot.git

WORKDIR /buildroot

COPY src /src/
All we’ve done so far is install dependencies and clone the buildroot repository, as
well as copy our source code into the container in the /src directory.
This repo is quite large, nearly 7GB, so keep this in mind.
Buildroot Boilerplate
Next to the Dockerfile, create a directory src/tutorial-kernel-modules:
mkdir -p src/tutorial-kernel-module
Create src/tutorial-kernel-modules/Config.in with the contents:
source "$BR2_EXTERNAL_TUTORIAL_KERNEL_MODULES_PATH/package/kernel-modules/Config.in"
Create src/tutorial-kernel-modules/external.desc with the contents:
name: TUTORIAL_KERNEL_MODULES
And create src/tutorial-kernel-modules/external.mk with the contents:
include $(sort $(wildcard $(BR2_EXTERNAL_TUTORIAL_KERNEL_MODULES_PATH)/package/*/*.mk))
These three files are required to create an external buildroot tree, and tell buildroot what to include in its configuration.
Kernel Module Package Boilerplate
Now we can create our actual kernel module package (remember, the above just creates an external package tree, we need to add a package to it).
mkdir -p src/tutorial-kernel-modules/package/kernel-modules/tutorial-mod
Create src/tutorial-kernel-modules/package/kernel-modules/Config.in with the contents:
menu "Kernel Modules"
    source "$BR2_EXTERNAL_TUTORIAL_KERNEL_MODULES_PATH/package/kernel-modules/tutorial-mod/Config.in"
endmenu
This adds a menu entry for our tutorial kernel module if one were to use
make menuconfig to configure buildroot.
Create src/tutorial-kernel-modules/package/kernel-modules/kernel-modules.mk with the
contents:
include $(sort $(wildcard $(BR2_EXTERNAL_TUTORIAL_KERNEL_MODULES_PATH)/package/*/*/*.mk))
This includes each of the (just one, in our case) kernel module package’s makefiles.
Kernel Module Boilerplate
At long last, we can set up and write our actual kernel module’s boilerplate.
Create src/tutorial-kernel-modules/package/kernel-modules/tutorial-mod/Config.in:
config BR2_PACKAGE_TUTORIAL_MOD
    bool "tutorial-mod"
    depends on BR2_LINUX_KERNEL
    help
        Tutorial kernel module for TSFFS fuzzing
This defines the actual menu entry for this kernel module.
TUTORIAL_MOD_VERSION = 1.0
TUTORIAL_MOD_SITE = $(BR2_EXTERNAL_TUTORIAL_KERNEL_MODULES_PATH)/package/kernel-modules/tutorial-mod
TUTORIAL_MOD_SITE_METHOD = local

$(eval $(kernel-module))
$(eval $(generic-package))
This makefile is included by buildroot and tells buildroot this should be built as a kernel module which is a generic package and tells buildroot where the source code is located (AKA the site).
Kernel Module Code
Next, create src/tutorial-kernel-modules/package/kernel-modules/tutorial-mod/Makefile,
which will be more familiar to Linux Kernel developers (note – you may need to convert
space indentation to tabs when pasting the contents below):
obj-m += $(addsuffix .o, $(notdir $(basename $(wildcard $(BR2_EXTERNAL_TUTORIAL_KERNEL_MODULES_PATH)/package/kernel-modules/tutorial-mod/*.c))))

.PHONY: all clean

all:
    $(MAKE) -C '/lib/modules/$(shell uname -r)/build' M='$(PWD)' modules

clean:
    $(MAKE) -C '$(LINUX_DIR)' M='$(PWD)' clean
This in turn invokes the standard KBuild process, specifying our current directory as an out of tree modules directory.
Then, copy tsffs.h from the harness directory of the repository into
src/tutorial-kernel-modules/package/kernel-modules/tutorial-mod/tsffs.h.
Finally, we can write our Kernel module. Doing so is well beyond the scope of this
tutorial, so copy the code below into
src/tutorial-kernel-modules/package/kernel-modules/tutorial-mod/tutorial-mod.c.
#include <asm/errno.h>
#include <linux/atomic.h>
#include <linux/cdev.h>
#include <linux/delay.h>
#include <linux/device.h>
#include <linux/fs.h>
#include <linux/init.h>
#include <linux/ioctl.h>
#include <linux/module.h>
#include <linux/printk.h>
#include <linux/types.h>
#include <linux/uaccess.h>
#include <linux/version.h>

#include "tsffs.h"

#define MAJOR_NUM 100
#define IOCTL_SET_MSG _IOW(MAJOR_NUM, 0, char *)
#define IOCTL_GET_MSG _IOR(MAJOR_NUM, 1, char *)
#define IOCTL_GET_NTH_BYTE _IOWR(MAJOR_NUM, 2, int)
#define DEVICE_FILE_NAME "char_dev"
#define DEVICE_PATH "/dev/char_dev"
#define SUCCESS 0
#define DEVICE_NAME "char_dev"
#define BUF_LEN 80

enum {
  CDEV_NOT_USED = 0,
  CDEV_EXCLUSIVE_OPEN = 1,
};

static atomic_t already_open = ATOMIC_INIT(CDEV_NOT_USED);
static char message[BUF_LEN + 1];
static struct class *cls;

static int device_open(struct inode *inode, struct file *file) {
  pr_info("device_open(%p)\n", file);

  try_module_get(THIS_MODULE);
  return SUCCESS;
}

static int device_release(struct inode *inode, struct file *file) {
  pr_info("device_release(%p,%p)\n", inode, file);

  module_put(THIS_MODULE);
  return SUCCESS;
}
static ssize_t device_read(struct file *file, char __user *buffer,
                           size_t length, loff_t *offset) {
  int bytes_read = 0;
  const char *message_ptr = message;

  if (!*(message_ptr + *offset)) {
    *offset = 0;
    return 0;
  }

  message_ptr += *offset;

  while (length && *message_ptr) {
    put_user(*(message_ptr++), buffer++);
    length--;
    bytes_read++;
  }

  pr_info("Read %d bytes, %ld left\n", bytes_read, length);

  *offset += bytes_read;

  return bytes_read;
}

void check(char *buffer) {
  if (!strcmp(buffer, "fuzzing!")) {
    // Cause a crash
    char *x = NULL;
    *x = 0;
  }
}

static ssize_t device_write(struct file *file, const char __user *buffer,
                            size_t length, loff_t *offset) {
  int i;

  pr_info("device_write(%p,%p,%ld)", file, buffer, length);

  for (i = 0; i < length && i < BUF_LEN; i++) {
    get_user(message[i], buffer + i);
  }

  check(message);

  return i;
}

static long device_ioctl(struct file *file, unsigned int ioctl_num,
                         unsigned long ioctl_param) {
  int i;
  long ret = SUCCESS;

  if (atomic_cmpxchg(&already_open, CDEV_NOT_USED, CDEV_EXCLUSIVE_OPEN)) {
    return -EBUSY;
  }

  switch (ioctl_num) {
    case IOCTL_SET_MSG: {
      char __user *tmp = (char __user *)ioctl_param;
      char ch;

      get_user(ch, tmp);

      for (i = 0; ch && i < BUF_LEN; i++, tmp++) {
        get_user(ch, tmp);
      }

      device_write(file, (char __user *)ioctl_param, i, NULL);
      break;
    }
    case IOCTL_GET_MSG: {
      loff_t offset = 0;
      i = device_read(file, (char __user *)ioctl_param, 99, &offset);
      put_user('\0', (char __user *)ioctl_param + i);
      break;
    }
    case IOCTL_GET_NTH_BYTE:
      if (ioctl_param > BUF_LEN) {
        return -EINVAL;
      }

      ret = (long)message[ioctl_param];

      break;
  }

  atomic_set(&already_open, CDEV_NOT_USED);

  return ret;
}

static struct file_operations fops = {
    .read = device_read,
    .write = device_write,
    .unlocked_ioctl = device_ioctl,
    .open = device_open,
    .release = device_release,
};

static int __init chardev2_init(void) {
  int ret_val = register_chrdev(MAJOR_NUM, DEVICE_NAME, &fops);

  if (ret_val < 0) {
    pr_alert("%s failed with %d\n", "Sorry, registering the character device ",
             ret_val);
    return ret_val;
  }

  cls = class_create(DEVICE_FILE_NAME);
  device_create(cls, NULL, MKDEV(MAJOR_NUM, 0), NULL, DEVICE_FILE_NAME);

  pr_info("Device created on /dev/%s\n", DEVICE_FILE_NAME);

  return 0;
}

static void __exit chardev2_exit(void) {
  device_destroy(cls, MKDEV(MAJOR_NUM, 0));
  class_destroy(cls);

  unregister_chrdev(MAJOR_NUM, DEVICE_NAME);
}

module_init(chardev2_init);
module_exit(chardev2_exit);

MODULE_LICENSE("GPL");
To summarize, the module creates a character device which can be opened, read and
written, both via the read and write syscalls and via IOCTL. When written, the module
checks the data written against the password fuzzing!, and if the check passes, it
will crash itself by dereferencing NULL, which will cause a kernel panic that we will
use as a “solution” later.
Harnessing the Kernel Module
We will harness the kernel module two ways:
- With harness code compiled into the kernel module
- With harness code compiled into a user-space application that drives the kernel module
This demonstrates the flexibility of the fuzzer – however your real target software should be harnessed, should be chosen.
Kernel Module Harness
Because the build process for the buildroot is quite long (5-10 mins on a fast machine),
we will avoid compiling it twice. Modify the device_write function:
static ssize_t device_write(struct file *file, const char __user *buffer,
                            size_t length, loff_t *offset) {
  int i;

  pr_info("device_write(%p,%p,%ld)", file, buffer, length);

  for (i = 0; i < length && i < BUF_LEN; i++) {
    get_user(message[i], buffer + i);
  }

  size_t size = BUF_LEN;
  size_t *size_ptr = &size;

  HARNESS_START(message, size_ptr);

  check(message);

  HARNESS_STOP();

  return i;
}
This adds our harness such that the first time the device_write function is called,
via a user-space application writing or using the IOCTL system call, the fuzzer will
take over and start the fuzzing loop.
Userspace Driver Code
First, copy tsffs.h from the harness directory in the repository into
src/tsffs.h.
We’ll also create src/tutorial-mod-driver.c, a user-space application which we will
use to drive the kernel module code via IOCTL.
#include <fcntl.h>
#include <linux/ioctl.h>
#include <stdio.h>
#include <stdlib.h>
#include <sys/ioctl.h>
#include <unistd.h>

#include "tsffs.h"

#define MAJOR_NUM 100
#define IOCTL_SET_MSG _IOW(MAJOR_NUM, 0, char *)
#define IOCTL_GET_MSG _IOR(MAJOR_NUM, 1, char *)
#define IOCTL_GET_NTH_BYTE _IOWR(MAJOR_NUM, 2, int)
#define DEVICE_FILE_NAME "char_dev"
#define DEVICE_PATH "/dev/char_dev"

int ioctl_set_msg(int file_desc, char *message) {
  int ret_val;

  ret_val = ioctl(file_desc, IOCTL_SET_MSG, message);

  if (ret_val < 0) {
    printf("ioctl_set_msg failed:%d\n", ret_val);
  }

  return ret_val;
}

int ioctl_get_msg(int file_desc) {
  int ret_val;
  char message[100] = {0};

  ret_val = ioctl(file_desc, IOCTL_GET_MSG, message);

  if (ret_val < 0) {
    printf("ioctl_get_msg failed:%d\n", ret_val);
  }
  printf("get_msg message:%s", message);

  return ret_val;
}

int ioctl_get_nth_byte(int file_desc) {
  int i, c;

  printf("get_nth_byte message:");

  i = 0;
  do {
    c = ioctl(file_desc, IOCTL_GET_NTH_BYTE, i++);

    if (c < 0) {
      printf("\nioctl_get_nth_byte failed at the %d'th byte:\n", i);
      return c;
    }

    putchar(c);
  } while (c != 0);

  return 0;
}

int main(void) {
  int file_desc, ret_val;
  char *msg = "AAAAAAAA\n";

  file_desc = open(DEVICE_PATH, O_RDWR);
  if (file_desc < 0) {
    printf("Can't open device file: %s, error:%d\n", DEVICE_PATH, file_desc);
    exit(EXIT_FAILURE);
  }

  ret_val = ioctl_set_msg(file_desc, msg);
  if (ret_val) goto error;

  close(file_desc);
  return 0;
error:
  close(file_desc);
  exit(EXIT_FAILURE);
}
This application opens the character device of our module, sets the message, and closes the device.
Harnessing the Userspace Driver Code
Once again, because the build process is quite long, we’ll add the user-space harness
now. Modify the main function:
int main(void) {
  int file_desc, ret_val;
  char msg[80] = {0};

  file_desc = open(DEVICE_PATH, O_RDWR);
  if (file_desc < 0) {
    printf("Can't open device file: %s, error:%d\n", DEVICE_PATH, file_desc);
    exit(EXIT_FAILURE);
  }

  size_t msg_size = 80;
  size_t *msg_size_ptr = &msg_size;

  __arch_harness_start(MAGIC_ALT_0, msg, msg_size_ptr);

  ret_val = ioctl_set_msg(file_desc, msg);

  __arch_harness_stop(MAGIC_ALT_1);

  if (ret_val) goto error;

  close(file_desc);
  return 0;
error:
  close(file_desc);
  exit(EXIT_FAILURE);
}
Notice that instead of using HARNESS_START and HARNESS_STOP here, we use
__arch_harness_start and stop so that we can send a signal with a different n
value. This allows us to keep the compiled-in harnessing in the test kernel module,
while leaving it inactive.
Update Build Configuration
Add Buildroot Defconfig
Similar to the Linux configuration system, we need to create a Buildroot config file.
This file was created with make menuconfig, and most of the customization is far out
of scope of this tutorial. In general, the options are either required by SIMICS
(OpenSBI, RISC-V configuration, and so forth) or are the defaults.
The file is too large to include here, so copy
examples/tutorials/risc-v-kernel/src/simics_simple_riscv_defconfig from the TSFFS
repository into your src directory.
Update Build Process
Now that all our source code is in place, we’ll add a few commands to our Dockerfile.
RUN mkdir -p /output/ && \
    cp /src/simics_simple_riscv_defconfig configs/simics_simple_riscv_defconfig && \
    make BR2_EXTERNAL=/src/tutorial-kernel-modules/ simics_simple_riscv_defconfig && \
    make BR2_EXTERNAL=/src/tutorial-kernel-modules/

RUN cp output/build/tutorial-mod-1.0/tutorial-mod.ko \
        output/images/Image \
        output/images/fw_jump.elf \
        output/images/rootfs.ext2 \
        /output && \
    output/host/bin/riscv64-buildroot-linux-gnu-gcc \
        -o /output/tutorial-mod-driver /src/tutorial-mod-driver.c
First, we create a directory to store our build artifacts (/output). Then, we make
buildroot with our configuration. This takes quite a while. Once it is built we copy the
build results outlined above into the /output directory and compile our user space
driver program.
To build the container and extract the results, we’ll create a shell script build.sh
alongside our Dockerfile notice that we use mcopy from the package dosfstools to
create a fat filesystem and add our files to it. In the next step, we’ll convert it to
a format mountable in SIMICS.
#!/bin/bash

# Copyright (C) 2024 Intel Corporation
# SPDX-License-Identifier: Apache-2.0

SCRIPT_DIR=$(cd -- "$(dirname -- "${BASH_SOURCE[0]}")" &>/dev/null && pwd)
IMAGE_NAME="tsffs-tutorial-riscv64-kernel-module"
CONTAINER_UID=$(echo "${RANDOM}" | sha256sum | head -c 8)
CONTAINER_NAME="${IMAGE_NAME}-tmp-${CONTAINER_UID}"

mkdir -p "${SCRIPT_DIR}/project/targets/risc-v-simple/images/linux/"
docker build -t "${IMAGE_NAME}" -f "${SCRIPT_DIR}/Dockerfile" "${SCRIPT_DIR}"
docker create --name "${CONTAINER_NAME}" "${IMAGE_NAME}"
docker cp \
    "${CONTAINER_NAME}:/output/Image"\
    "${SCRIPT_DIR}/project/targets/risc-v-simple/images/linux/"
docker cp \
    "${CONTAINER_NAME}:/output/fw_jump.elf"\
    "${SCRIPT_DIR}/project/targets/risc-v-simple/images/linux/"
docker cp \
    "${CONTAINER_NAME}:/output/rootfs.ext2"\
    "${SCRIPT_DIR}/project/targets/risc-v-simple/images/linux/"
docker cp \
    "${CONTAINER_NAME}:/output/tutorial-mod.ko"\
    "${SCRIPT_DIR}/project/"
docker cp \
    "${CONTAINER_NAME}:/output/tutorial-mod-driver"\
    "${SCRIPT_DIR}/project/"
docker rm -f "${CONTAINER_NAME}"

dd if=/dev/zero "of=${SCRIPT_DIR}/project/test.fs" bs=1024 count=131072
mkfs.fat "${SCRIPT_DIR}/project/test.fs"
mcopy -i "${SCRIPT_DIR}/project/test.fs" "${SCRIPT_DIR}/project/tutorial-mod-driver" ::tutorial-mod-driver
mcopy -i "${SCRIPT_DIR}/project/test.fs" "${SCRIPT_DIR}/project/tutorial-mod.ko" ::tutorial-mod.ko
Notice that we copy Image, fw_jump.elf, and rootfs.ext2 into
targets/risc-v-simple/images/linux/. This is by convention, and is where the
risc-v-simple target provided by SIMICS expects to find these three files. You can
read the specifics in the RISC-V model package documentation.
Build The Software
With all the configuration and build processes done, it’s time to build the target software:
chmod +x build.sh
./build.sh
If all goes well, you’ll be greeted with a project directory with all our necessary
files.
Convert the Filesystem
To easily mount our FAT formatted filesystem test.fs in our simulated system, we need
to convert it to the CRAFF format. SIMICS base provides the craff utility to do this.
Find your SIMICS base path with:
$ ispm packages --list-installed
Installed Base Packages
 Package Number  Name         Version  Installed Paths
 1000            Simics-Base  6.0.169  /home/YOUR_USERNAME/simics/simics-6.0.169
The craff utility is in /home/YOUR_USERNAME/simics/simics-6.0.169/linux64/bin/craff.
Convert the filesystem with:
/home/YOUR_USERNAME/simics/simics-6.0.169/linux64/bin/craff \
  -o project/test.fs.craff \
  project/test.fs
This will allow us to mount test.fs.craff into the simulator.
Running the Fuzzer
Generate a Corpus
Because we have inside knowledge that this is an extremely simple test, we’ll generate a corpus ourselves.
mkdir -p project/corpus/
for i in $(seq 5); do
  echo -n "$(bash -c 'echo $RANDOM')" | sha256sum | head -c 8 > "project/corpus/${i}"
done
Create a Project
The build script for our application created a project directory for us if it did not
exist, so we’ll instantiate that directory as our project with ispm:
ispm projects project --create 1000-latest 2096-latest 2050-latest 2053-latest 8112-latest 31337-latest \
  --ignore-existing-files
cd project
Configuring the Fuzzer
Create a script project/run.simics. First, we’ll set up the fuzzer for harnessing in
the kernel module, using the default start/stop on harness.
load-module tsffs
init-tsffs

tsffs.log-level 4
@tsffs.start_on_harness = True
@tsffs.stop_on_harness = True
@tsffs.timeout = 3.0
@tsffs.exceptions = [14]

load-target "risc-v-simple/linux" namespace = riscv machine:hardware:storage:disk1:image = "test.fs.craff"

script-branch {
    bp.time.wait-for seconds = 15
    board.console.con.input "mkdir /mnt/disk0\r\n"
    bp.time.wait-for seconds = 1.0
    board.console.con.input "mount /dev/vdb /mnt/disk0\r\n"
    bp.time.wait-for seconds = 1.0
    board.console.con.input "insmod /mnt/disk0/tutorial-mod.ko\r\n"
    bp.time.wait-for seconds = 1.0
    board.console.con.input "/mnt/disk0/tutorial-mod-driver\r\n"
}

run
Run the Test Script
Run the script:
./simics -no-gui --no-win --batch-mode run.simics
The machine will boot to Linux, mount the disk, and run the driver application. The driver application will call into the kernel module, and the fuzzer will start fuzzing.
Switch Harnesses
To change harnesses, instead harnessing via the user-space driver program, the same target software should be used. Only the two lines:
@tsffs.start_on_harness = True
@tsffs.stop_on_harness = True
Should be changed to:
@tsffs.start_on_harness = False
@tsffs.stop_on_harness = False
@tsffs.magic_start = 4
@tsffs.magic_stop = 5
You can run the script again – this time, the fuzzing loop will instantiate in the
user-space application code, run through the transition between user-space and
kernel-space caused by the ioctl system call, and run until the stop code in the
user-space application. This is slower (because more code is running in the simulation
in total), but can be very helpful for drivers which are not trivial to harness. For
example, the internals of drivers such as network devices can be complicated, but there
are limited APIs which provide access to their entire external interface from
user-space.
EDK2 SIMICS Platform BIOS Tutorial
This tutorial will walk you through the entire process of creating, building, and fuzzing a platform BIOS image. You can read about what exactly a platform BIOS FD image contains here.
- Obtaining Sources
- Building the BIOS
- Booting the BIOS
- Harnessing the BIOS Boot Logo Parser
- Configuring the Fuzzer
- Running the Fuzzer
- Optimizing the Fuzzer
Obtaining Sources
Everything we need to build a BIOS that we can boot in SIMICS is open source!
We’ll need four repositories:
EDK2 is the reference implementation of the UEFI specification, and EDK2 Platforms provides platform builds for various open boards. These include the board we’ll be using, the generic X58I reference platform, as well Intel Reference Validation Platforms for several other processor generations.
EDK2’s dependency chain is not large, but the easiest way to work with EDK2 by far is
to use Docker. We’ll start building up a Dockerfile to obtain the sources.
FROM ghcr.io/tianocore/containers/fedora-37-build:a0dd931

SHELL ["/bin/bash", "-o", "pipefail", "-c"]

ARG PROJECT=

WORKDIR "$PROJECT"
We’ll start from Tianocore’s Fedora 37 build image, which provides all the dependencies
needed to build EDK2 and EDK2-based platforms. We make sure we set the pipefail option
in the BASH shell. We’re going to set our workdir to a build argument called PROJECT,
which we’ll pass in when we build the container. This will let us set the path inside
and the path outside the container where we build our code to the same path which
we will need later when we use the auxiliary information EDK2 provides (in the form of
.map files) to enable source-code debugging and breakpoints in our firmware.
Next, we’ll obtain our sources. Note that commit hashes are provided for all the open source repositories. It’s possible (or hopefully, likely!) these instructions will work on newer commits, but to ensure the instructions here are reproducible, we check out a specific HEAD.
ARG EDK2_HASH="eccdab6"
ARG EDK2_PLATFORMS_HASH="f446fff"
ARG EDK2_NON_OSI_HASH="1f4d784"
ARG INTEL_FSP_HASH="8beacd5"

RUN git -C edk2 checkout "${EDK2_HASH}" && \
    git -C edk2 submodule update --init && \
    git -C edk2-platforms checkout "${EDK2_PLATFORMS_HASH}" && \
    git -C edk2-platforms submodule update --init && \
    git -C edk2-non-osi checkout "${EDK2_NON_OSI_HASH}" && \
    git -C edk2-non-osi submodule update --init && \
    git -C FSP checkout "${INTEL_FSP_HASH}" && \
    git -C FSP submodule update --init
Note that for every repository, we check out the submodules. If we fail to do this, we’ll get an arcane error about a missing binary later on when we build.
That’s everything we need!
Building the BIOS
Working from the same Dockerfile we obtained sources into, we’ll set things up to
build the BIOS image. First, we need to set up a few environment variables:
ENV EDK_TOOLS_PATH="${PROJECT}/edk2/BaseTools/"
ENV PACKAGES_PATH="${PROJECT}/edk2:${PROJECT}/edk2-platforms:${PROJECT}/edk2-non-osi"
ENV WORKSPACE="${PROJECT}"
These variables are used by EDK2 to find its own sources and binaries.
Next, we’ll build the Base Tools. You can read more about the Base Tools in the EDK2 build system documentation.
RUN source edk2/edksetup.sh && \
    make -C edk2/BaseTools/
With the Base Tools built, we can build the BIOS. We directly follow the directions provided, and you can read more about the process, what settings are available for the BIOS (in particular, how to change the BIOS stages) in the repo.
First, we’ll change into the tree containing the platform code for all the Intel platforms, then use the Intel-provided build script to select our board, toolchain, and debug mode (in this case, enabled).
WORKDIR "${PROJECT}/edk2-platforms/Platform/Intel"

# Build SimicsOpenBoardPkg
RUN source "${PROJECT}/edk2/edksetup.sh" && \
    python build_bios.py -p BoardX58Ich10X64 -d -t GCC
We’ll use a build script to manage building the container and copying the relevant
artifacts out of it. Place this script build.sh next to your Dockerfile.
#!/bin/bash

SCRIPT_DIR=$(cd -- "$(dirname -- "${BASH_SOURCE[0]}")" &>/dev/null && pwd)
IMAGE_NAME="edk2-simics-platform"
DOCKERFILE="${SCRIPT_DIR}/Dockerfile"
CONTAINER_UID=$(echo "${RANDOM}" | sha256sum | head -c 8)
CONTAINER_NAME="${IMAGE_NAME}-tmp-${CONTAINER_UID}"

mkdir -p "${SCRIPT_DIR}/project/"
docker build -t "${IMAGE_NAME}" -f "${DOCKERFILE}" --build-arg "PROJECT=${SCRIPT_DIR}/project/workspace/" "${SCRIPT_DIR}"
docker create --name "${CONTAINER_NAME}" "${IMAGE_NAME}" bash
rm -rf "${SCRIPT_DIR}/project/workspace/"
docker cp "${CONTAINER_NAME}:${SCRIPT_DIR}/project/workspace/" "${SCRIPT_DIR}/project/workspace/"
docker rm -f "${CONTAINER_NAME}"
Now run the script:
chmod +x build.sh
./build.sh
If all goes well, you’ll have a directory
project/workspace/Build/SimicsOpenBoardPkg/BoardX58Ich10/DEBUG_GCC/FV containing our
BIOS image (BOARDX58ICH10.fd).
ls project/workspace/Build/SimicsOpenBoardPkg/BoardX58Ich10/DEBUG_GCC/FV/BOARDX58ICH10.fd
Booting the BIOS
After building our BIOS, we want to make sure we can boot it normally before we add our fuzzing harness. This time, we’ll add our harness to the boot flow, before any UEFI shell, so it is prudent to make sure everything looks OK first.
Before this step, you’ll need to have the TSFFS SIMICS package installed in your system
by following the setup steps or by installing a prebuilt ispm
package. You’ll also need the SIMICS base package (1000), the QSP-x86 package (2096),
and the QSP-CPU (8112) package. All three are available in the public simics release.
You can check that you have the package installed by running:
ispm packages --list-installed
You should see (at least, but likely more packages):
Installed Base Packages
 Package Number  Name         Version  Installed Paths
 1000            Simics-Base  6.0.169  /home/rhart/simics/simics-6.0.169

Installed Addon Packages
 Package Number  Name             Version    Installed Paths
 2096            QSP-x86          6.0.70     /home/rhart/simics/simics-qsp-x86-6.0.70
 8112            QSP-CPU          6.0.17     /home/rhart/simics/simics-qsp-cpu-6.0.17
 31337           TSFFS            6.0.1      /home/rhart/simics/simics-tsffs-6.0.1
in the list!
Create the Project
We already created the project directory when we built our image, but we need to go
ahead and initialize it and add the packages we need with ispm.
ispm projects project --create 1000-latest 2096-latest 8112-latest 31337-latest \
  --ignore-existing-files
We won’t be using any custom UEFI applications, so we can skip the boot disk we used in other tutorials. We will, however, need to customize our boot script slightly.
In the previous tutorials, we used the QSP-x86 package provided qsp-x86/uefi-shell
target to boot directly to the UEFI shell without any extra steps. That target uses
a script to choose the boot device for us, but because the included BIOS is both
different from the one we’re using and boots in release mode without debug output, we
need to modify it somewhat to work with our custom BIOS.
Add SIMICS Targets
A SIMICS “target” is a YAML file which declares configuration options that are ultimately passed to a script. It provides an easy way to configure and override options without digging through scripts to find the right configuration options. You can read more about targets here.
We’ll create a new target in project/targets/qsp-x86/qsp-uefi-custom.target.yml:
%YAML 1.2
---
description: QSP booting to EFI shell, defaults to empty disks
params:
  machine:
    system_info:
      type: str
      description: A short string describing what this system is.
      default: "QSP x86 - UEFI Shell"
    hardware:
      import: "%simics%/targets/qsp-x86/hardware.yml"
      defaults:
        name: qsp
        rtc:
          time: auto
        usb_tablet:
          create: true
        firmware:
          bios: ^machine:software:firmware:bios
          lan_bios:
          spi_flash: ^machine:software:firmware:spi_flash
    uefi_device:
      advanced: 2
      name:
        type: str
        default: simics_uefi
        description: |
          Name of a simics-uefi device added under the top component.
      video_mode:
        type: int
        default: 5
        description: |
          Bochs GFX Mode to be set by UEFI BIOS during boot before OS handover.
    software:
      firmware:
        description: Firmware images
        advanced: 2
        bios:
          type: file
          description: BIOS file.
          default: "%simics%/workspace/Build/SimicsOpenBoardPkg/BoardX58Ich10/DEBUG_GCC/FV/BOARDX58ICH10.fd"
        lan_bios:
          type: file
          required: false
          description: ROM BIOS file for the ICH10 LAN Ethernet adaptor
        spi_flash:
          type: file
          default: "%simics%/targets/qsp-x86/images/spi-flash.bin"
          description: The ICH10 SPI flash file to use.
        script_delay:
          type: int
          default: 1
          description: Script delay multiplier during UEFI boot

  network:
    switch:
      import: "%simics%/targets/common/ethernet-setup.yml"
    service_node:
      import: "%simics%/targets/common/sn-setup.yml"
      defaults:
        ethernet_switch: ^network:switch:ethernet_switch:name

  output:
    system:
      type: str
      output: yes
      default: ^machine:hardware:output:system
script: "%script%/qsp-uefi-custom.target.yml.include"
...
This target is copied more or less wholesale from the uefi-shell.target.yml file in
your SIMICS QSP-x86 installation, but is modified to use a different default BIOS file,
a different .include script, and uses a different path to import the top level
hardware.yml script.
We also need to provide a custom .include script, which is (as the name may suggest)
included by the target and run on startup to configure the system. Most of this script
is also copied from the uefi-shell.target.yml.include script with the exception of the
final script-branch. This script-branch enters the BIOS boot menu and selects the
UEFI shell from it after waiting for a print message that indicates the boot menu is
visible.
run-script "%simics%/targets/qsp-x86/hardware.yml" namespace = machine:hardware

local $system = (params.get machine:hardware:output:system)

instantiate-components $system

# Add Simics UEFI meta-data device
if (params.get machine:uefi_device:name) {
        @name = f"{simenv.system}.{params['machine:uefi_device:name']}"
        @dev = SIM_create_object("simics-uefi", name, [])
        @getattr(conf, simenv.system).mb.nb.pci_bus.devices.append([0, 7, dev])
        @dev.video_mode = params['machine:uefi_device:video_mode']
}

## Name system
$system->system_info = (params.get machine:system_info)

## Set a time quantum that provides reasonable performance
set-time-quantum cell = $system.cell seconds = 0.0001

## Set up Ethernet
run-script "%simics%/targets/common/ethernet-setup.yml" namespace = network:switch
if (params.get network:switch:create_network) {
    local $ethernet_switch = (params.get network:switch:ethernet_switch:name)
    connect ($ethernet_switch.get-free-connector) (params.get machine:hardware:output:eth_slot)
    instantiate-components (params.get network:switch:ethernet_switch:name)
}
run-script "%simics%/targets/common/sn-setup.yml" namespace = network:service_node

local $system = (params.get machine:hardware:output:system)

local $system = (params.get machine:hardware:output:system)

script-branch {
        local $con = $system.serconsole.con
        # NOTE: We have to modify this from the included target because
        # the custom BIOS doesn't print the original message until the menu appears
        bp.console_string.wait-for $con "End Load Options Dumping"
        bp.time.wait-for seconds = 5.0
        echo "Got load options dump"
        echo "Opening EFI shell"
        $con.input -e Esc
        bp.time.wait-for seconds = 5.0

        $con.input -e Down
        $con.input -e Down
        $con.input -e Enter
        bp.time.wait-for seconds = 5.0

        foreach $i in (range 6) {
                $con.input -e Down
        }

        $con.input -e Enter
        $con.input -e Enter
}
Save this file as project/targets/qsp-x86/qsp-uefi-custom.target.yml.include.
Test Booting The BIOS
With our files all in place, we can create a tiny SIMICS script, and save it as
project/run.simics:
load-target "qsp-x86/qsp-uefi-custom" namespace = qsp machine:hardware:firmware:bios = "%simics%/workspace/Build/SimicsOpenBoardPkg/BoardX58Ich10/DEBUG_GCC/FV/BOARDX58ICH10.fd"

script-branch {
    local $con = qsp.serconsole.con
    bp.console_string.wait-for $con "Shell>"
    bp.time.wait-for seconds = .5
    qsp.serconsole.con.input "help\n"
    bp.time.wait-for seconds = .5
}

run
Then run the script:
./simics -no-gui --no-win ./run.simics
Somewhere in the output you should see:
<qsp.serconsole.con>Shell> help\r\n
<qsp.serconsole.con>alias         - Displays, creates, or deletes UEFI Shell aliases.\r\n
<qsp.serconsole.con>attrib        - Displays or modifies the attributes of files or directories.\r\n
<qsp.serconsole.con>bcfg          - Manages the boot and driver options that are stored in NVRAM.\r\n
<qsp.serconsole.con>cd            - Displays or changes the current directory.\r\n
If you do, all is well! Notice that there is quite a bit more output due to being a debug build of the BIOS.
Harnessing
Just before the time of writing, a vulnerability received significant publicity this week concerning the boot logo parser in many vendors BIOS images called LogoFAIL. In a press release the vulnerability finders noted that “Our fuzz testing and subsequent vulnerability triage results clearly indicate that these image parsers were never tested by IBV or OEM”. Unlike the findings, some, have been fuzzed, but even so let’s get our platform harnessed – all we need to do is add the vulnerability ourselves!
Writing a Harness
We’ll target the Logo.c file of DxeLogoLib. To harness this function, we want to
inject our fuzzer testcase just before the call to ConvertBmpToGopBlt. This function
is called like:
Status = ConvertBmpToGopBlt (
            ImageData,
            ImageSize,
            (VOID **) &Blt,
            &BltSize,
            &Height,
            &Width
            );
The ImageData and ImageSize are returned by either the OEMBadging protocol:
Status = Badging->GetImage (
                    Badging,
                    &Instance,
                    &Format,
                    &ImageData,
                    &ImageSize,
                    &Attribute,
                    &CoordinateX,
                    &CoordinateY
                    );
Or, if the badging protocol is not registered, it’s obtained from the RAW section of any
Firmware Volume (FV) (the LogoFile here is a pointer to the PCD-defined GUID to look
up the logo file, which is a BMP file
Logo.bmp):
Status = GetSectionFromAnyFv (LogoFile, EFI_SECTION_RAW, 0, (VOID **) &ImageData, &ImageSize);
Either way, we end up populating ImageData with our data and setting ImageSize equal
to the size of the image data. It’s important to note that here, ImageData is only
technically untrusted input. It could be overwritten using an SPI programming chip (if
this were a real board), or a malicious user with the ability to write flash could
overwrite it on disk. This isn’t a “visit a website and get owned” type of attack, but
it is a good example of how unexpected vectors could present a danger to very high value
computing systems.
We want to insert our fuzzer’s testcases into the ImageData buffer, and we can support
testcases up to ImageSize. We could use a massive original image to ensure that
we have enough space, but we’ll just use the default one.
We’ll set our harness (which, recall, also triggers the initial snapshot, so we want it as close to the code under test as possible) immediately before the call:
HARNESS_START(ImageData, &ImageSize);
Status = ConvertBmpToGopBlt (
            ImageData,
            ImageSize,
            (VOID **) &Blt,
            &BltSize,
            &Height,
            &Width
            );
When the macro is called for the first time, a snapshot will be taken of the full
system, and the ImageSize value will be saved. Then, each fuzzing iteration, the new
test case will be truncated to ImageSize bytes and written to ImageData.
We also want to tell the fuzzer to stop executing before we return from the
EnableBootLogo function, so we place a call to HARNESS_STOP() before every return
statement for the rest of the function after this point.
Making the Code Vulnerable
Because this is a tutorial, it’ll be more fun if we make this code actually vulnerable
to LogoFAIL. If we take a walk through ConvertBmpToGopBlt, you’ll notice two things:
-
There is a check on the result of
AllocatePool, so the first vulnerability where failure to allocate memory occurs isn’t applicable. If we just removed the check here, we’d be vulnerable to a failure to allocate memory and subsequent dereferencing of an uninitialized pointer.*GopBlt = AllocatePool (*GopBltSize); IsAllocated = TRUE; if (*GopBlt == NULL) { return EFI_OUT_OF_RESOURCES; } -
We’re really, really close to having the vulnerability where
PixelHeightcan be zero andPixelWidthcan be large. If we just hadHeight <= BmpHeader->PixelHeighthere, we’d be vulnerable, but becauseBmpHeader->PixelHeightis strictly greater thanHeightand unsigned, we’ll never be able to have a case (as is) whereBmpHeader->PixelHeight - Height - 1 < 0.for (Height = 0; Height < BmpHeader->PixelHeight; Height++) { Blt = &BltBuffer[(BmpHeader->PixelHeight - Height - 1) * BmpHeader->PixelWidth];
This explains why this platform code wasn’t in the Binarly blog post, but just for fun
we’ll change both of these things when we add our harnessing code, for
demonstration purposes only. For the second case, we’ll just add an ASSERT statement
when PixelHeight == 0, because changing the for loop condition to Height <= BmpHeader->PixelHeight would cause a crash on every input, and will make the fuzzer
complain that we have no interesting testcases.
Adding the Harness
We’ll add our harness in the form of a patch to edk2-platforms.
Our Dockerfile from previously just needs a couple modifications.
First, we need to copy
tsffs.h
from the harness directory of the repository and
put it next to our Dockerfile. Then, just before the last RUN step (where we run
build_bios.py), we’ll add the following to create and apply our patch and copy the
harness header file to the correct location.
COPY <<'EOF' /tmp/edk2-platforms.patch
diff --git a/Platform/Intel/SimicsOpenBoardPkg/Library/DxeLogoLib/Logo.c b/Platform/Intel/SimicsOpenBoardPkg/Library/DxeLogoLib/Logo.c
index 9cea5f4665..00815adba2 100644
--- a/Platform/Intel/SimicsOpenBoardPkg/Library/DxeLogoLib/Logo.c
+++ b/Platform/Intel/SimicsOpenBoardPkg/Library/DxeLogoLib/Logo.c
@@ -11,6 +11,7 @@
#include <OemBadging.h>
#include <Protocol/GraphicsOutput.h>
#include <Library/BaseLib.h>
+#include <Library/DebugLib.h>
#include <Library/UefiLib.h>
#include <Library/BaseMemoryLib.h>
#include <Library/UefiBootServicesTableLib.h>
@@ -22,6 +23,7 @@
#include <IndustryStandard/Bmp.h>
#include <Protocol/BootLogo.h>
+#include "tsffs.h"
/**
Convert a *.BMP graphics image to a GOP blt buffer. If a NULL Blt buffer
is passed in a GopBlt buffer will be allocated by this routine. If a GopBlt
@@ -164,9 +166,6 @@ ConvertBmpToGopBlt (
*GopBltSize = (UINTN) BltBufferSize;
*GopBlt = AllocatePool (*GopBltSize);
IsAllocated = TRUE;
- if (*GopBlt == NULL) {
- return EFI_OUT_OF_RESOURCES;
- }
} else {
//
// GopBlt has been allocated by caller.
@@ -184,6 +183,7 @@ ConvertBmpToGopBlt (
// Convert image from BMP to Blt buffer format
//
BltBuffer = *GopBlt;
+ ASSERT (BmpHeader->PixelHeight != 0);
for (Height = 0; Height < BmpHeader->PixelHeight; Height++) {
  Blt = &BltBuffer[(BmpHeader->PixelHeight - Height - 1) * BmpHeader->PixelWidth];
for (Width = 0; Width < BmpHeader->PixelWidth; Width++, Image++, Blt++) {
@@ -398,6 +398,7 @@ EnableBootLogo (
// Try BMP decoder
//
Blt = NULL;
+ HARNESS_START(ImageData, &ImageSize);
Status = ConvertBmpToGopBlt (
ImageData,
ImageSize,
@@ -411,6 +412,7 @@ EnableBootLogo (
FreePool (ImageData);
if (Badging == NULL) {
+ HARNESS_STOP();
return Status;
} else {
continue;
@@ -537,6 +539,7 @@ Done:
FreePool (Blt);
}
+ HARNESS_STOP();
return Status;
}
@@ -561,6 +564,7 @@ Done:
// Ensure the LogoHeight * LogoWidth doesn't overflow
//
if (LogoHeight > DivU64x64Remainder ((UINTN) ~0, LogoWidth, NULL)) {
+ HARNESS_STOP();
return EFI_UNSUPPORTED;
}
BufferSize = MultU64x64 (LogoWidth, LogoHeight);
@@ -569,11 +573,13 @@ Done:
// Ensure the BufferSize * sizeof (EFI_GRAPHICS_OUTPUT_BLT_PIXEL) doesn't overflow
//
if (BufferSize > DivU64x32 ((UINTN) ~0, sizeof (EFI_GRAPHICS_OUTPUT_BLT_PIXEL))) {
+ HARNESS_STOP();
return EFI_UNSUPPORTED;
}
LogoBlt = AllocateZeroPool ((UINTN)BufferSize * sizeof (EFI_GRAPHICS_OUTPUT_BLT_PIXEL));
if (LogoBlt == NULL) {
+ HARNESS_STOP();
return EFI_OUT_OF_RESOURCES;
}
@@ -600,5 +606,6 @@ Done:
}
FreePool (LogoBlt);
+ HARNESS_STOP();
return Status;
}
EOF
COPY tsffs.h /workspace/edk2-platforms/Platform/Intel/SimicsOpenBoardPkg/Library/DxeLogoLib/tsffs.h
RUN git -C /workspace/edk2-platforms apply /tmp/edk2-platforms.patch
With this modification applied to the Dockerfile, we’ll go ahead and build again with
our build script ./build.sh.
Configuring
Now that we have a harnessed BIOS, we’ll configure the fuzzer.
Enabling UEFI Tracking
During fuzzing, it will be helpful to us for many reasons if we can use source-level debugging functionality that is built into SIMICS. Recall that earlier, we made sure that the build directory inside our Docker container is the same as the directory we run our BIOS from. This is because we are going to use the UEFI Firmware Tracker built into SIMICS.
We already had a project/run.simics script, we’ll create another script
project/fuzz.simics which we’ll build on to enable fuzzing.
We’ll start with a script that just loads the platform and runs. We won’t even be booting up to the UEFI shell, only through the BIOS image load process, so we’ll remove the extra code that we had before.
load-target "qsp-x86/qsp-uefi-custom" namespace = qsp machine:hardware:firmware:bios = "%simics%/workspace/Build/SimicsOpenBoardPkg/BoardX58Ich10/DEBUG_GCC/FV/BOARDX58ICH10.fd"

run
Next, we want to add functionality to enable UEFI tracking, which you can read about in full detail in the docs.
At the top of the script, we’ll load the tracker:
load-module uefi-fw-tracker

load-target "qsp-x86/qsp-uefi-custom" namespace = qsp machine:hardware:firmware:bios = "%simics%/workspace/Build/SimicsOpenBoardPkg/BoardX58Ich10/DEBUG_GCC/FV/BOARDX58ICH10.fd"

run
Then, we need to create a new OS-awareness object (which we’ll call qsp.software),
insert the UEFI tracker into the awareness module, and detect parameters, which we’ll
save to the file “%simics%/uefi.params”. This params file will contain a dictionary of
parameters like:
[
    'uefi_fw_tracker',
    {
        'tracker_version': 6263,
        'map_info': [],
        'map_file': None,
        'pre_dxe_start': 0,
        'pre_dxe_size': 0,
        'dxe_start': 0,
        'dxe_size': 4294967296,
        'exec_scan_size': 327680,
        'notification_tracking': True,
        'pre_dxe_tracking': False,
        'dxe_tracking': True,
        'hand_off_tracking': True,
        'smm_tracking': True,
        'reset_tracking': True,
        'exec_tracking': True
    }
]
We want to enable the map file, so we’ll tell the command to set the map-file path to
our map file. This will automatically populate the map_info with the info contained in
the map file. Our script will look like this:
load-module uefi-fw-tracker

load-target "qsp-x86/qsp-uefi-custom" namespace = qsp machine:hardware:firmware:bios = "%simics%/workspace/Build/SimicsOpenBoardPkg/BoardX58Ich10/DEBUG_GCC/FV/BOARDX58ICH10.fd"

new-os-awareness name = qsp.software
qsp.software.insert-tracker tracker = uefi_fw_tracker_comp
qsp.software.tracker.detect-parameters -overwrite param-file = "%simics%/uefi.params" map-file = "%simics%/workspace/Build/SimicsOpenBoardPkg/BoardX58Ich10/DEBUG_GCC/SimicsX58.map"
qsp.software.tracker.load-parameters "%simics%/uefi.params"
qsp.software.enable-tracker

run
With tracking enabled, we can add a source_location breakpoint on a symbol (SIMICS
will track UEFI mappings and make symbols available when they are loaded during
execution, or from a map file as we’ve done here). To break on assertions, we will
add a breakpoint on the DebugAssert function (which EDK2’s ASSERT macro ultimately
calls).
Configuring the Fuzzer
The above can be applied to any code which runs during the SEC, PEI, or early DXE stages. If the codepath you want to fuzz is always executed during boot, all you need to do is add the harness macros to it and turn on the fuzzer.
We’ll use the breakpoint API to wait for the DebugAssert function in a loop. We do
this instead of using the $bp_num = bp.source_location.break DebugAssert command and
adding it to the fuzzer configuration with
@tsffs.breakpoints = [simenv.bp_num] because the HAP for
breakpoints does not trigger on breakpoints set on source locations in this way, so the
fuzzer cannot intercept it. This is in contrast to breakpoints set with the following,
which will work with the tsffs API:
$ctx = (new-context)
qsp.mb.cpu0.core[0][0].set-context $ctx
$ctx.break -w $BUFFER_ADDRESS $BUFFER_SIZE
The rest of the configuration is similar to configuration we’ve already done in previous tutorials.
load-module tsffs
init-tsffs
tsffs.log-level 4
@tsffs.start_on_harness = True
@tsffs.stop_on_harness = True
@tsffs.timeout = 3.0
@tsffs.exceptions = [13, 14]

load-module uefi-fw-tracker

load-target "qsp-x86/qsp-uefi-custom" namespace = qsp machine:hardware:firmware:bios = "%simics%/workspace/Build/SimicsOpenBoardPkg/BoardX58Ich10/DEBUG_GCC/FV/BOARDX58ICH10.fd"

new-os-awareness name = qsp.software
qsp.software.insert-tracker tracker = uefi_fw_tracker_comp
qsp.software.tracker.detect-parameters -overwrite param-file = "%simics%/uefi.params" map-file = "%simics%/workspace/Build/SimicsOpenBoardPkg/BoardX58Ich10/DEBUG_GCC/SimicsX58.map"
qsp.software.tracker.load-parameters "%simics%/uefi.params"
qsp.software.enable-tracker

script-branch {
    while 1 {
        bp.source_location.wait-for DebugAssert -x -error-not-planted
        echo "Got breakpoint"
        @tsffs.iface.fuzz.solution(1, "DebugAssert")
    }
}

run
Obtaining a Corpus
To keep things simple, we’ll go ahead and use one file as the corpus provided to us, the actual boot image.
mkdir -p project/corpus/
curl -L -o project/corpus/0 https://raw.githubusercontent.com/tianocore/edk2-platforms/master/Platform/Intel/SimicsOpenBoardPkg/Logo/Logo.bmp
Running the Fuzzer
Now that everything is harnessed, we can run the fuzzer:
./simics --no-win fuzz.simics
After some time, we should be able to discover the bugs we added.
Optimizing the Fuzzer
Without any optimization, the fuzzer will run quite slowly for this test, due to a variety of factors. Some of these are out of our control. For example we must restore the snapshot, and there is not much that can be done to speed up the process of restoring the full system state.
Some, however, are under our control. Let’s optimize!
Eliminate Breakpoint Waiting
In the initial iteration of the fuzzing script, we set a breakpoint on the DebugAssert
function using bp.source_location.wait-for in a loop, and triggered a solution
manaully:
script-branch {
    while 1 {
        bp.source_location.wait-for DebugAssert -x -error-not-planted
        echo "Got breakpoint"
        @tsffs.iface.fuzz.solution(1, "DebugAssert")
    }
}
While this works, it’s far from optimial. Not only is it slower, but we can make the
code much simpler by using TSFFS’s built-in breakpoint handling. Instead, we can use
the Debugger
API
to get the address of the symbol and use a traditional breakpoint, which TSFFS can
consume. We’ll get the address of the DebugAssert function directly, place a
breakpoint on it using a new context, which we assign to our CPU core (this has a side
effect of using the virtual address to set the breakpoint, although in this case it is
an identity mapped address so physical addressing would work), and add that breakpoint
to the fuzzer.
load-module tsffs
init-tsffs
tsffs.log-level 4
@tsffs.start_on_harness = True
@tsffs.stop_on_harness =True
@tsffs.timeout = 3.0
@tsffs.exceptions = [13, 14]

load-module uefi-fw-tracker

load-target "qsp-x86/qsp-uefi-custom" namespace = qsp machine:hardware:firmware:bios = "%simics%/workspace/Build/SimicsOpenBoardPkg/BoardX58Ich10/DEBUG_GCC/FV/BOARDX58ICH10.fd"

new-os-awareness name = qsp.software
qsp.software.insert-tracker tracker = uefi_fw_tracker_comp
qsp.software.tracker.detect-parameters -overwrite param-file = "%simics%/uefi.params" map-file = "%simics%/workspace/Build/SimicsOpenBoardPkg/BoardX58Ich10/DEBUG_GCC/SimicsX58.map"
qsp.software.tracker.load-parameters "%simics%/uefi.params"
qsp.software.enable-tracker

@tcf = SIM_get_debugger()
@debug_context = tcf.iface.debug_query.matching_contexts('"UEFI Firmware"/*')[1][0]
@simenv.debug_assert_address = next(filter(lambda s: s.get("symbol") == "DebugAssert", tcf.iface.debug_symbol.list_functions(debug_context)[1])).get("address")

$ctx = (new-context)
qsp.mb.cpu0.core[0][0].set-context $ctx
$debug_assert_bp = ($ctx.break -x $debug_assert_address)
@tsffs.breakpoints = [simenv.debug_assert_bp]

run
This results in approximately a 2x speedup over the script branch loop.
Fuzzing a Windows Kernel Mode Driver (KMD)
This tutorial will walk you through the process of creating, building, and fuzzing a Windows Kernel Mode Driver (KMD) running on the simulated x86_64 platform on Windows 11.
Building a Simics-Compatible Windows Kernel Development VM
We will use VirtualBox to create a Windows Kernel Development Virtual machine before converting the VirtualBox Virtual Disk Image (VDI) to the CRAFF format used by Simics.
There are several advantages to creating the image this way:
- Speed: VirtualBox runs faster than Simics and is easier to work with interactively
- Compatibility: The image can be used for other purposes
- Iteration: Speed and compatibility allow iterating on the image contents more quickly
- Install VirtualBox
- Download Windows
- Create a VM
- Install Windows
- Set Up SSH
- Enable SSH Port Forwarding in VirtualBox
- Change Default Shell to PowerShell
- Installing the EWDK
- Installing Development Tools
- Install Simics Agent
- Clone and Build HEVD
- Install the Code Signing Certificate
- Install HEVD Driver
- Create a Fuzz Harness
- Compile the Fuzz Harness
- Convert the Image to CRAFF
Install VirtualBox
Install VirtualBox from virtualbox.org. VirtualBox supports Windows, Linux, and macOS.
Download Windows
Download an ISO for 64-bit Windows 11 from the Direct Link or if this does not work, download from the Microsoft Evaluation Center. You will be asked for your email and name, but there is no validation of this information and you will be given a download link regardless of what is entered.
The ISO should have a filename like:
22631.2428.231001-0608.23H2_NI_RELEASE_SVC_REFRESH_CLIENTENTERPRISEEVAL_OEMRET_x64FRE_en-us.iso
This tutorial assumes version 23H2, but should be the same for future versions.
Create a VM
Run VirtualBox. You will be greeted with this window (if this is your first time using VirtualBox, the list of VMs will be empty, for example below you will not see an entry for “Windows 10”):

Click “New” to create a new Virtual Machine. You should see the dialog below.
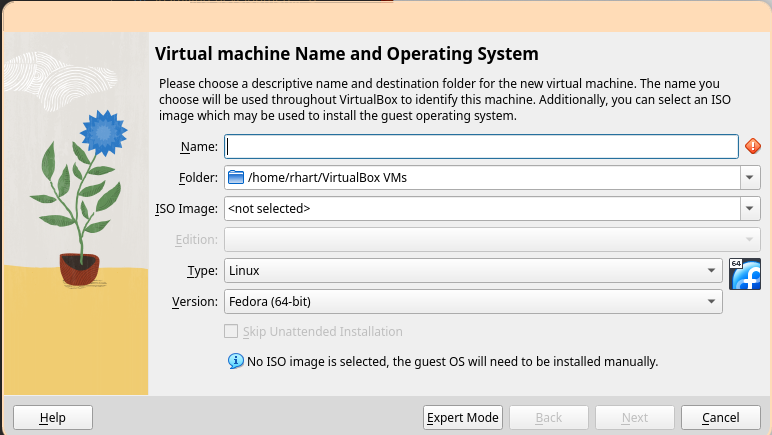
Enter a name, select the ISO image we downloaded, and be sure to check “Skip unattended installation”. Then, click “Next”.
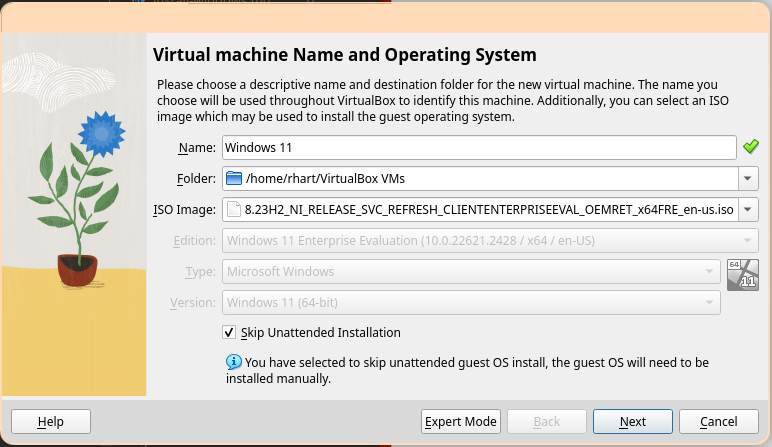
At least 4GB of RAM and 1 CPU is recommended, but add more if you have resources available. Be sure to check “Enable EFI (special OSes Only)”. Then, click “Next”.
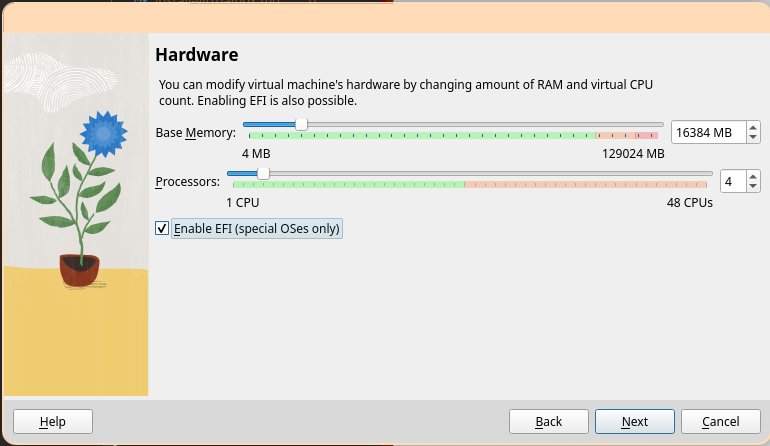
At least 64GB of disk space is recommended to ensure enough space for all required development tools, including Visual Studio and the Windows Driver Kit.
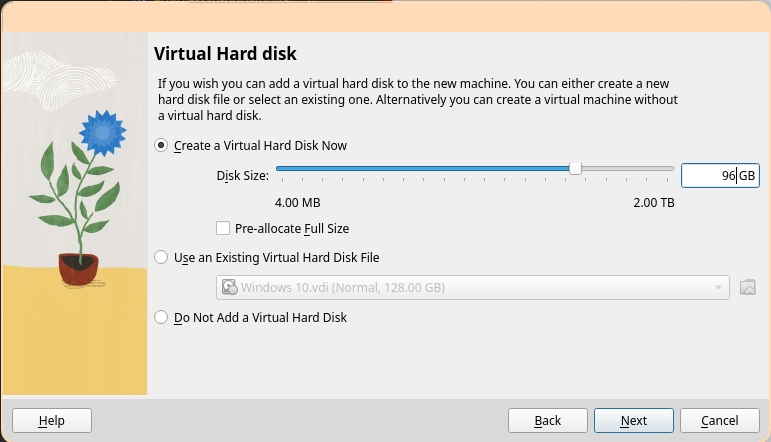
Ensure the settings look correct, then select “Finish”.
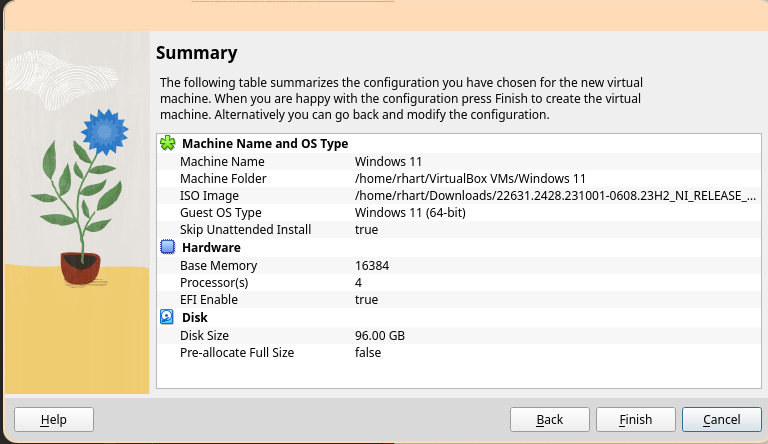
Click “Settings” in the Windows 11 image tab.
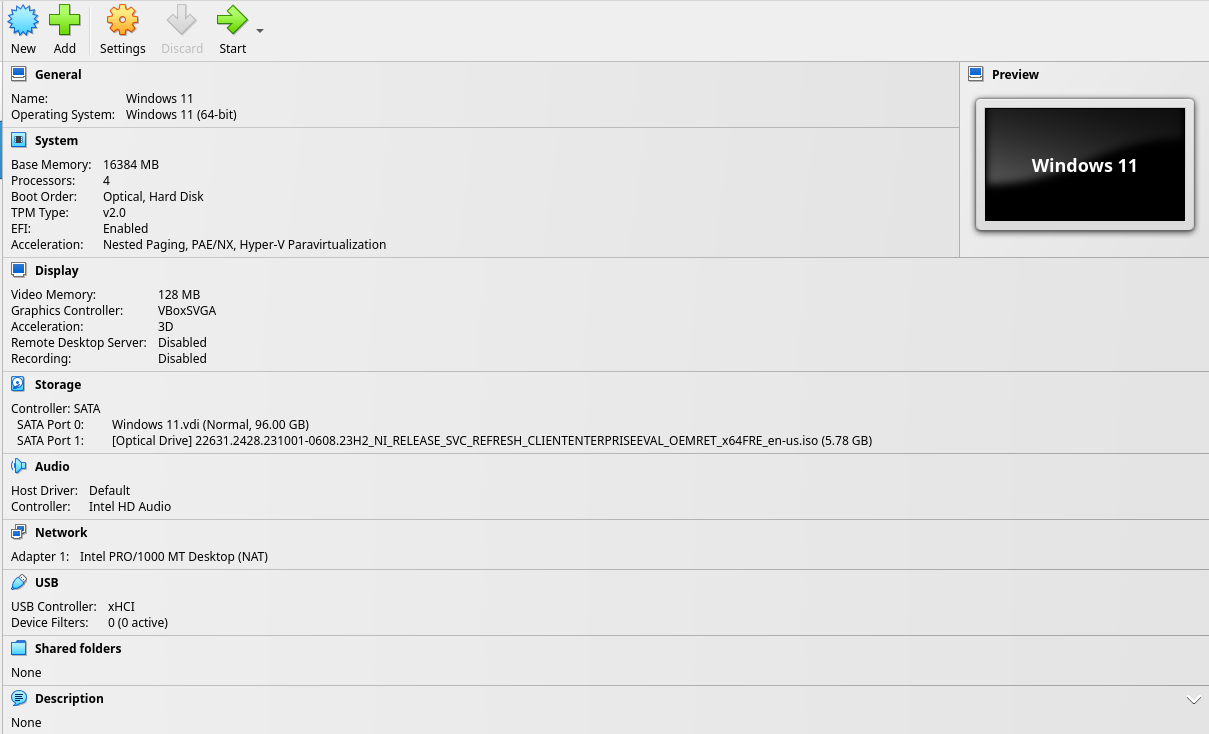
In the “System” tab and “Motherboard” sub-tab, ensure the following settings. Uncheck “Floppy” from “Boot Order”, ensure “TPM” is set to “v2.0”, ensure “Enable I/O APIC” and “Enable EFI” are checked, and ensure “Enable Secure Boot” is unchecked.
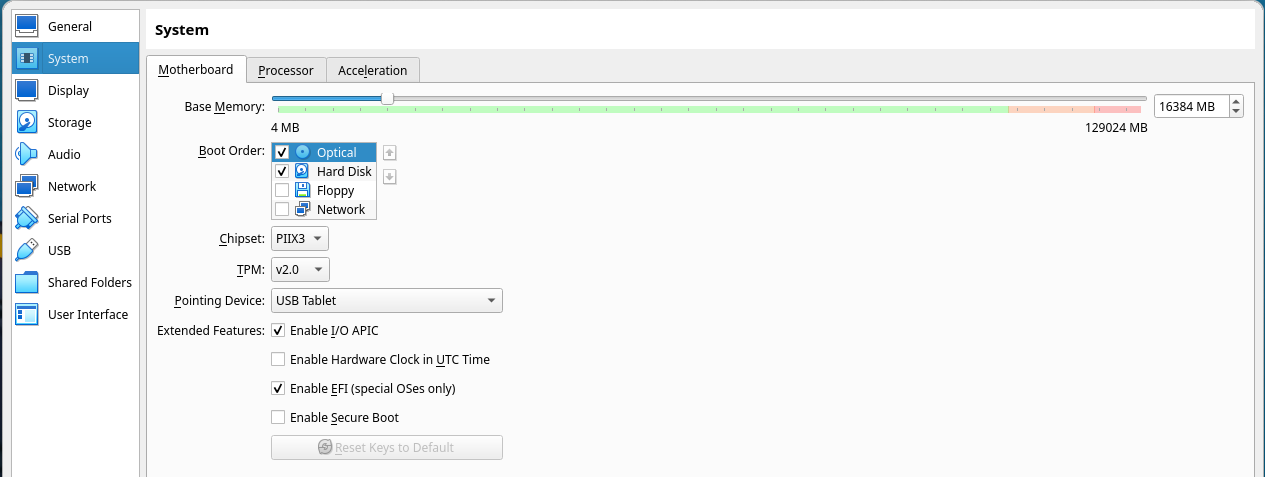
In the “System” tab and “Processor” sub-tab, ensure the following settings. Ensure “Enable PAE/NX” is checked and that “Enable Nested VT-x/AMD-V” is unchecked.
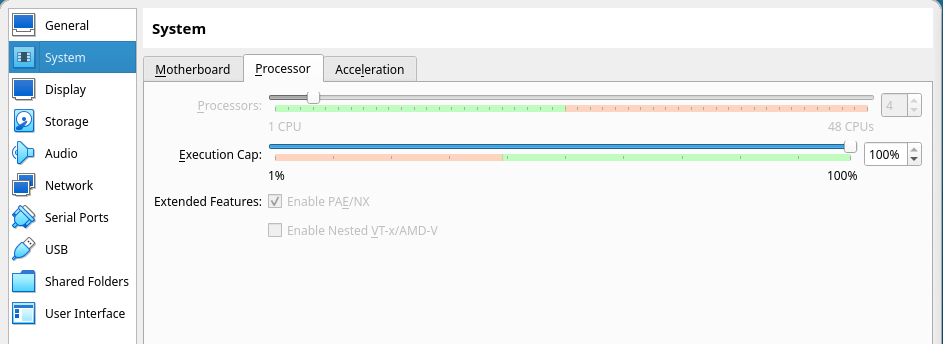
In the “Display” tab, ensure “Graphics Controller” is set to “VBoxSVGA” and “Extended Features: Enable 3D Acceleration” is checked.
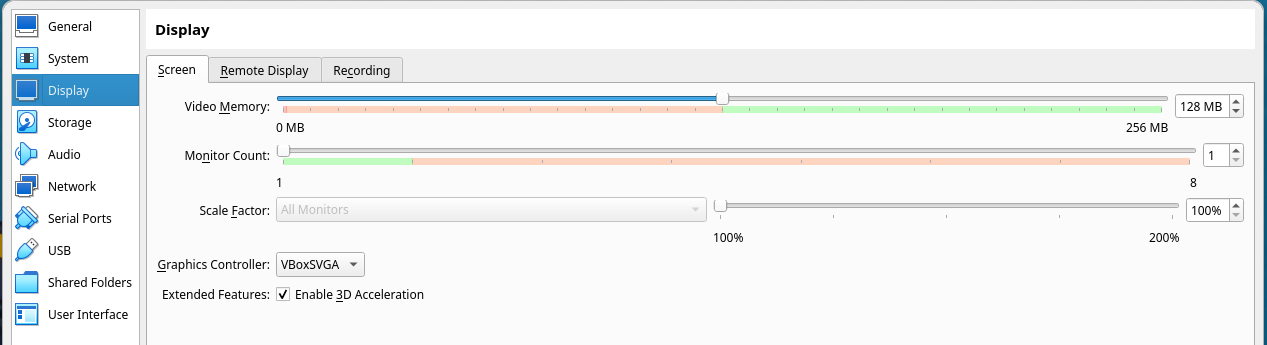
Click “OK” to close the settings Window, then click “Start” in the Windows 11 image tab to start the virtual machine.
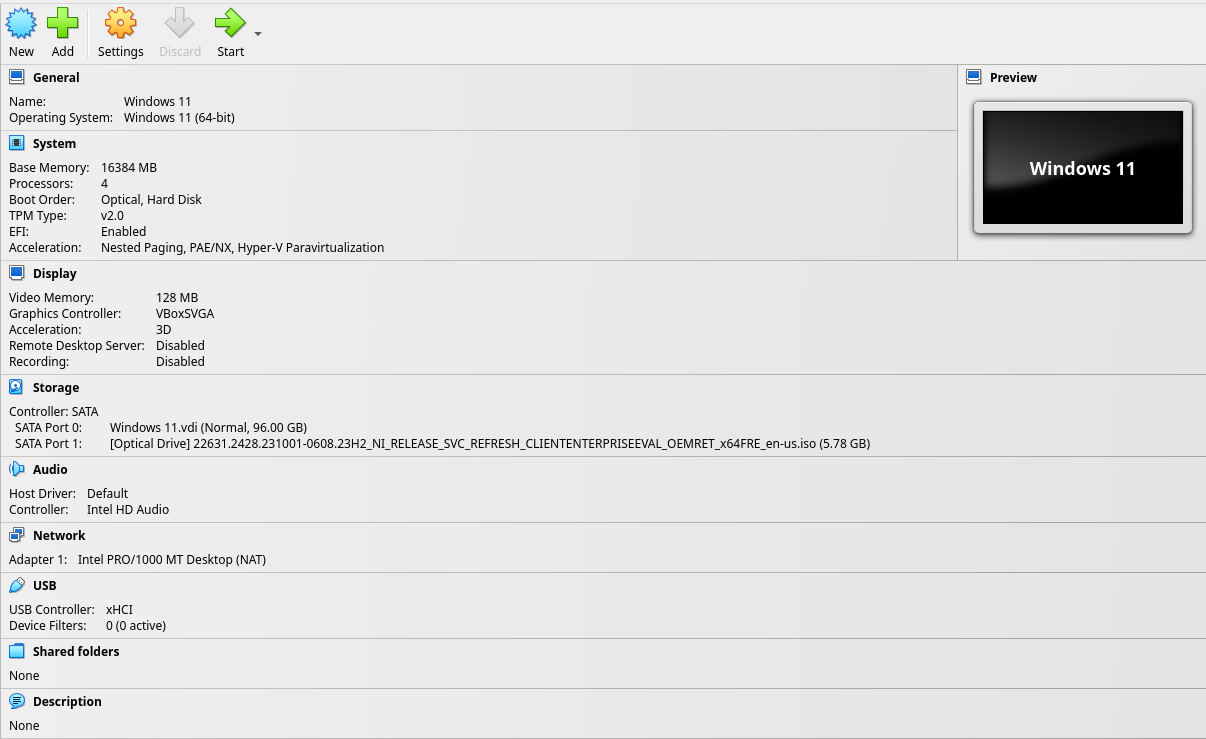
A window that says “Press any key to boot from CD or DVD…..” will appear. Click inside the Virtual Machine window and press “Enter”. The VirtualBox EFI boot screen should appear, followed by the Windows Setup dialog. We’re ready to install Windows.
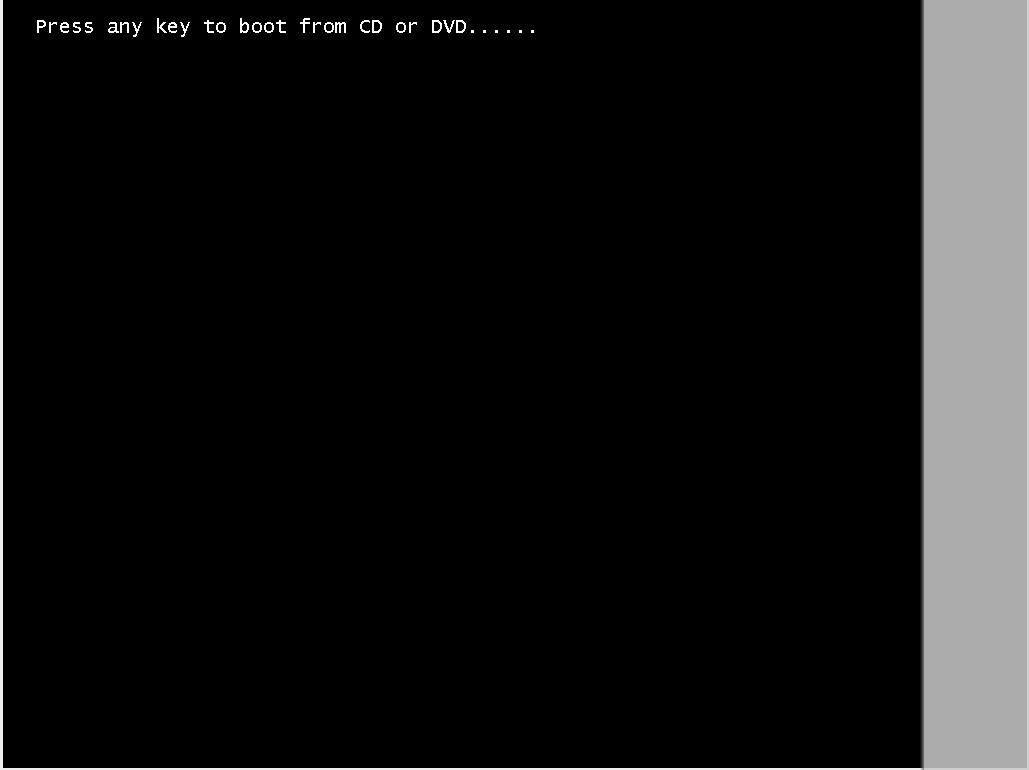
Install Windows
Change the language options if desired, but note the tutorial will assume English.
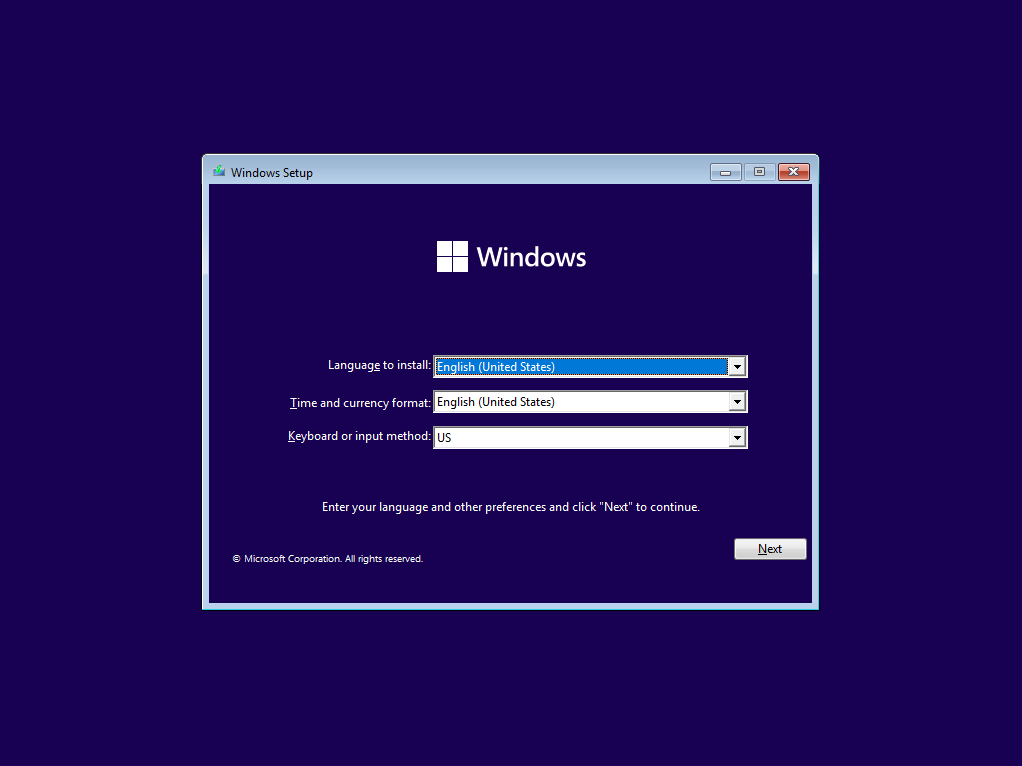
Select “Install Now”.
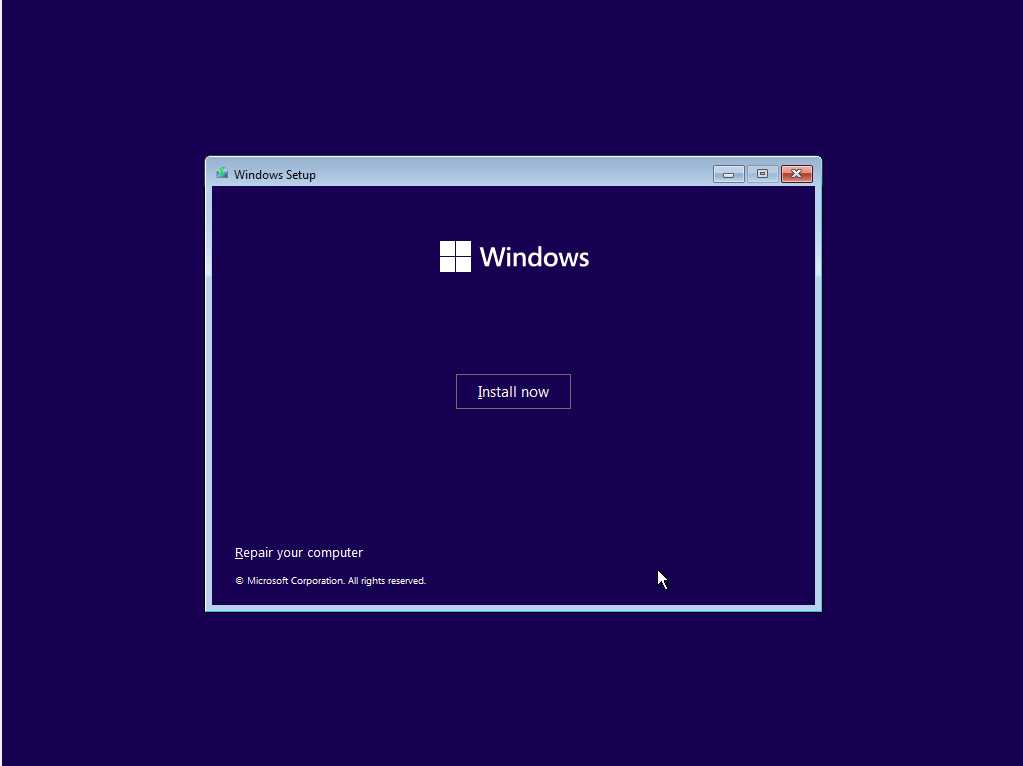
Accept the license terms and select “Next”.
Select “Custom: Install Windows only (advanced)”.
Select “New”.
Select “Apply”. The default size is the full size of the virtual drive.
Select “OK”.
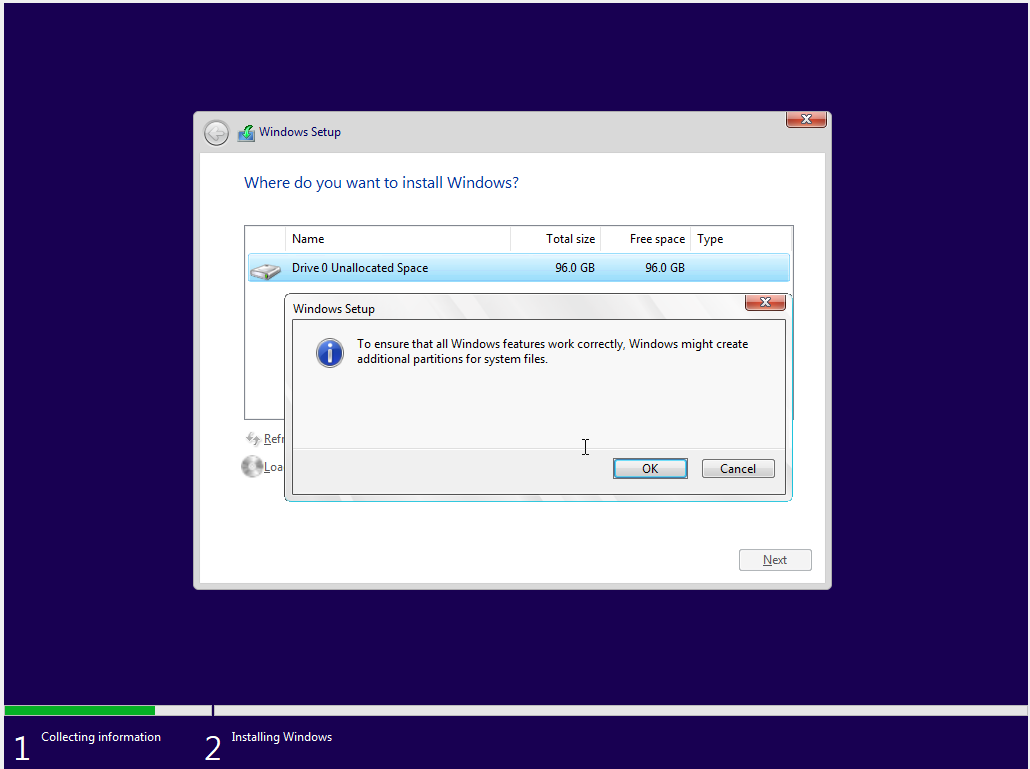
Select “Next”.
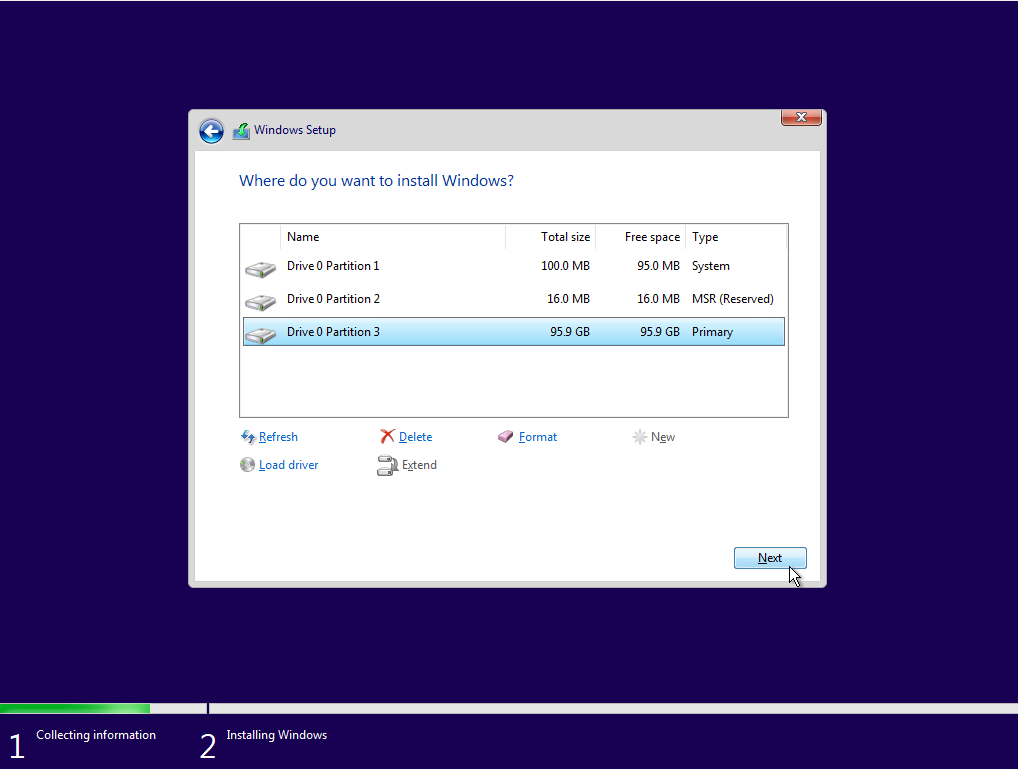
Wait for the installation process to complete. The machine will reboot a couple times. If prompted to press a key to boot from CD or DVD, do not press anything, because we do not want to do that.
Select your region.

Select your keyboard layout.
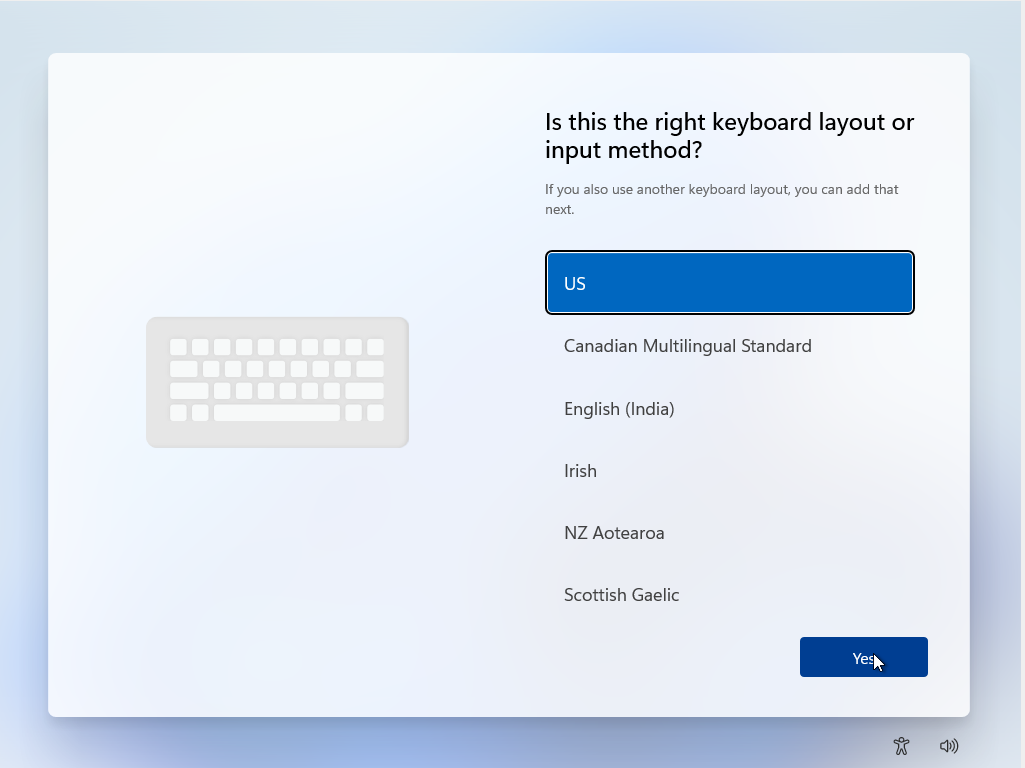
Skip adding a second keyboard layout unless you need one.
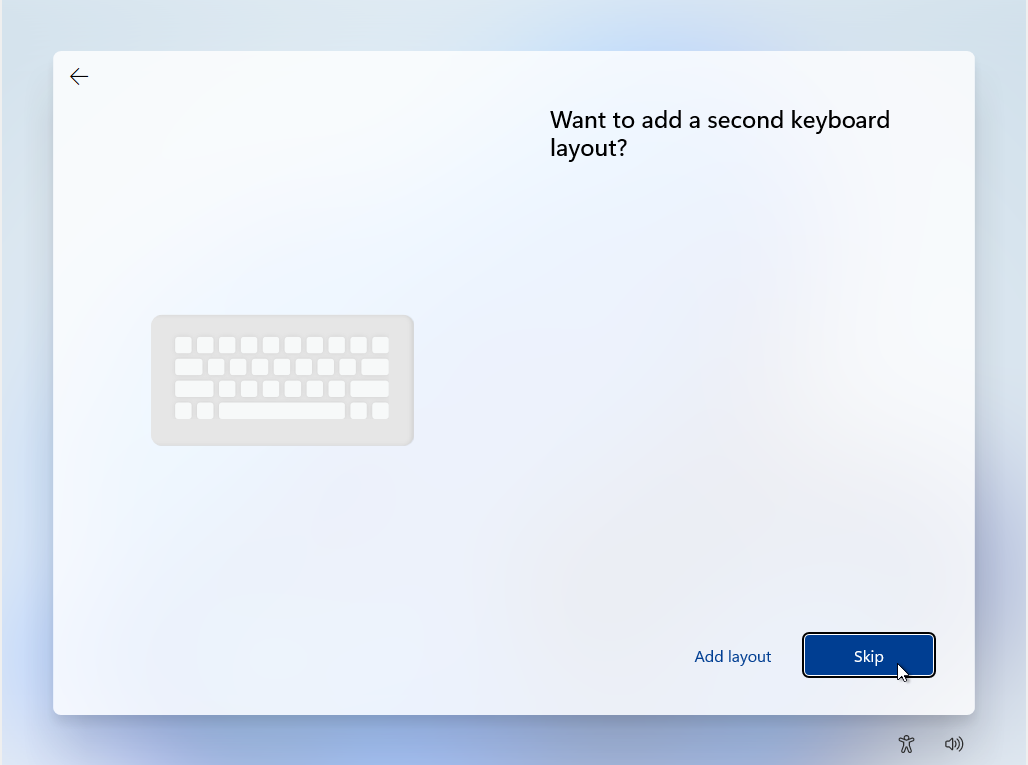
Select “Sign-in Options”.

Select “Domain join instead”.

Set a username. For this tutorial, we’ll use user. Select “Next”.
Set a password. For this tutorial, we’ll use password. Select “Next”.
Confirm your password. Select “Next”.

Our first dog’s name was password. Select “Next”.

Surprisingly, we were also born in the city of password. Select “Next”.

This cannot possibly be a coincidence! Our childhood nickname was also password.
Select “Next”.

Disable some of Microsoft’s snooping by checking “No” for all options. Then select “Accept”.
Eventually, you’ll be greeted with a clean desktop.
Set Up SSH
Click the Windows button and type “powershell”. Then right click “Windows PowerShell” and select “Run as administrator”.
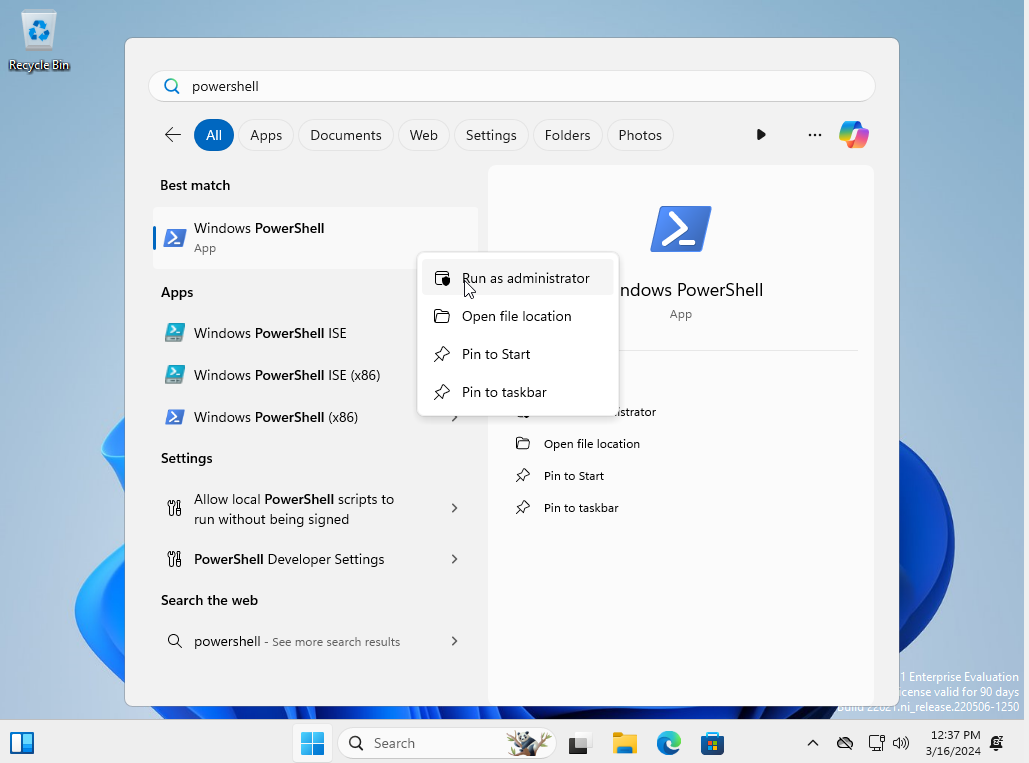
At the User Account Control (UAC) prompt, select “Yes”.
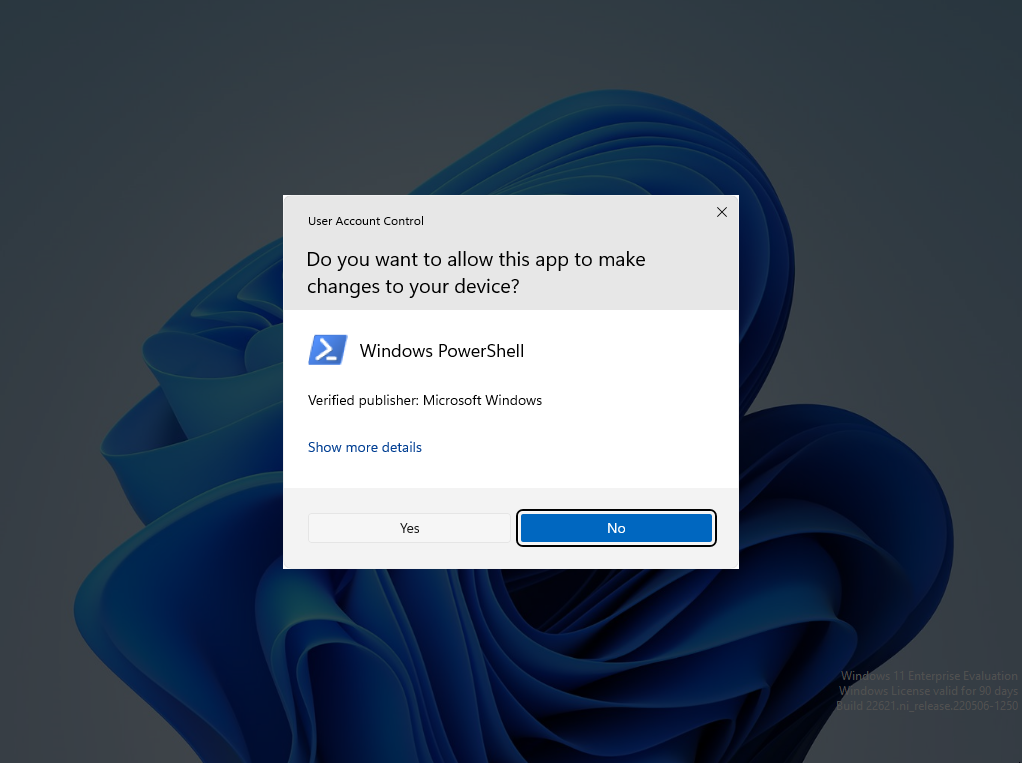
We will install and enable OpenSSH server as described in the Microsoft Documentation. In the PowerShell prompt, run:
Add-WindowsCapability -Online -name OpenSSH.CLIENT~~~~0.0.1.0
Next, in the PowerShell prompt, run:
Add-WindowsCapability -Online -name OpenSSH.Server~~~~0.0.1.0
Note that if this command fails with an error code, you may need to disconnect from any connected VPN/proxy on the host machine then restart the guest virtual machine, or set up the proxy on the guest virtual machine.
Then, run:
Start-Service sshd
Set-Service -name sshd -StartupType 'Automatic'
Enable SSH Port Forwarding in VirtualBox
Shut down the VM by selecting File > Close in the
VirtualBox menu bar, then select “Send the shutdown
signal”.
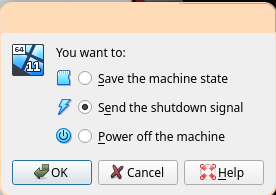
Click “Settings” in the Windows 11 image tab.
Select the “Network” tab on the left.
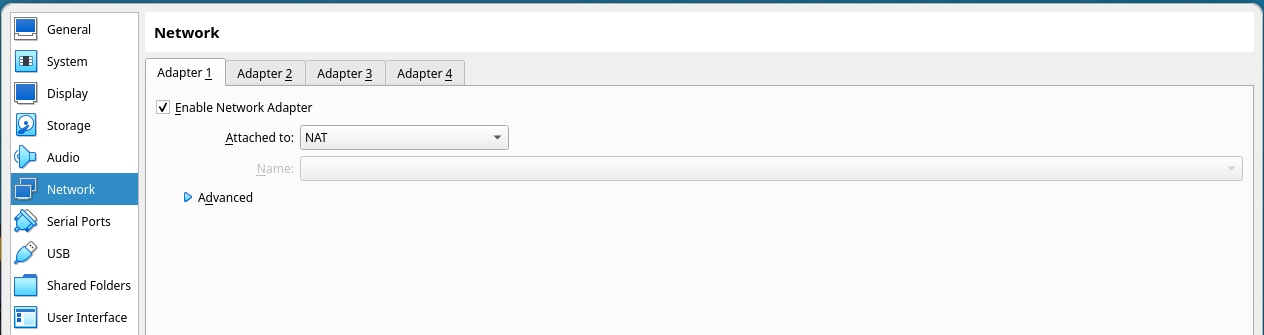
Select the “Advanced” drop-down menu.
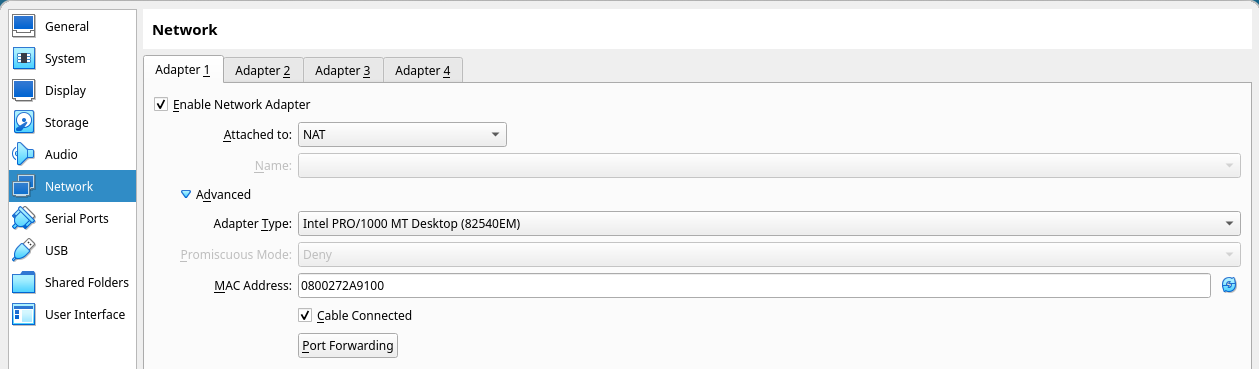
Select the “Port Forwarding” button to open the port forwarding menu.
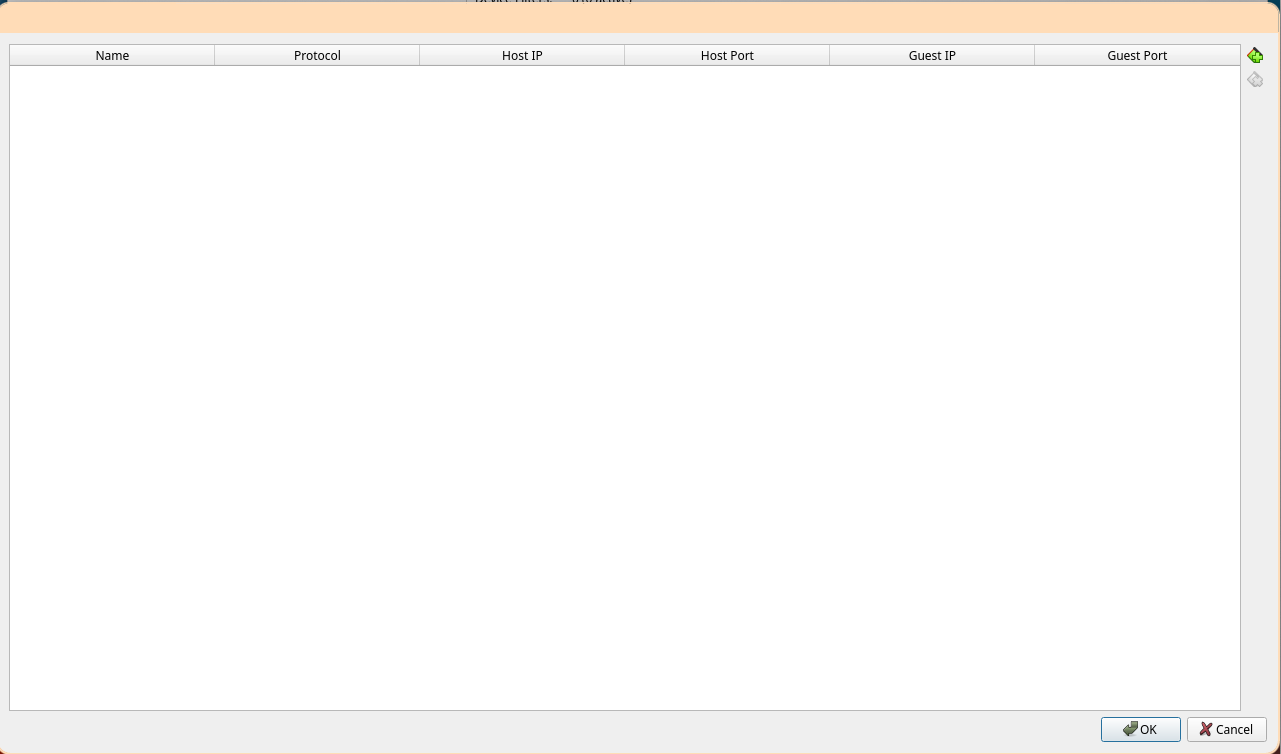
Select the top-right button “Adds port forwarding rule” to add a new rule.
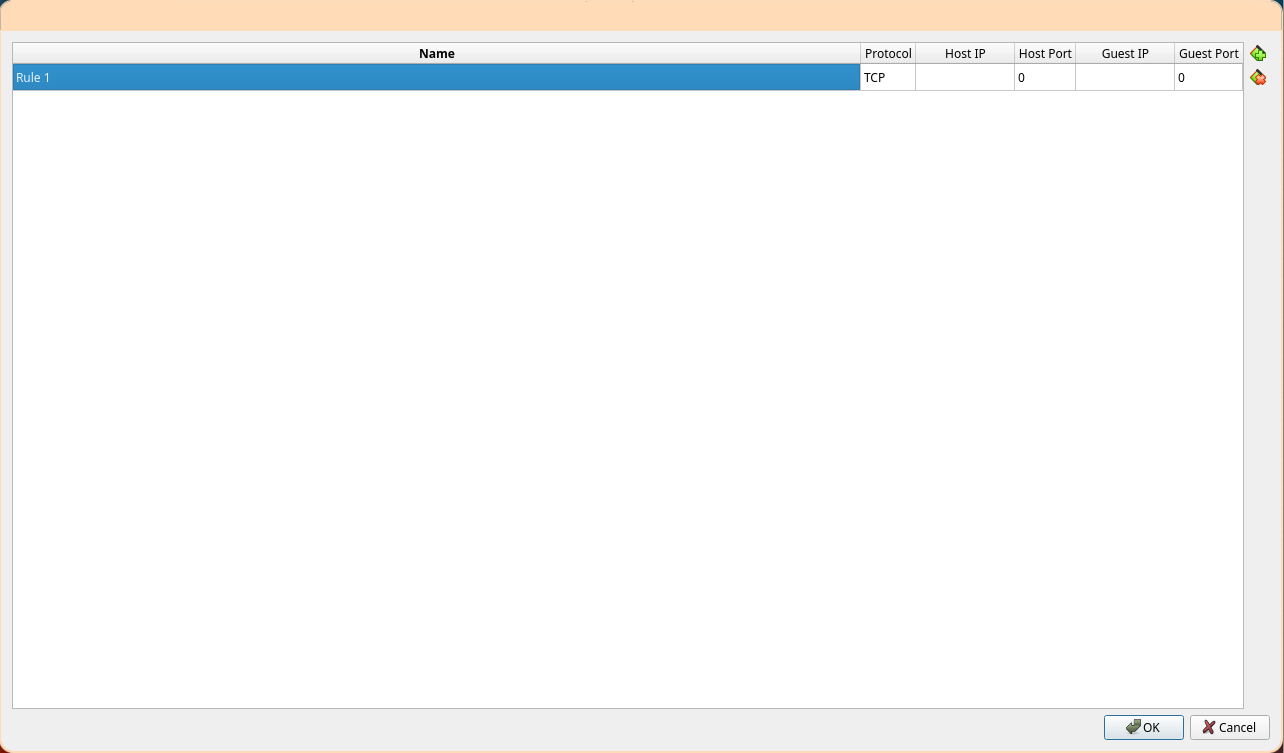
Set the name to “OpenSSH” on protocol TCP from host port 2222 to guest port 22. Leave both IP fields blank. Select “OK” in the port forwarding menu, then select “OK” on the settings menu.
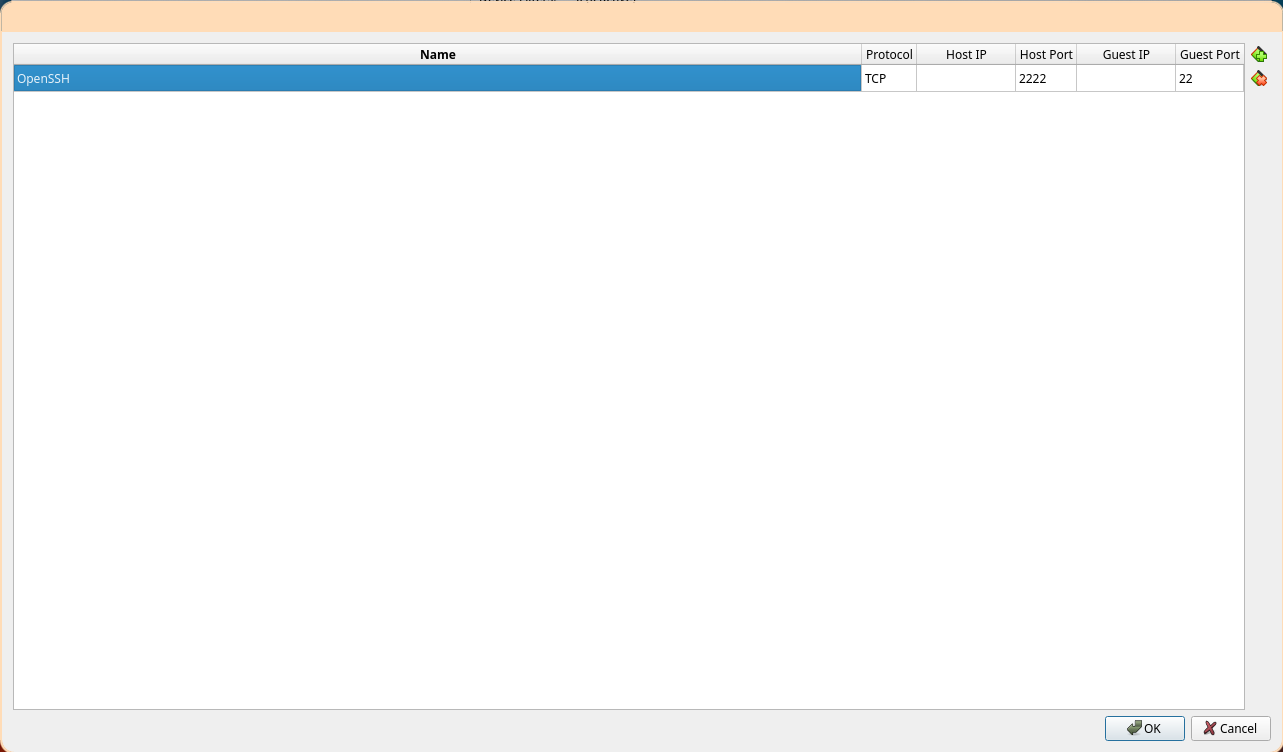
Start the image back up by clicking “Start” in the Windows 11 image tab.
Then, on your host (if your host is a Windows machine,
enable the OpenSSH.CLIENT capability on your host as
shown above), run:
ssh -p 2222 user@localhost
After entering the password at the prompt, you should be greeted with a command prompt:
Microsoft Windows [Version 10.0.22631.2428]
(c) Microsoft Corporation. All rights reserved.

user@DESKTOP-QNP1C9S C:\Users\user>
Change Default Shell to PowerShell
This is a CMD command prompt. The remainder of the tutorials for Windows will provide only PowerShell commands. To change the default shell for OpenSSH to PowerShell, run:
powershell.exe -Command "New-ItemProperty -Path 'HKLM:\SOFTWARE\OpenSSH' -Name DefaultShell -Value 'C:\Windows\System32\WindowsPowerShell\v1.0\powershell.exe' -PropertyType String -Force"
Exiting the SSH session by running exit, then reconnecting with ssh -p 2222 user@localhost should log you into a PowerShell session by default:
Windows PowerShell
Copyright (C) Microsoft Corporation. All rights reserved.

Try the new cross-platform PowerShell https://aka.ms/pscore6

PS C:\Users\user>
Installing the EWDK
We will use the Enterprise Windows Driver Kit (EWDK) throughout this tutorial to compile both user-space applications and Windows Kernel modules.
We will use the EWDK because unfortunately all versions of Visual Studio (including Visual Studio Community) are not possible to easily install on the command line, which means more images which complicate a tutorial unnecessarily and make it harder to maintain. If you are more comfortable with using Visual Studio, the remainder of the tutorial will still be relevant and you can translate to the equivalent GUI instructions.
Download the EWDK
If the link below becomes outdated, you can obtain the EWDK ISO download by visiting the WDK and EWDK download page and downloading it. The page Using the Enterprise WDK also contains useful background.
You can download the latest version of the EWDK as of the time of writing (20 December 2023) by running (note the first line is required to obtain a reasonable download speed):
$ProgressPreference = 'SilentlyContinue'
Invoke-WebRequest -Uri "https://software-static.download.prss.microsoft.com/dbazure/888969d5-f34g-4e03-ac9d-1f9786c66749/EWDK_ni_release_svc_prod1_22621_230929-1800.iso" -OutFile ~/Downloads/EWDK_ni_release_svc_prod1_22621_230929-1800.iso
This download is quite large (approximately 15GB). The command will finish when the download is complete.
Mount the EWDK Disk Image
To ensure paths throughout the tutorial work correctly, we will mount our
disk image to a specific drive letter (W).
$diskImage = Mount-DiskImage -ImagePath C:\Users\user\Downloads\EWDK_ni_release_svc_prod1_22621_230929-1800.iso -NoDriveLetter
$volumeInfo = $diskImage | Get-Volume
mountvol W: $volumeInfo.UniqueId
Note that after a reboot or sleep, you may need to run this command again to re-mount the disk image.
Test the Build Environment
We can now launch the build environment by running:
W:\LaunchBuildEnv.cmd
Test that the build environment works as expected:
cl
You should see the output:
Microsoft (R) C/C++ Optimizing Compiler Version 19.31.31107 for x86
Copyright (C) Microsoft Corporation.  All rights reserved.

usage: cl [ option... ] filename... [ /link linkoption... ]
Make sure to exit the cmd environment after using it and return to PowerShell:
exit
Installing Development Tools
We will install a couple of additional development tools.
Set Up Winget
On most systems, WinGet should work correctly without tweaking, however it is a notoriously buggy tool, and in many cases issues may occur. You can view the most up-to-date troubleshooting steps on GitHub.
In most cases, the best way to resolve an issue is to
simply install a new version of WinGet. The most up to
date msixbundle link can be found from the
releases.
For example:
Invoke-WebRequest -Out C:\Users\user\Downloads\winget.msixbundle https://github.com/microsoft/winget-cli/releases/download/v1.7.10661/Microsoft.DesktopAppInstaller_8wekyb3d8bbwe.msixbundle
Add-AppxPackage C:\Users\user\Downloads\winget.msixbundle
Then check the version matches with winget --info.
Once you have a working WinGet installation, update your sources with:
winget source update
You should see “Done” messages for all sources. If you do not, refer to the troubleshooting steps, because the next steps in this tutorial will not work correctly.
Install Git
Install Git with:
winget install --id Git.Git -e --source winget
Once the installation is complete (you should see some licensing and download information on the command line), add it to the path with:
$env:Path += ";C:\Program Files\Git\bin"
[Environment]::SetEnvironmentVariable("Path", $env:Path + ";C:\Program Files\Git\bin", "Machine")
Install Vim
Install Vim with:
winget install --id vim.vim -e --source winget
And add it to the path with the following. Note that
the sub-directory vim91 may change with newer
versions of vim – make note of the major and minor
version displayed during the winget install (like
Found Vim [vim.vim] Version 9.1.0104) and subsitute
the major and minor version into the command below.
$env:Path += ";C:\Program Files\Vim\vim91"
[Environment]::SetEnvironmentVariable("Path", $env:Path + ";C:\Program Files\Vim\vim91", "Machine")
Install CMake
Install CMake with:
winget install --id Kitware.CMake -e --source winget
And add it to the path with:
$env:Path += ";C:\Program Files\CMake\bin"
[Environment]::SetEnvironmentVariable("Path", $env:Path + ";C:\Program Files\CMake\bin", "Machine")
Install Visual Studio Community
We will use the EWDK to build the vulnerable driver, but because we will be using LibFuzzer to fuzz the driver from user-space, we also need to install Visual Studio Community with the proper workloads to obtain the LibFuzzer implementation.
winget install Microsoft.VisualStudio.2022.Community --silent --override "--wait --quiet --addProductLang En-us --add Microsoft.VisualStudio.Workload.NativeDesktop --add Microsoft.VisualStudio.Component.VC.ASAN --add Microsoft.VisualStudio.Component.VC.ATL --add Microsoft.VisualStudio.Component.VC.Tools.x86.x64 --add Microsoft.VisualStudio.Component.Windows11SDK.22621 --add Microsoft.Component.VC.Runtime.UCRTSDK --add Microsoft.VisualStudio.Workload.CoreEditor"
The command will return once the installation is complete, it may take a very long time (the same as the graphical VS installer).
Refresh PATH
The $env:Path environment variable changes will not
take effect until SSHD is restarted. Restart it with
(this will not end your current session):
Restart-Service -Name sshd
Now, exit the sesion by typing exit and re-connect via SSH. Confirm the
environment variable changes took effect:
git --version
vim --version
cmake --version
Both commands should succeed.
Install the Simics Agent
You should already have Simics installed on your machine. In the Simics base directory
(e.g. simics-6.0.185), unzip targets/common/images/simics_agent_binaries.zip.
From the unzipped files, copy simics_agent_x86_win64.exe to the guest machine:
scp -P 2222 simics_agent_x86_win64.exe "user@localhost:C:\\Users\\user\\"
Next, on the guest machine, set the agent to run at logon:
schtasks /create /sc onlogon /tn "Simics Agent" /tr "C:\Users\user\simics_agent_x86_win64.exe"
Now, set the user account to automatically log in at boot:
reg add "HKLM\SOFTWARE\Microsoft\Windows NT\CurrentVersion\Winlogon" /v AutoAdminLogon /t REG_SZ /d 1 /f
reg add "HKLM\SOFTWARE\Microsoft\Windows NT\CurrentVersion\Winlogon" /v DefaultUserName /t REG_SZ /d "user" /f
reg add "HKLM\SOFTWARE\Microsoft\Windows NT\CurrentVersion\Winlogon" /v DefaultPassword /t REG_SZ /d "password" /f
Restart the machine with:
shutdown /r /f /t 0
And reconnect with:
ssh -P 2222 user@localhost
Ensure the agent is running:
ps | findstr simics
You should see output like:
41 4 508 1408 0.02 4132 1 simics_agent_x86_win64
Clone and Build HEVD
We will use HackSys Extreme Vulnerable Driver (HEVD) as our windows driver target.
We’ll clone HEVD into our home directory and enter the EWDK build environment.
cd ~
git clone https://github.com/novafacing/HackSysExtremeVulnerableDriver -b windows-training
cd HackSysExtremeVulnerableDriver/Driver
W:\LaunchBuildEnv.cmd
Now, we can go ahead and build the driver:
cmake -S . -B build -DKITS_ROOT="W:\Program Files\Windows Kits\10"
cmake --build build --config Release
And exit our build environment:
exit
Back in PowerShell, check to make sure there is a release directory:
ls build/HEVD/Windows/
You should see:
    Directory: C:\Users\user\HackSysExtremeVulnerableDriver\Driver\build\HEVD\Windows


Mode                 LastWriteTime         Length Name
----                 -------------         ------ ----
d-----        12/20/2023   7:16 PM                CMakeFiles
d-----        12/20/2023   7:16 PM                HEVD.dir
d-----        12/20/2023   7:17 PM                Release
-a----        12/20/2023   7:16 PM           1073 cmake_install.cmake
-a----        12/20/2023   7:17 PM           2275 hevd.cat
-a----        12/20/2023   7:17 PM           1456 HEVD.inf
-a----        12/20/2023   7:17 PM          32216 HEVD.sys
-a----        12/20/2023   7:16 PM          45308 HEVD.vcxproj
-a----        12/20/2023   7:16 PM           4117 HEVD.vcxproj.filters
If so, we’re in business!
Install the Code Signing Certificate
Windows does not permit loading drivers signed with
untrusted certificates, so we need to both import our
untrusted certificate and enable test signing. From the
HackSysExtremeVulnerableDriver\Driver directory, run
the following to enable test signing and reboot (which
is required after enabling test signing):
certutil -importPFX HEVD\Windows\HEVD.pfx
bcdedit -set TESTSIGNING on
bcdedit -set loadoptions DISABLE_INTEGRITY_CHECKS
shutdown /r /f /t 0
Once the Virtual Machine reboots, you can reconnect with ssh -p 2222 user@localhost.
Install HEVD Driver
With the HEVD driver installed, we will create a service and set it to automatically run on system start.
First, create the service:
sc.exe create HEVD type= kernel start= auto binPath= C:\Users\user\HackSysExtremeVulnerableDriver\Driver\build\HEVD\Windows\HEVD.sys
The service will automatically start on reboot.
Reboot the guest with:
shutdown /r /f /t 0
And reconnect via ssh:
ssh -p 2222 user@localhost
We will then check that the service is started with:
sc.exe query HEVD
You should see:
SERVICE_NAME: HEVD
        TYPE               : 1  KERNEL_DRIVER
        STATE              : 4  RUNNING
                                (STOPPABLE, NOT_PAUSABLE, IGNORES_SHUTDOWN)
        WIN32_EXIT_CODE    : 0  (0x0)
        SERVICE_EXIT_CODE  : 0  (0x0)
        CHECKPOINT         : 0x0
        WAIT_HINT          : 0x0
The driver is installed and set to start automatically.
Create a Fuzz Harness
We’ll create a directory ~/fuzzer where we’ll create and run our fuzz harness:
mkdir ~/fuzzer
cd ~/fuzzer
We’re going to fuzz the driver via its IOCTL interface. The handler for the interface is defined here. It is possible as well to harness the kernel driver directly, but it is typically much easier to use a user-space driver to fuzz the kernel driver. This has the added benefit that most test cases for drivers are implemented as user-space programs, so converting a test case to a fuzz driver becomes very simple.
Essentially, if we pass more than 512 * 4 = 2048 bytes of data, we will begin to
overflow the stack buffer. Create fuzzer.c by running vim fuzzer.c.
We’ll start by including windows.h for the Windows API and stdio.h so we can print.
#include <windows.h>
#include <stdio.h>
We will also include our TSFFS header:
#include "tsffs.h"
Next, we need to define the control
code
for the driver interface. The device servicing IOCTL we are triggering is not a
pre-specified file
type,
so we access it with an unknown type. We grab the control code for the handler we want
from the driver source
code.
Note that in the handler, we can see this is a type 3 IOCTL handler (AKA
METHOD_NEITHER) and that we want RW access to the driver file.
#define HACKSYS_EVD_IOCTL_STACK_OVERFLOW CTL_CODE(FILE_DEVICE_UNKNOWN, 0x800, METHOD_NEITHER, FILE_ANY_ACCESS)
Next, we’ll define our device name and a handle for the device once we open it.
const char g_devname[] = "\\\\.\\HackSysExtremeVulnerableDriver";
HANDLE g_device = INVALID_HANDLE_VALUE;
Now we can implement our fuzz driver. Since we’re compiling as C code, note we do not
declare the function as extern "C", but if we were compiling as C++ we would need to
do this.
int main() {
The first thing we need to do is check if the device handle is initialized, and initialize it if not.
    printf("Initializing device\n");

    if ((g_device = CreateFileA(g_devname,
        GENERIC_READ | GENERIC_WRITE,
        0,
        NULL,
        OPEN_EXISTING,
        0,
        NULL
    )) == INVALID_HANDLE_VALUE) {
        printf("Failed to initialize device\n");
        return -1;
    }
    printf("Initialized device\n");
Next, we’ll declare a buffer and a size of the buffer. We’ll make it 1 page in size.
Note that the size variable must be a pointer-width integer to be compatible with the
TSFFS fuzz harnesses. We will downcast it to the DWORD size parameter for
DeviceIoControl later.
   BYTE buffer[4096];
   size_t size = 4096;
Now we can add our start harness. When this harness function executes, the fuzzer will
take a snapshot. Each fuzzing iteration, buffer will be filled with up to 4096 bytes
of fuzzer data and size will be set to the actual number of bytes of the fuzzing
testcase.
HARNESS_START(buffer, &size);
We’ll also add a print for ourselves to let us know if the buffer should be overflowed by an input.
    if (size > 2048) {
        printf("Overflowing buffer!\n");
    }
Finally, we’ll call DeviceIoControl to interact with the driver by passing our input
data to the IOCTL interface.
    DWORD size_returned = 0;

    BOOL is_ok = DeviceIoControl(g_device,
        HACKSYS_EVD_IOCTL_STACK_OVERFLOW,
        (BYTE *)buffer,
        (DWORD)size,
        NULL, //outBuffer -> None
        0, //outBuffer size -> 0
        &size_returned,
        NULL
    );
After executing the IOCTL, we check the return value and in either case, we will add a
HARNESS_STOP call, which signals the fuzzer that this fuzzing iteration is over. The
fuzzer will reset to the initial snapshot and run again with a new input. It is
important to insert a stop harness before any exit from the fuzzing harness code path so
the fuzzer knows when to stop. Otherwise, execution will proceed until a timeout occurs,
which in this case would be a false positive.
    if (!is_ok) {
        printf("Error in DeviceIoControl\n");
        HARNESS_STOP();
        return -1;
    }

    HARNESS_STOP();

    return 0;
}
Save the file with
Add Header & ASM File
To build the fuzz harness with the TSFFS harness functions, we need both the header
(tsffs.h) and the MSVC ASM file (tsffs-msvc-x86_64.h).
Copy tsffs.h and tsffs-msvc-x86_64.h into the fuzzer directory by running the
following on your host machine:
scp -P 2222 harness/tsffs.h "user@localhost:C:\\Users\\user\\fuzzer\\"
scp -P 2222 harness/tsffs-msvc-x86_64.asm "user@localhost:C:\\Users\\user\\fuzzer\\"
Compile the Fuzz Harness
That’s all we need to test the driver from user-space. We can now compile the harness by entering the Build Environment for VS Community (not the EWDK):
Set-ExecutionPolicy Unrestricted
& 'C:\Program Files\Microsoft Visual Studio\2022\Community\Common7\Tools\Launch-VsDevShell.ps1' -Arch amd64
ml64 /c /Cp /Cx /Zf tsffs-msvc-x86_64.asm
cl fuzzer.c tsffs-msvc-x86_64.obj
Convert Image to CRAFF
Now that we have set up our Windows image, we need to convert the image to the CRAFF format that Simics uses.
First, shut down the guest machine with:
shutdown /s /f /t 0
Find The Virtual Disk Image
After the guest machine has shut down, click the “Storage” category header in the machine page shown below.
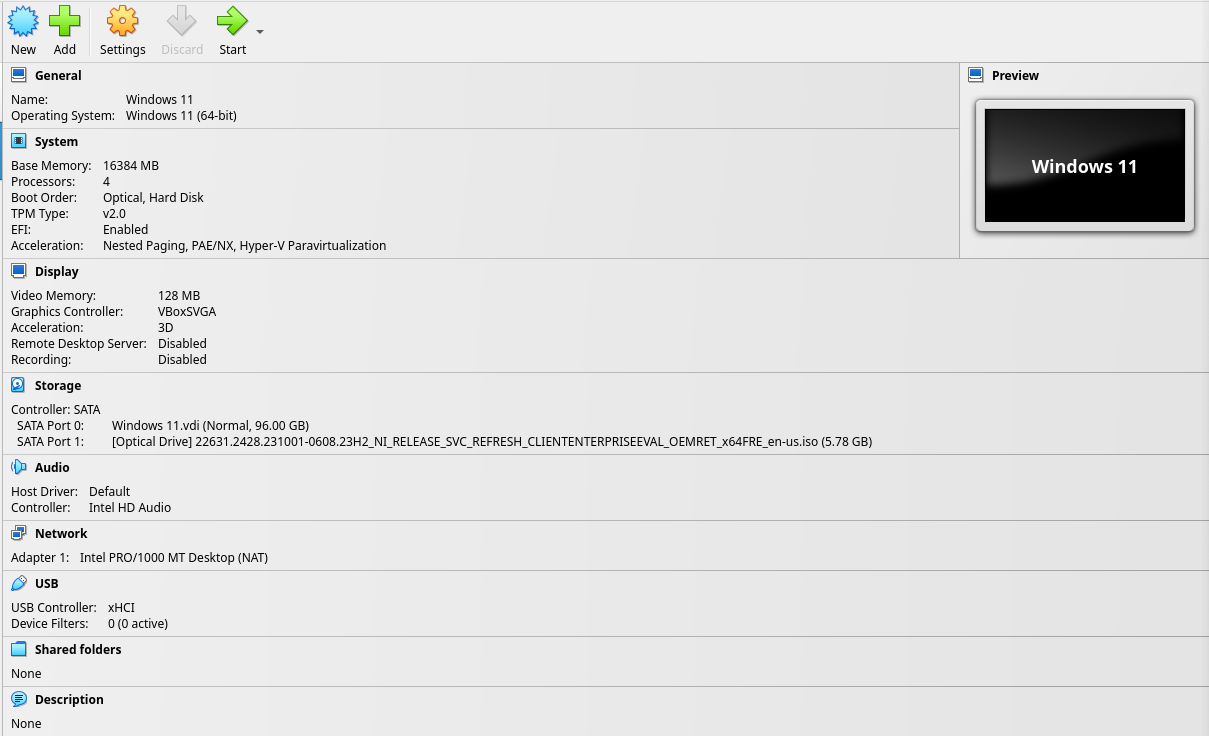
The settings window for Storage will appear. Note the “Location” field. This is the path to the virtual disk image.

Convert the Virtual Disk Image
To convert the VDI to raw, we can use either the VirtualBox CLI:
VBoxManage clonehd "/path/to/VirtualBox VMs/Windows 11/Windows 11.vdi" "examples/tutorials/windows-kernel/windows-11.img" --format raw
Or we can use the qemu-img tool (included with QEMU installations):
qemu-img convert -f vdi -O vdi "/path/to/VirtualBox VMs/Windows 11/Windows 11.vdi" "examples/tutorials/windows-kernel/windows-11.img"
Then, we will use the craff utility included with Simics. Find your Simics
base directory (e.g. simics-6.0.185), and run:
~/simics/simics-6.0.185/bin/craff -o examples/tutorials/windows-kernel/windows-11.craff examples/tutorials/windows-kernel/windows-11.img
Create a Project
Now that we have a disk image, we’ll create a project for fuzzing our Windows machine.
From the root of this repository:
cd examples/tutorials/windows-kernel
ispm projects . --create 1000-latest 2096-latest 8112-latest 1030-latest 31337-latest --ignore-existing-files
Make sure windows-11.craff is in the project
directory. Then, create a script run.simics. Before
we start fuzzing, we’ll need to let Windows set itself
up on the new simulated hardware.
run.simics should look like this to initialize TSFFS and start the simulation.
$cpu_comp_class = "x86QSP2"
$disk0_image = "%simics%/windows-11.craff"
$use_vmp = FALSE
$create_usb_tablet = TRUE
$num_cores = 1
$num_threads = 2

run-command-file "%simics%/targets/qsp-x86/qsp-hdd-boot.simics"
Run the Simulation
Run the system with the command below. Remember that the simulated system will be much slower than the virtualized system, especially as we will run with VMP disabled.
./simics ./run.simics
Then, in the Simics command line:
run
The system will begin booting. The boot process may take a significant amount of time and the system may reboot. Wait until the system runs all the way through boot. Wait until after you are automatically logged into the system and the Simics agent command window is open. This is a good time to make another coffee!
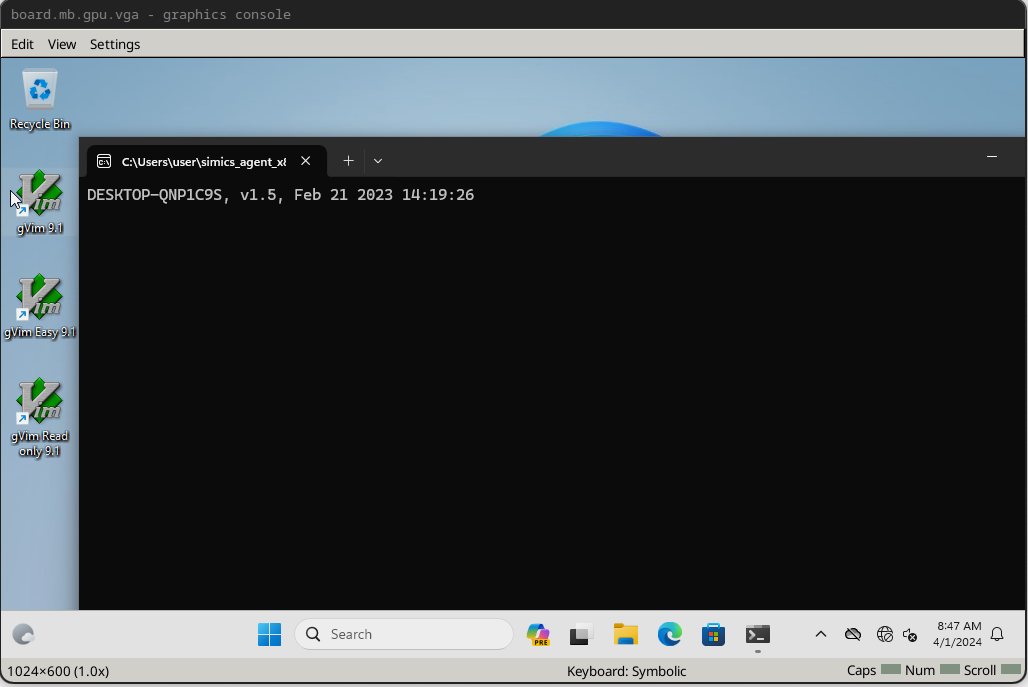
At this point, if the mouse cursor is visible on the guest, move it to the taskbar.
Then, After being logged in, press control+c on the Simics command line to pause
execution. The board.mb.gpu.vga screen should turn greyscale like below.
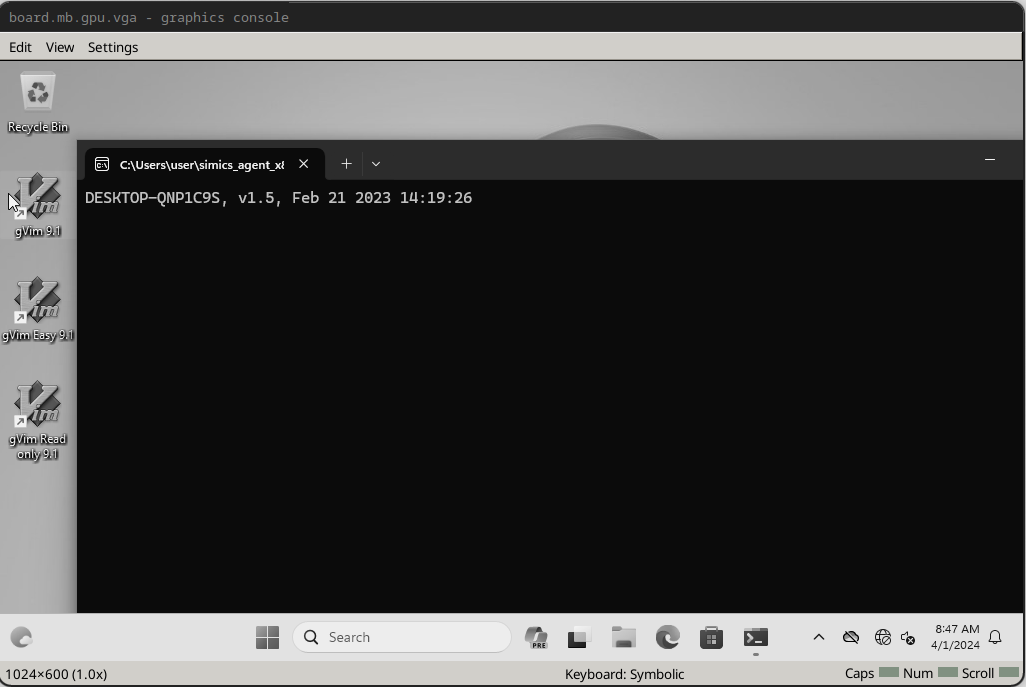
Then, run:
board.disk0.hd_image.save-diff-file filename = "windows-11.diff.craff"
This will save a diff between the current image state and our initial state, which will allow us to skip the long process of Windows driver reinitialization.
Next, we will add a line to run.simics to load the diff file from the saved diff. This
will speed up subsequent boots of the system significantly.
board.disk0.hd_image.add-diff-file filename = "windows-11.diff.craff"
Then, we will save a graphical breakpoint which will allow us to wait in the boot process until login is complete and the system is logged in and ready to run Agent commands.
In the Simics cli, run:
board.console.con.status
This will display graphical console information like:
Status of board.console.con [class graphcon]
============================================

Mouse:
            Absolute positioning : True
         Absolute pointer device : board.tablet.usb_tablet

Grab:
                    Mouse button : right
                        Modifier : shift

VNC:
                            Port : none
                     UNIX socket : none
                       Listening : False
                     Connections : 0

Screen:
             Size width x height : 1024x600
    Refresh rate (Hz, real time) : 50
Note the screen width and height. We will not capture the entire screen, only the very top left – enough to conclude the system is booted but not enough to capture any time data.
To determine the size of screenshot we need, we’ll save the screen to a PNG with:
board.console.con.screenshot filename = screenshot.png
Then, we can crop it on the command line with ImageMagick (dnf -y install ImageMagick)
and examine the result:
convert screenshot.png -crop 80x80+0+0 cropped.png
Then, check the screenshot in your favorite viewer (a web browser works conveniently for this), e.g.:
firefox cropped.png
In this case, we want to see the desktop and the CMD window that tells us the Simics agent is running. Importantly, we do not want to see the time printed by either the Simics agent at startup, or the time on the taskbar (or anything else that could change from run to run).
With our graphical breakpoint size decided, we can save our boot breakpoint:
board.console.con.save-break-xy breakpoint-boot 0 0 80 80
This will save a graphical capture of the graphical console containing the top left of the displayed screen (enough to capture the booted desktop and CMD prompt window, and exclude the time in the taskbar and CMD prompt).
We will then resume the simulation by running (in the Simics CLI):
continue
Allow the simulation to run for a few seconds to tick the clock, then pause it again by entering Ctrl+C.
Check that the breakpoint is valid by running:
board.console.con.gfx-break-match breakpoint-boot
You should see:
TRUE
Connect to Agent
Next, we’ll create an agent manager in the Simics CLI:
start-agent-manager
You should see:
'agent_manager' is created and enabled.
Then we’ll run:
agent_manager.connect-to-agent
After which you should see:
matic0:job 0 (connect-to)
[matic0 info] connected to DESKTOP-QNP1C9S0
Now we can run commands on the guest from the Simics command line. We want run our fuzz driver program.
matic0.run "C:\\Users\\user\\fuzzer\\fuzzer.exe"
When the fuzz driver runs, we’ll get a blue screen:
This is because we just submitted a buffer of size 4096 (our configured maximum size) and overflowed the stack of the driver process, corrupting it. This means all is working correctly and we can move on to fuzzing the driver. Note that when we start up the fuzzer, it will not immediately cause the same blue screen because it will start with a random corpus of small inputs.
Run the Fuzzer
First, we’ll make a new script fuzz.simics. We’ll start with the same parameters we
used previously:
$cpu_comp_class = "x86QSP2"
$disk0_image = "%simics%/windows-11.img"
$use_vmp = FALSE
$create_usb_tablet = TRUE
$num_cores = 1
$num_threads = 2
We’ll add some code next the top to check if we have a checkpoint called
booted.ckpt, and read the configuration from it if we do. This will allow us to skip
the (many minutes) wait time on all but first boot, which significantly improves
time-to-fuzzing-start.
if file-exists "booted.ckpt" {
    echo "Booted checkpoint found, loading..."
    read-configuration "booted.ckpt"
} else {
    echo "No booted checkpoint saved, running..."
    run-command-file "%simics%/targets/qsp-x86/qsp-hdd-boot.simics"
    board.disk0.hd_image.add-diff-file filename = "windows-11.diff.craff"
    # Uncomment this line to enable VNC for headless access
    # board.console.con.vnc-setup port = 7500 password = "PassPass"
}
Next, we’ll add a script-branch that will wait for our graphical breakpoint. This
allows us to unattended-ly wait until the system is booted and the Simics agent, which
allows us to run commands and upload files to the system, is started.
Once we get the breakpoint, we will save the booted checkpoint if we did not have one already.
Then, we start the agent manager, set the poll interval to 1 minute such that the slow simulation (since we are running without VMP) will not time out.
Finally, we run our fuzzer executable and wait for all commands to execute. Once the fuzzer executable runs, the fuzzer will start and the execution loop will begin.
script-branch {
    board.console.con.bp-wait-for-gfx breakpoint-boot 1
    echo "Got booted breakpoint. Waiting 10 seconds..."
    bp.time.wait-for seconds = 10
    echo "Got booted breakpoint, stopping..."
    stop

    if not (file-exists "booted.ckpt") {
        echo "Got booted BP, saving checkpoint..."
        write-configuration booted.ckpt
    } else {
        echo "Already had checkpoint, not saving..."
    }

    start-agent-manager
    $matic = (agent_manager.connect-to-agent)
    continue
    $matic.wait-for-job
    $matic.agent-poll-interval ms = 60000
    stop
    load-module tsffs
    init-tsffs
    @tsffs.log_level = 4
    @tsffs.start_on_harness = True
    @tsffs.stop_on_harness = True
    @tsffs.timeout = 3.0
    @tsffs.exceptions = [13]
    @tsffs.generate_random_corpus = True
    @tsffs.iteration_limit = 1000

    $matic.upload-dir -overwrite "%simics%/fuzzer/"
    $matic.run "C:\\fuzzer\\fuzzer.exe"
    continue
    $matic.wait-for-job
    echo "Done with jobs..."
}
For example, you should see something like below. Note that you should see a very large initial spike in coverage on the first fuzzer execution.
[tsffs info] Saving checkpoint to /home/rhart/hub/tsffs/examples/tutorials/windows-kernel/checkpoint.ckpt
[tsffs info] Saving initial snapshot
[tsffs info] Testcase: Testcase { testcase: "[181, 102] (2 bytes)", cmplog: false }
[tsffs info] Posting event on processor at time 175.99922852 for 3s (time 178.99922852)
[tsffs info] Resuming simulation
[tsffs info] on_magic_instruction(4)
[tsffs info] Simulation stopped with reason Magic { magic_number: StopNormal }
[tsffs info] Cancelling event with next time 2.9999871535 (current time 175.9992413665)
[tsffs info] Testcase: Testcase { testcase: "[139, 250, 96, 144, 239, 7, 187, 60, 109, 147, 230, 211] (12 bytes)", cmplog: false }
[tsffs info] Posting event on processor at time 175.99922852 for 3s (time 178.99922852)
[tsffs info] Resuming simulation
[tsffs info] on_magic_instruction(1)
[tsffs info] Interesting input for AFL indices [503, 766, 2935, 3049, 3169, 3797, 4263, 4337, 4655, 5256, 5335, 5350, 5361, 5373, 6196, 6310, 6381, 6570, 6715, 10288, 10680, 11672, 11805, 12079, 13347, 13408, 13418, 14562, 14800, 14846, 17643, 20093, 20115, 20116, 20353, 20986, 21600, 21706, 22895, 24028, 24504, 24570, 24792, 24808, 25568, 25709, 25896, 26497, 26871, 26901, 26921, 26944, 26949, 26960, 26993, 27111, 27134, 27175, 27201, 27208, 27215, 27231, 27285, 27327, 27408, 27421, 27447, 27449, 27471, 27480, 27504, 27581, 27592, 27593, 27604, 27645, 27906, 27916, 27926, 27966, 28001, 28169, 28178, 28218, 28239, 28265, 28269, 28277, 28294, 28315, 28341, 28356, 28404, 28415, 28434, 28436, 28450, 28482, 28531, 28552, 28570, 28603, 28620, 28624, 28649, 28671, 28672, 29080, 29107, 29163, 29164, 29168, 29400, 29447, 29624, 29683, 29730, 29734, 29770, 29781, 29828, 29852, 29923, 29970, 29979, 30009, 30030, 30050, 30061, 30068, 30076, 30119, 30150, 30169, 30213, 30262, 30285, 30299, 30329, 30348, 30396, 30406, 30461, 30500, 30505, 30536, 30553, 30580, 30600, 30602, 30622, 30640, 30675, 30677, 31132, 31412, 31696, 31746, 31748, 31765, 31776, 31795, 31796, 31900, 31932, 32028, 32124, 32136, 32189, 32249, 32779, 32799, 33039, 33101, 33106, 33132, 33148, 33212, 33789, 33795, 33814, 33854, 33920, 33921, 33926, 33930, 33938, 33945, 33961, 33968, 33975, 33978, 33980, 34017, 34048, 34058, 34078, 34103, 34108, 34123, 34125, 34137, 34248, 34252, 34268, 34270, 34279, 34301, 34547, 34579, 34629, 34694, 34782, 34793, 35774, 35942, 35957, 36151, 36164, 36229, 36250, 36254, 36275, 36279, 36332, 36945, 36968, 37213, 37243, 37310, 37459, 37466, 37483, 37508, 37529, 37554, 37556, 37623, 37657, 37663, 37687, 37732, 37752, 37804, 37847, 38777, 38943, 39043, 39069, 39237, 39292, 39304, 39320, 39704, 39808, 39810, 39827, 39845, 39989, 40030, 40066, 40203, 40267, 40426, 40444, 40859, 40898, 40909, 40922, 40967, 40972, 40976, 40978, 41015, 41040, 41055, 41056, 41104, 41223, 41425, 41499, 41890, 42264, 42328, 42348, 42405, 42406, 42427, 42702, 42930, 42938, 43013, 43151, 43336, 43570, 43598, 43612, 43641, 43661, 43677, 43691, 43693, 43711, 43724, 43735, 43762, 43768, 43773, 43784, 43804, 43812, 43894, 43906, 43935, 44002, 44053, 44087, 44144, 44176, 44257, 44270, 44385, 44619, 44697, 44741, 44768, 44771, 44774, 44827, 44828, 44851, 45095, 45113, 45231, 45736, 45870, 45929, 46047, 46427, 46440, 46466, 46490, 46516, 46879, 49157, 49528, 49671, 49683, 49722, 49758, 49763, 49769, 49837, 49862, 49883, 49907, 50002, 50045, 50067, 50092, 50099, 50191, 50201, 50284, 50293, 50407, 50537, 50657, 50712, 50722, 50751, 50777, 50809, 50871, 50902, 51457, 51767, 51798, 51806, 51811, 51902, 51905, 51911, 51920, 51935, 51969, 52002, 52099, 52101, 52144, 52148, 52193, 52203, 52245, 52300, 52317, 52355, 52359, 52403, 52428, 52444, 52454, 52456, 52459, 52485, 52521, 52581, 52582, 52594, 52606, 52626, 52699, 52701, 52724, 52770, 52849, 52888, 52899, 52943, 52958, 52959, 53025, 53106, 53129, 53170, 53210, 54665, 54966, 55048, 55099, 55312, 55425, 55545, 55565, 55802, 55836, 56068, 56076, 56110, 56833, 56842, 56863, 56938, 56972, 56987, 57221, 57259, 57338, 57367, 57474, 57475, 57476, 57497, 57504, 57526, 57579, 57701, 57712, 57765, 57790, 57798, 57803, 57817, 57919, 58071, 58187, 58200, 58222, 58267, 58707, 58864, 59183, 59211, 59235, 59379, 60738, 60760, 61386, 62586, 62976, 63317, 63637, 63647, 63668, 63717, 63718, 64067, 64430, 65124, 66015, 66722, 66872, 66905, 66914, 66940, 67021, 68227, 71196, 71228, 71367, 72668, 73658, 74857, 75644, 75858, 75955, 75960, 76042, 76164, 76193, 76199, 76202, 76268, 76568, 76594, 76605, 76633, 76644, 76652, 77804, 78094, 78511, 80215, 80318, 81032, 81098, 81210, 81217, 81225, 81244, 81265, 81266, 81342, 81529, 81904, 82214, 82770, 84289, 84295, 84341, 84380, 84402, 84436, 84459, 84467, 84471, 84481, 84901, 84955, 84991, 85046, 85134, 85144, 85171, 85183, 85203, 85223, 85225, 85256, 85308, 85348, 85435, 85701, 85751, 85777, 85783, 85844, 85879, 85932, 86301, 86422, 86742, 86757, 86774, 86782, 87028, 87739, 89260, 89951, 90610, 90813, 91088, 91182, 91481, 91588, 92006, 92633, 92799, 93101, 93143, 93159, 93163, 95382, 96072, 96269, 96360, 96506, 96528, 96529, 96534, 96574, 96606, 96681, 96763, 96782, 96787, 96802, 96804, 96810, 96825, 96832, 96833, 96847, 96886, 96956, 96957, 96985, 97066, 97080, 97097, 97147, 97169, 97173, 97188, 97224, 97235, 97267, 97538, 97574, 97666, 97814, 97904, 97966, 98015, 98033, 98100, 98122, 98146, 98157, 98178, 98179, 98204, 98220, 98225, 98254, 98288, 98649, 98897, 100786, 100884, 100990, 100994, 101028, 101041, 101043, 101930, 101978, 102002, 102064, 102434, 102445, 102458, 102470, 102473, 102481, 102483, 102484, 102494, 102643, 102782, 102968, 103039, 103142, 103167, 103169, 103172, 103181, 103279, 103348, 103353, 103438, 103599, 104038, 104075, 104080, 104085, 104120, 104128, 104181, 104326, 104530, 104750, 104962, 105456, 105475, 105491, 105675, 105683, 105715, 105742, 106491, 108730, 108753, 109047, 109393, 109508, 109554, 109666, 109716, 109790, 109829, 109832, 109848, 109900, 109961, 109998, 110086, 110098, 110099, 110165, 110258, 110313, 110376, 110398, 110470, 110582, 111201, 112657, 112723, 112725, 112743, 112747, 112765, 112839, 112880, 112947, 112968, 112969, 113073, 113104, 113110, 113115, 113131, 113133, 113136, 113142, 113223, 113224, 113308, 113328, 113332, 113361, 113395, 113408, 113412, 113420, 113465, 113484, 113500, 113506, 113510, 113514, 113531, 113567, 113581, 113602, 113609, 113708, 113729, 114201, 114228, 114239, 114698, 114717, 114737, 114740, 114777, 114806, 114901, 115008, 115031, 115054, 115133, 115191, 115227, 115241, 115261, 115270, 115309, 115826, 115897, 115908, 115934, 116058, 116059, 116102, 116123, 116151, 116159, 116177, 116196, 116225, 116229, 116235, 116261, 116287, 116339, 116348, 116360, 116386, 116404, 116434, 116460, 116591, 116622, 116623, 116989, 117662, 117825, 117848, 117855, 117877, 117900, 117909, 117918, 117999, 118073, 118130, 118143, 118215, 118306, 118377, 118414, 118433, 118448, 119041, 119047, 119129, 119139, 119160, 119394, 119446, 119482, 119500, 119623, 119646, 119680, 119689, 119697, 119711, 119728, 119742, 119754, 119781, 119875, 120231, 120246, 120388, 120504, 120807, 121096, 122007, 122039, 122079, 122109, 123049, 124211, 124252, 124433, 124456, 124508, 124605, 124937, 124955, 124987, 125019, 125028, 125030, 125034, 125094, 125097, 125112, 125120, 125148, 125183, 125253, 125254, 125272, 125326, 125328, 125364, 125409, 125698, 126696, 127225, 127271, 127281, 127475, 127494, 127496, 127504, 127539, 127582, 127617, 127640, 127678, 127728, 127748, 127749, 127751, 127753, 127764, 127792, 127796, 127798, 127825, 127842, 127849, 127855, 127886, 127898, 127908, 127932, 127939, 127941, 128023, 128557, 129009, 129070, 129071, 129095, 129102, 129113, 129144, 129156, 129159, 129173, 129202, 129206, 129208, 129239, 129255, 129273, 129300, 129330, 129400, 129423, 129451, 129455, 129484, 129494, 129679, 129776, 129784, 129811, 129825, 129833, 129835, 129881, 129911, 130080, 130601, 130676] with input [181, 102]
[tsffs info] 955 Interesting edges seen since last report (955 edges total)
Documenation
Documentation for the public distribution of SIMICS and all the crates which make up TSFFS are provided here.
Developer Documentation
- Build Internals
- Refreshing Build Environment
- Building Against A Specific SIMICS Version
- Debugging TSFFS
Build Internals
TSFFS is somewhat unique as a SIMICS module written in Rust, instead of a supported language like Python, C, C++, or DML. This is possible due to a complex build configuration.
SIMICS API Bindings
TSFFS maintains its own bindings to the SIMICS API, both low level bindings to the exported C API and high level bindings that are more idiomatic Rust.
Low Level Bindings
The low level bindings are initially generated using
bindgen from the C header files in the
SIMICS installation’s src/include directory. This generates a large Rust file
containing declarations of all data types and function prototypes in the headers.
The low level bindings crate (simics-api-sys) also emits linking instructions in its
build.rs build script to link against the libraries which actually provide the symbols
exported by the SIMICS header files.
High Level Bindings
The high level bindings import the low level bindings and re-export them as
simics::api::sys. They also provide high level, more idiomatic bindings to nearly all
APIs in the low level bindings. In general, the sys bindings should never be used
except by the high level bindings, they are provided simply as an escape hatch.
The high level bindings make extensive use of dynamic code generation from the low level binding code and SIMICS HTML documentation. Code for generated for all built-in interfaces in SIMICS base by parsing the struct definitions from the low level bindings. HTML documentation is parsed to emit index information for the interfaces. Code is generated for all built-in HAPS in SIMICS base by parsing the names and prototypes of the HAP callback function, and emitting safe bindings around them.
There are several core ideas expressed in the high level bindings:
AttrValueas a serialization and deserialization primitive- Functions which take callbacks as parameters are wrapped with bindings that instead take closures
- Where appropriate (in particular with
ConfObject), pointers are left raw. Pointers which are never dereferenced except by the SIMICS API are left raw without violating safety.
Macros
The high level SIMICS crate also has an associated proc-macro crate. It provides several attribute macros for implementing:
- Interfaces
- Classes
- Functions which may throw SIMICS exceptions
It also provides derive macros for converting Rust structs to and from AttrValues.
Build Process
The build process for the TSFFS SIMICS package is implemented in the
cargo-simics-build crate. It builds the crate with correct link arguments, signs the
output module, and packages the module along with any built interfaces.
Refreshing Build Environment
In some cases, the TSFFS package environment can become desynchronized with the local
SIMICS installation. To resolve this issue, you can remove the files SIMICS/ISPM added
during setup and re-initialize the project by running cargo clean.
Targeting A Specific SIMICS Version
The Simics version the module is built against is determined by the Simics base
directory pointed to by the SIMICS_BASE environment variable. For example, running:
SIMICS_BASE=/home/user/simics/simics-6.0.185/ cargo simics-build
will build the module against Simics version 6.0.185.
Debugging
Hopefully not very often, but once in a while you may need to debug the TSFFS module.
The easiest way to do this is by loading and using it in a script that does what you want. For example, early in development there was a bug when calling the interface API.
So this script was used to help debug:
load-module tsffs
@tsffs = SIM_create_object(SIM_get_class("tsffs"), "tsffs", [])
tsffs.log-level 4
@import time
@print("Sleeping")
@time.sleep(30)
# Call your API here
ALl this script does is sleep for 30 seconds, then call the API we care about. The 30 second sleep gives you enough time to run this script, find the PID of the simics process, and attach it with GDB. Once in GDB, just break all threads on the place you want to debug.
$ ./simics -no-gui --no-win ./test.simics
$ ps aux | grep simics | grep -v grep | awk '{print $2}'
134284
$ gdb -q attach 134284
gdb> thread apply all break set_corpus_directory
gdb> continue
...
In general, most bugs will happen in FFI code, so breakpointing should be relatively straightforward. However, in complex cases demangling may be necessary. For this, a new version of GDB including rustfilt is suggested.
Releasing TSFFS
- Run check script:
./check.sh- This will report issues with formatting (C and Python formatting can be ignored for releases, markdown and Rust issues should be fixed)
- This will perform most checks done in CI including dependencies
- Any dependencies that are outdated or flag vulnerabilities in audits should be updated
- Any code which has breaking changes (very rare) should be fixed