Web User Guide - Task Management
Display All Tasks
The default landing page is Task Management. Clicking the Create/Modify Tasks at the top-left of the navigation bar also displays the Task Management page. This page will display all the tasks currently available in the system.
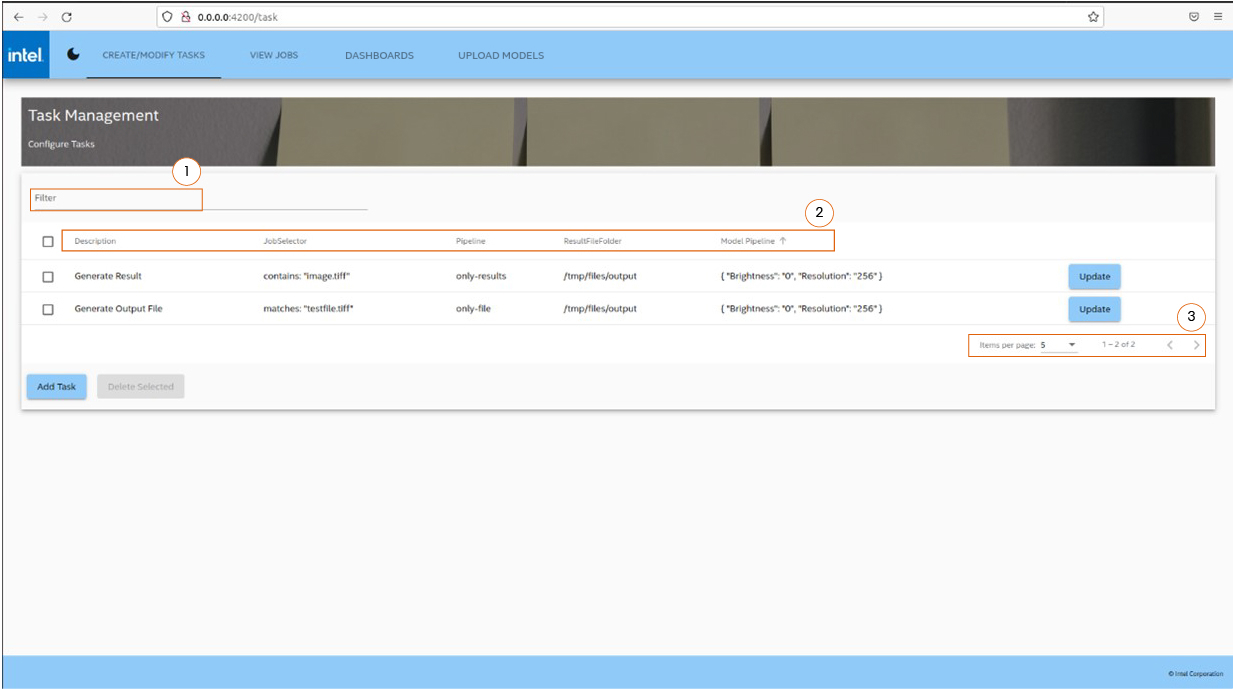
The UI, shown in Figure 1, offers different ways to look at the current tasks:
-
Filter: enter text in the textbox to filter tasks.
-
Sort: click on individual columns to sort tasks either in ascending or descending order.
-
View pages: use pagination, provided at the bottom of the page, to display a set number of tasks on the page.
Create Task
To create a task:
-
From Task Management page, select Add Task.
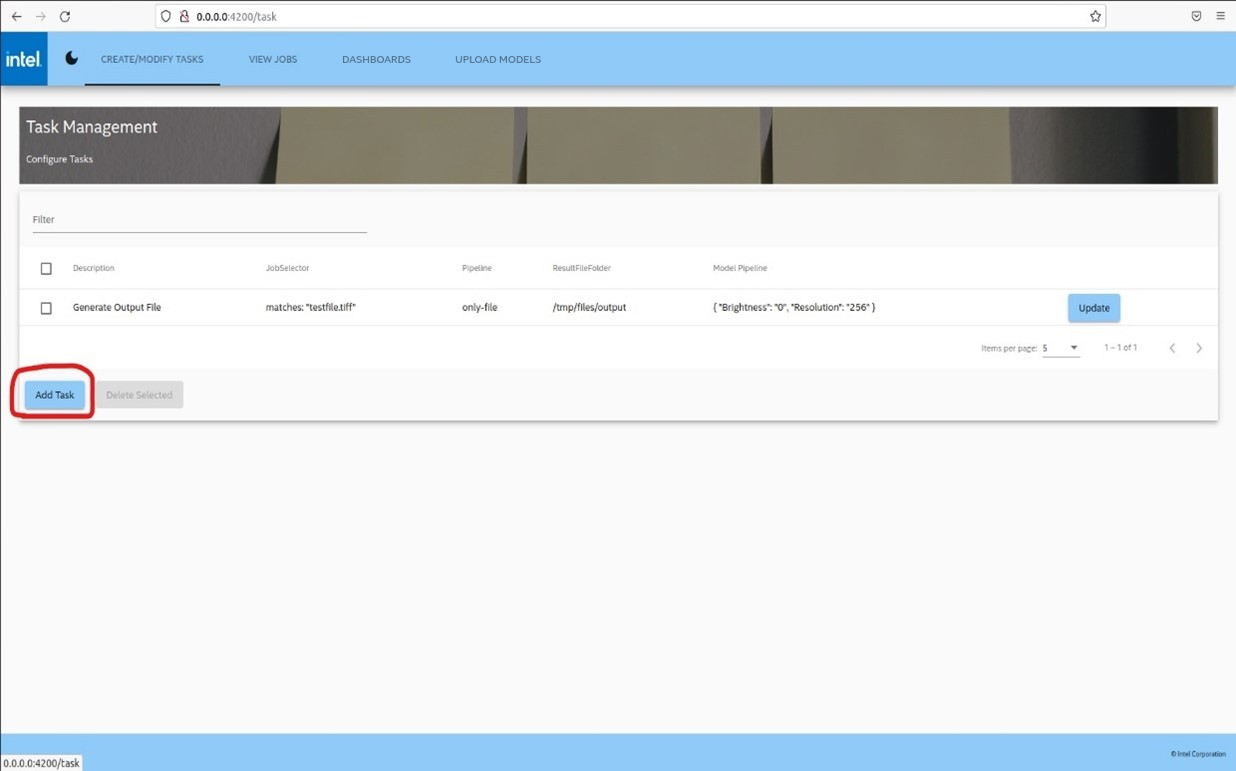
Figure 2: Create Task -
Complete the following fields with the task details:
Note
Regular expressions are not supported.
For example, in Job Selector below, use of contains with "*.tiff" will filter for tasks with the literal substring "*.tiff".
-
Description: enter Task Description
-
Pipeline: click to select the Model Execution Pipeline from the dropdown
-
Job Selector: click to select between the two checkboxes -
-- matches: filter jobs based on filename that exactly match “filename” field value from below
-- contains: filter jobs based on filename that contain “filename” field value from below
-
Filename: enter input image filename
-
Model Parameters: enter parameter details for the model, it should adhere to the following json format, including quotes – {“parameter” : ”value”}
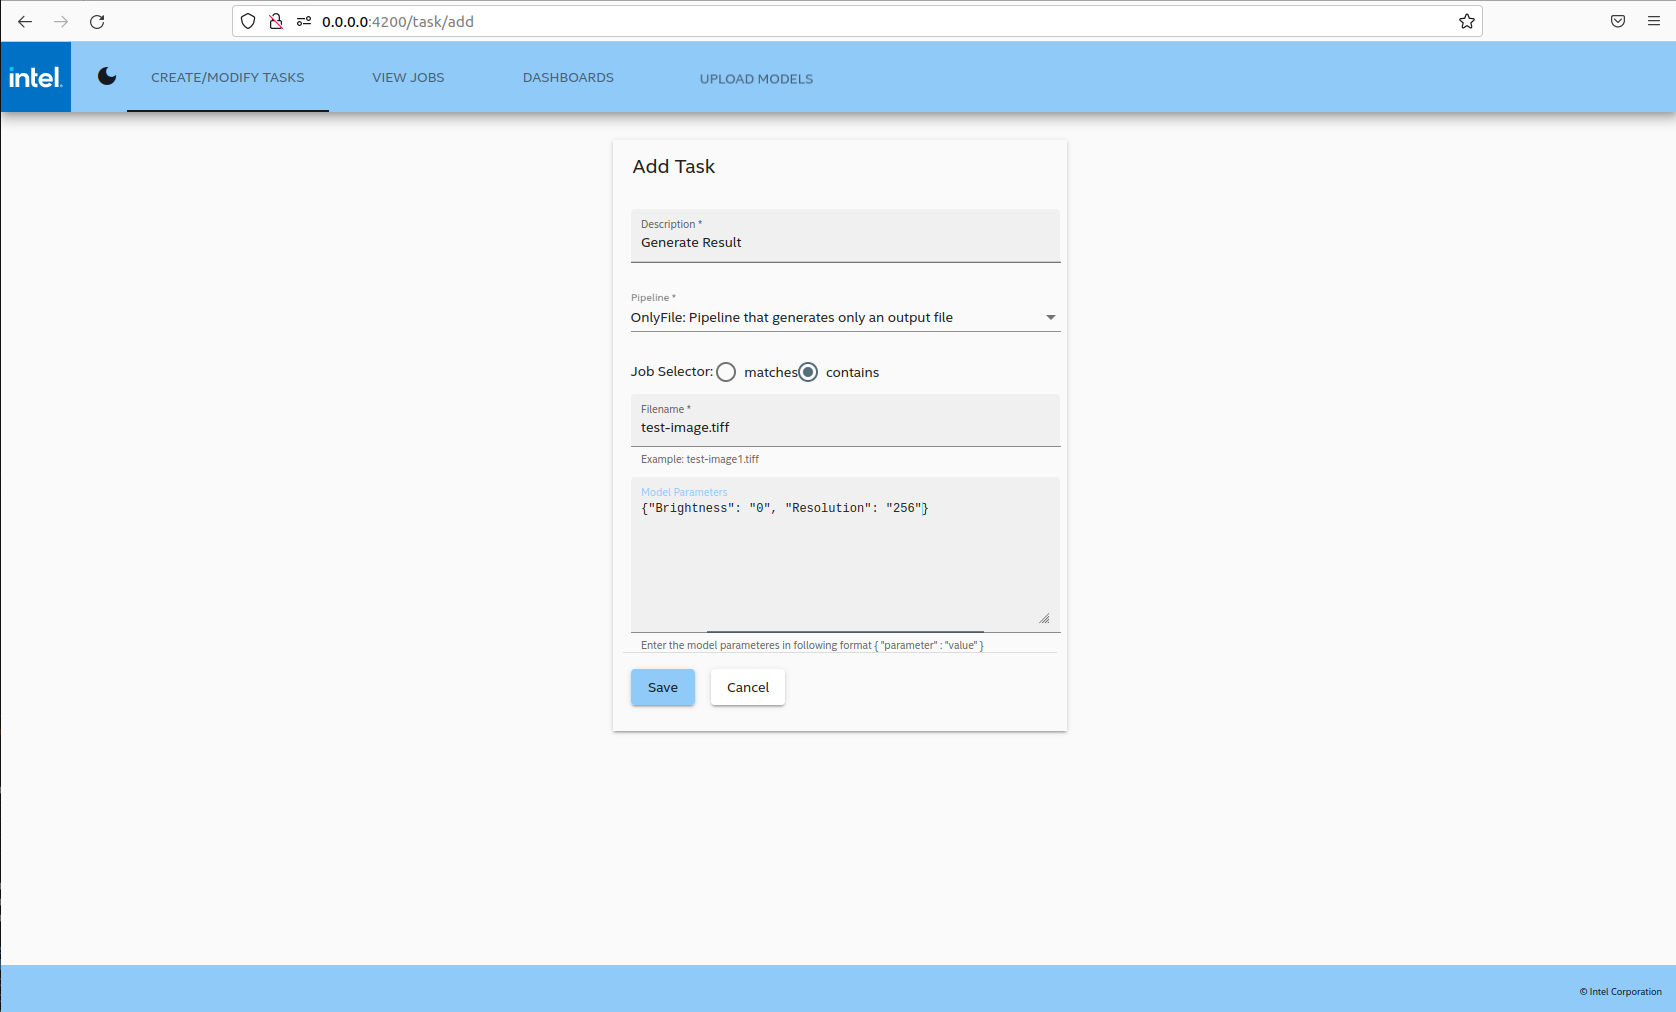
Figure 3: Task Form -
-
Click Save.
Update Task
-
Click on Update for the task that needs to be modified:
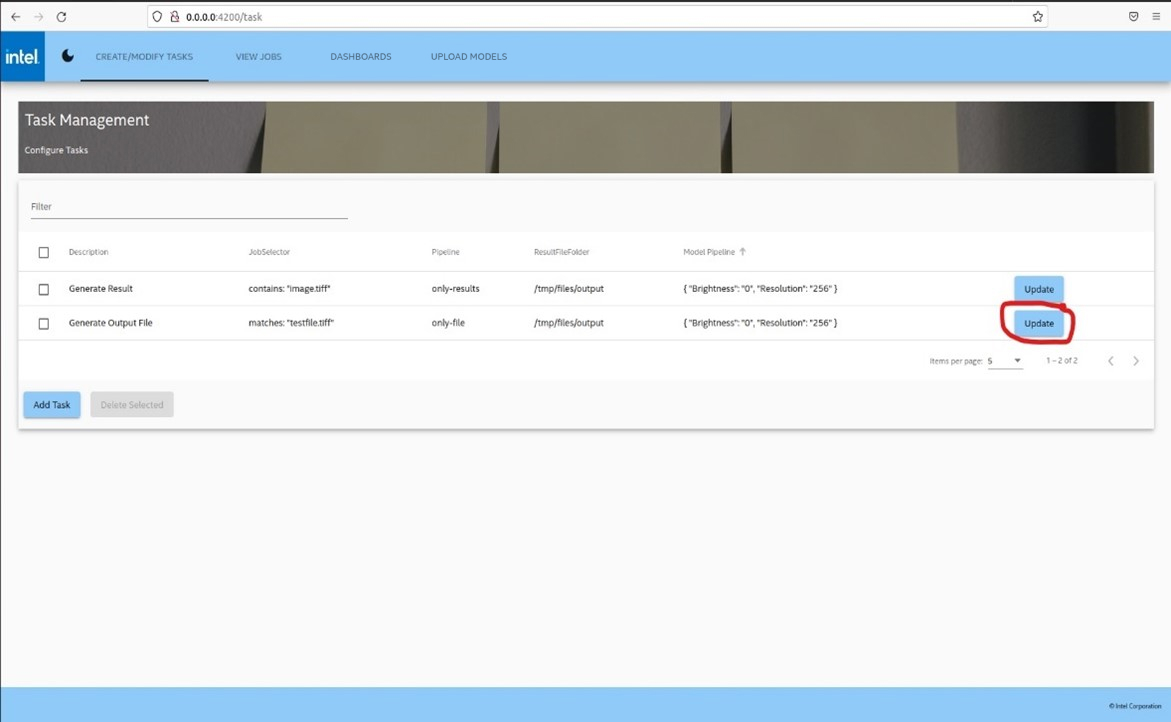
Figure 4: Update Task -
Modify the appropriate field (i.e., Description modified)
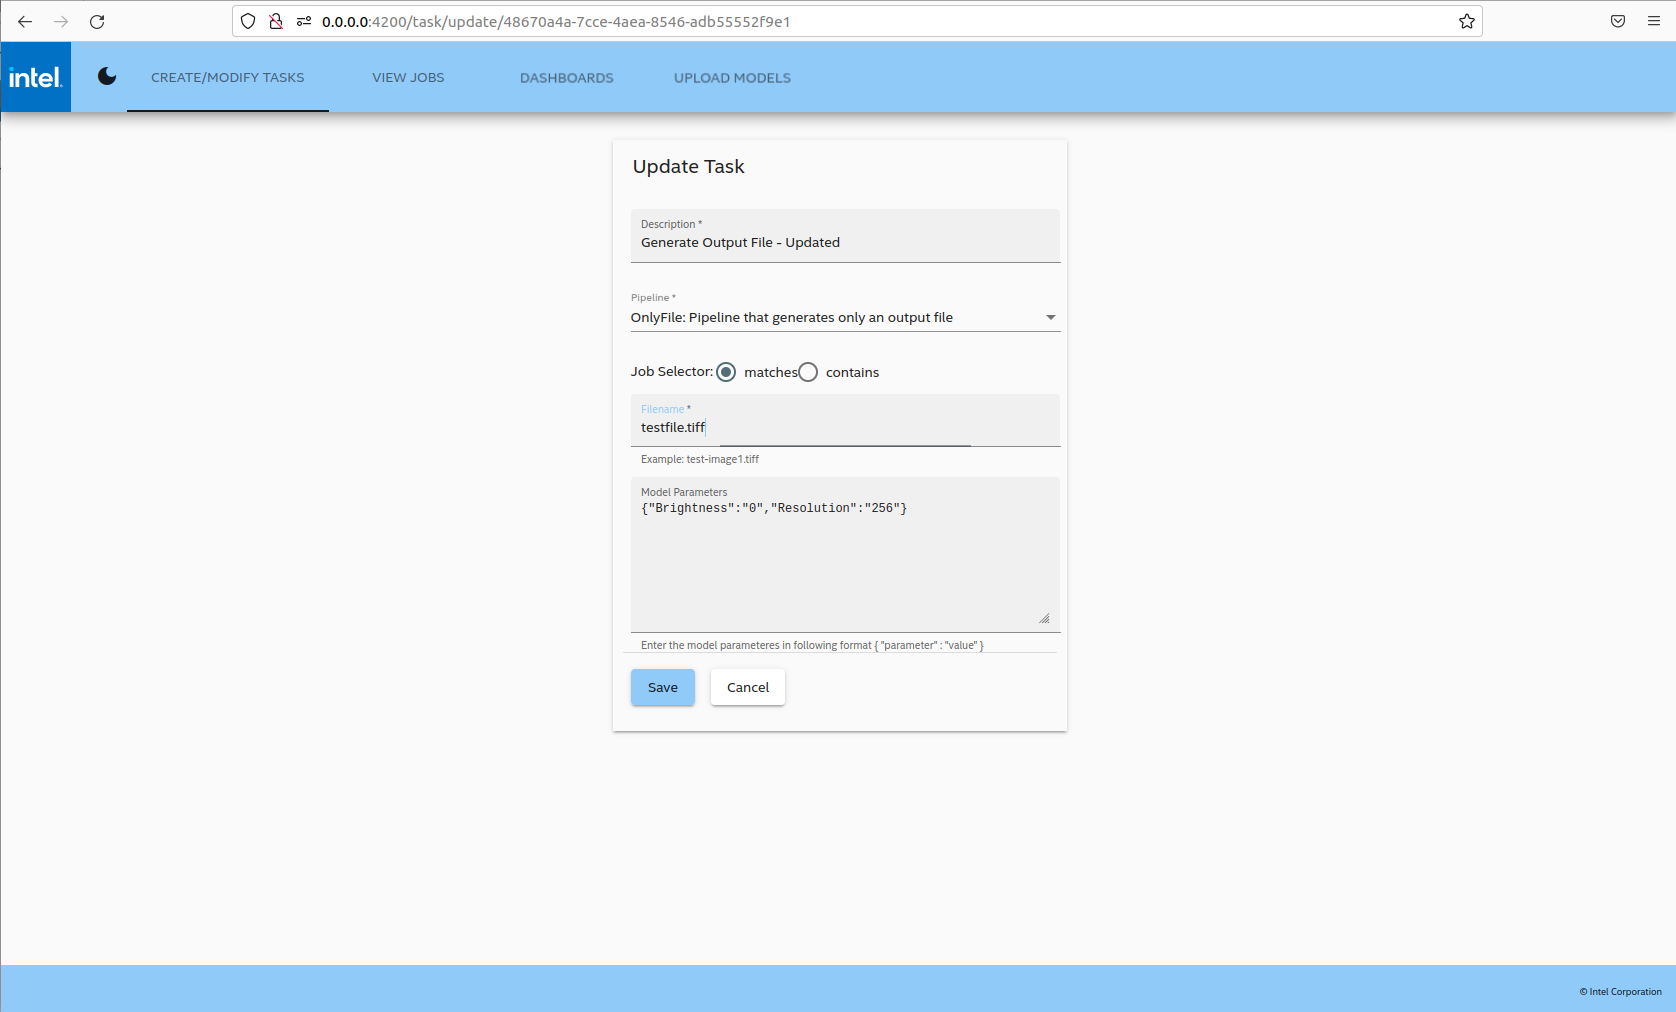
Figure 5: Modify Field Task -
Click Save.
-
Confirm that the changes are saved as shown below:
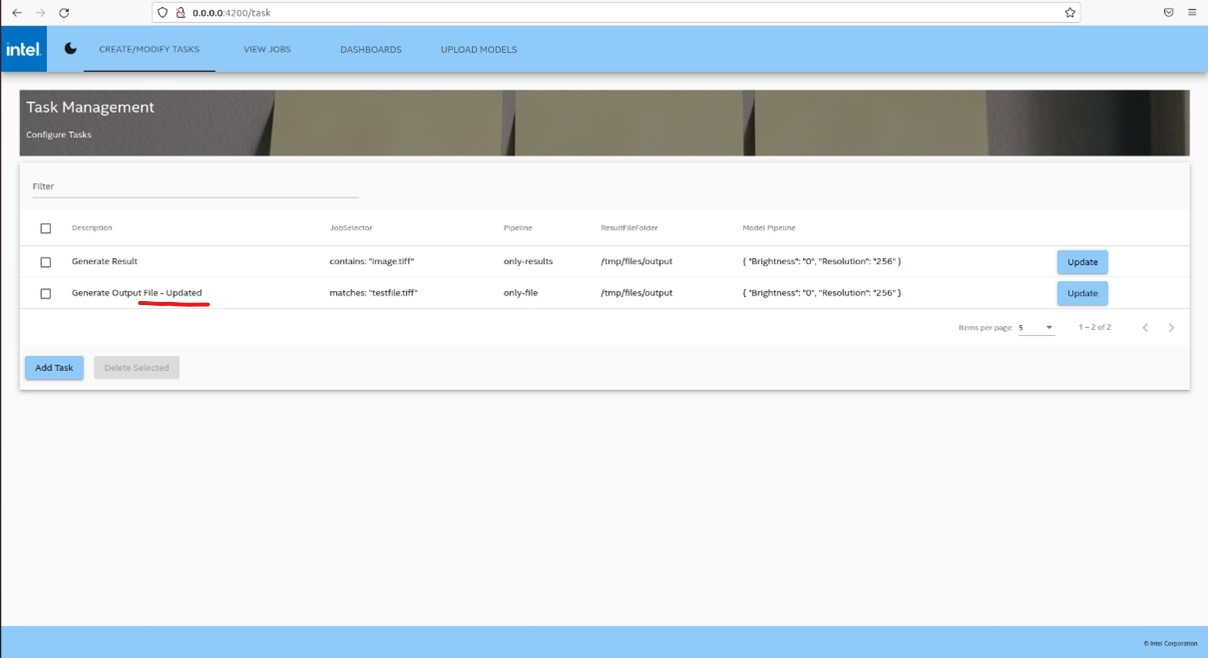
Figure 6: Updated Task
Delete Task
- Select one or more checkboxes next to the entry/entries to delete.
- Click Delete Selected.
-
Confirm the deletion:
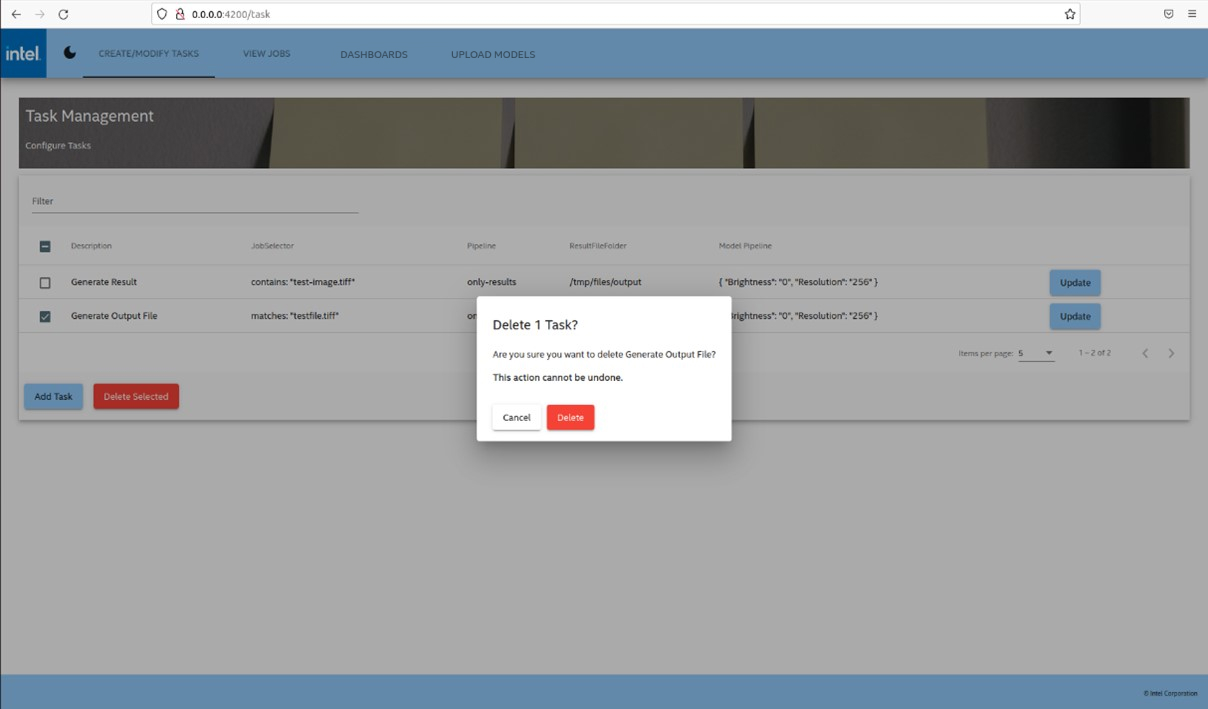
Figure 7: Task Deletion
Next up
BSD 3-Clause License: See License.